Unit 1: Grade 11/12 Computer Engineering Technology: Safety & Careers
This University/College preparation course extends students understanding of computer systems and computer interfacing with external devices. Students will assemble computer systems by installing and configuring appropriate hardware and software, and will learn more about fundamental concepts of electronics, robotics, programming, and networks. Students will examine related environmental and societal issues, and will explore postsecondary pathways leading to careers in computer technology. Focus will support robotics and the Robo program here at Western. The course will be 18 weeks in duration with your later term work weighted heavier than at the beginning of course, and will include a culuminating project.
Course Units and Descriptions
Use this table for an overview and navigate to each of the course unit pages.
| Unit | Description |
|---|---|
| Review course outline for more details | |
| 1 | Safety & Career - Intro, computers, organization, safety, careers, and custom proposal |
| 2 | Computers & Components - Electronics, operation, design, troubleshooting, and maintenance |
| 3 | Digital Logic & Circuits - Binary, boolean, logic gates, counters/register ccts., calculations, design, & build |
| 4 | Networking & Programming - IP addressing, data routing protocols, services, languages, and concepts |
| 5 | Hardware Interface & Control - Student designed custom project |
| 6 | Showcase & Web Portfolio - Testing and presentation |
Unit Activity Breakdown Format
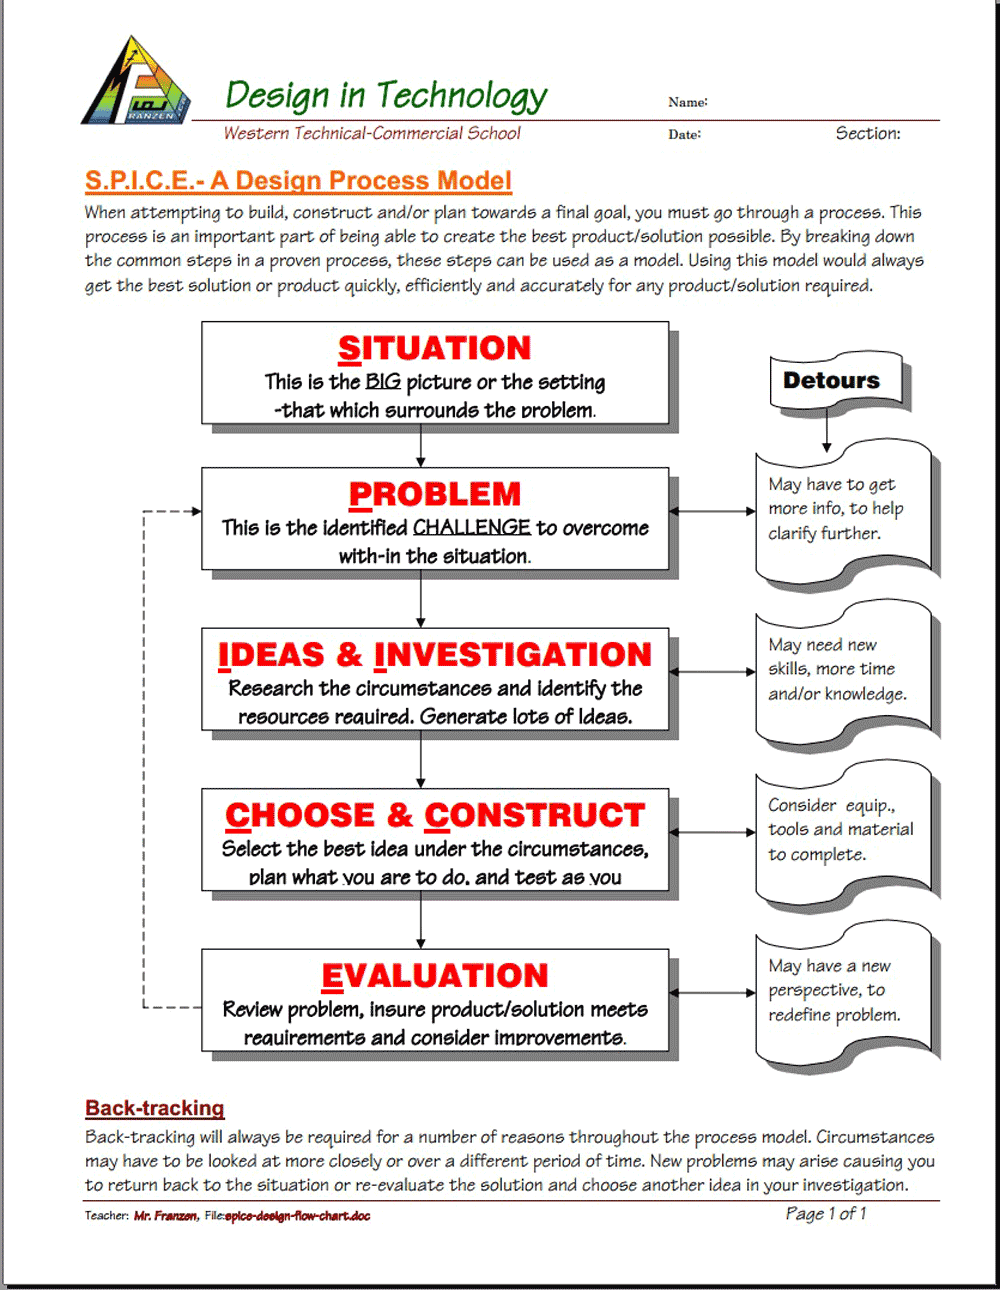
You will notice each unit activity below is broken down into five subtopics, SPICE, to guide and help you through the project and assignments related to the unit activity:
- Situation - This is the introduction, big picture, or you can think of it as the setting of story/novel
- Problem/Challenge - What must be resolved or completed, i.e. what you will need to accomplish
- Investigation/Ideas - includes gathering ideas, research and organizing information to help create, construct, and/or complete the Problem/Challenge
- Create/Construct - take your best idea and complete and/or build the needed solution
- Evaluation - did the Problem/Challenge above get resolved and/or completed
This unit will introduce you to the course, class routines, expectations, organization, safety, possible project ideas, and circuit characteristics.

Unit Content Activity Quick Links, Click to Jump to Specific Activity!
- Unit 1, Act. 1: Introduction, Computers, Organization, and General Safety
- Unit 1, Act. 2: Related Career
- Unit 1, Act. 3: Custom Project Proposals
 Unit 1, Act. 1: Course Information, Organization, and Safety
Situation:
A class of students starting a computer technology/robotics course here at school.
Problem/Challenge:
Getting familiar with what the course is all about, related careers, class routines, expectations of the course and the teacher, general administration of class, and safety are all important issues to know and understand. This activity will allow students the opportunity to organize and prepare for course and understand administration, evaluation, marks, routine, possible career direction, and expectations for classes to run smoothly.
Investigation/Ideas:
The following is list of items that are to be reviewed by students to understand what is going on in this course:

- Course Details
- General Safety
- Detailed Safety Issues
- Shop/room Layout
- Shop/room Resources
- Emergency Procedures
- Expectations
- Assessment & Evaluation
- Class Policies
- Routines
- Remote learning
- Attendance and Lates
- Moodle Log-in
It is important that students feel comfortable with the above points and should know what is happening in the course.
Create/Construct:

Introduction
Start by organizing your supplies and materials for taking and storing your notes and assignments in a binder. A duo-tang will be provided for your in-class journals and safety related paper work and stored in the classroom filing cabinet share. Review the course outline and class routines and write down any questions you have about the course, requirements, expectations, or responsibilities you need to be clear on. Timetable and school policies will also be reviewed using your agenda as a guide. A room and school tour will be conducted to familiarize students with our facilities.
A ![]() Survey - Getting to know you will be handed out for students to fill out in-class so that the instructor can get to know you and allow you to write down any important information that you feel the instructor should know about such as extra support, health, social, and/or interests you may want to pass on..
Survey - Getting to know you will be handed out for students to fill out in-class so that the instructor can get to know you and allow you to write down any important information that you feel the instructor should know about such as extra support, health, social, and/or interests you may want to pass on..
The following is a list of related support document links for students, which will be reviewed in class:

Related Links
The following list of resources can be used to further review, after going over them in class:
 Robotics and Control System, Grade 12 Course Outline
- Robotics and Control System, Grade 11 Course Outline
- Course Achievement Breakdown
- Learning skills work habits
- Evaluation and Tips Breakdown
- Foreperson Responsibilities
- Peer Evaluation Process
Work Redo?
If work is done poorly resulting in less than 50% of a mark, students may have an opportunity to redo. Before submitting a second time:
- use teachers feedback as a checklist here and show/report back what is done, fixed, and/or updated,
- double check the instructions,
- share with a peer mentor that has already done well, to get a peer comment with feedback on your work
This process should result in a close to if not perfect assignment to hand in. If you still need further support, go see the teacher in the morning prior to classes, for extra help.
Tech Info Page
One of the first things in class we do is review the ![]() Introduction to Technical Classes, point number three above which gives you a great overview of the course operation. The top section of the page has ten blank boxes to be filled in with the important things we will cover in this course. You will find this information by reviewing the course outline and listening to the teacher discussing what is happening in the course. The bottom section will also need to be filled out with two in-class peer partners for contact information and support with-in the class to help foster team support. collaboration, and responsibility.
Introduction to Technical Classes, point number three above which gives you a great overview of the course operation. The top section of the page has ten blank boxes to be filled in with the important things we will cover in this course. You will find this information by reviewing the course outline and listening to the teacher discussing what is happening in the course. The bottom section will also need to be filled out with two in-class peer partners for contact information and support with-in the class to help foster team support. collaboration, and responsibility.
Important Information, Routine Details, and Support
To help everyone understand daily routines, expectations, student responsibilities there are some steps that you must be aware of, that we will discuss in detail such as:

Paper Hand-in Bin
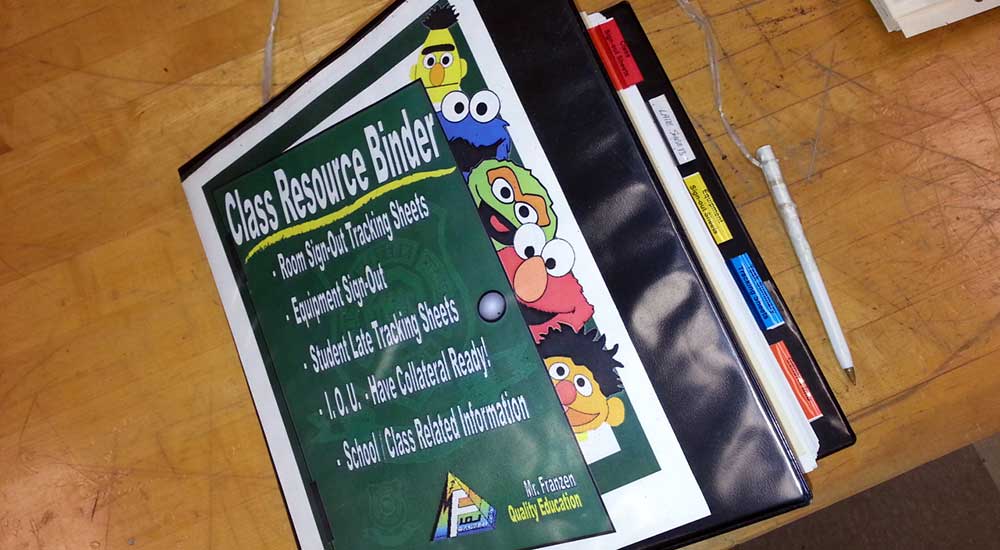
Resource Binder
Current Events
- Class schedule day
- School/room map layout (tour)
- Late arrival process and class entry
- Absent - note name, reason, & dates to office VP
- End of period journals- finish & discussions/collaboraton
- Paperwork hand-in bin
- Paperwork over-flow out bin
- Class share resource table/area
- Extra handouts & digital copies
- Daily current events board
- Supply teacher respect and learning
- Due date - beginning of class
- Leaving the room - process (ex. - washroom - 1)
- Class Sign-out resource binder
- Seating - support, proximity, and behavior
- Partners, groups, and leaders - collaboration
- Communication - email, chat, phone, video, txt, forum
- Foreperson/moderator leadership/support
- Late/missed class lesson/work responsibilities
- Clean up process - yours and others
- Back-up digital work daily (routine)
- Work on current lesson work right after lesson
- Contact process - e-mail, details and what you tried
- Extra support, instructions, resources, help options
- Don't know, or not sure? ... ask!
Remote and Digital Process of Learning
Remote learning is something relatively new for High School students and the following points should be considered.
- Make a schedule and keep a routine to help with even breakdown and consistency of learning - requires self-motivation and being self-sufficient
- Create a study area and stay organized, use a distraction free environment, in an open public area, so you can focus on learning
- Require appropriate technology - microphone, web cam, good Internet connection, lighting, ergonomic comfort
- Communication- hand-up, chat, normally muted, clarifications & understanding of content
- Read assignments and course material, post in discussion forums (chats), work ahead, participate, and seek help if/when needed
More information to support this course can be found on the Virtual & Digital e-Learning Support page and is a must to check out. This page can also be accessed from any page by going to the main menu, selecting the Support drop-down, then Virtual e-Learning.

Safety
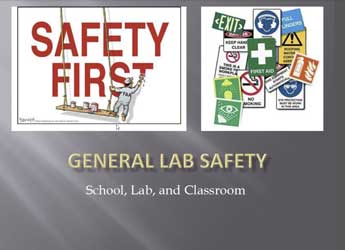
In this activity, we will review the ![]() General Safety Presentation to get an overview of safety concerns students must be aware of in the school and classroom. Students will review and sign a
General Safety Presentation to get an overview of safety concerns students must be aware of in the school and classroom. Students will review and sign a ![]() General Safety Contract then take home to parents to also review and sign. Safety awareness and lessons in this class will be on-going throughout the course, and specific to each project so that it is fresh in your minds when starting work on that specific project. Although there are less physical dangers, there are other safety concerns such as working with digital work safely as an example.
General Safety Contract then take home to parents to also review and sign. Safety awareness and lessons in this class will be on-going throughout the course, and specific to each project so that it is fresh in your minds when starting work on that specific project. Although there are less physical dangers, there are other safety concerns such as working with digital work safely as an example.
Given our current situation with Covid-19, a presentation on ![]() Covid-19 Safety and Well Being will be also reviewed, for process, support, and clarification.
Covid-19 Safety and Well Being will be also reviewed, for process, support, and clarification.
USB Memory, File Naming Conventions, Folders, Back-up, and Shortcuts

It is highly recommended that you get a USB memory stick, for saving your work on to. It does not have to be large, 2 Gig or larger (use your school drive temporarily if you do not have your USB flash drive). You will need to follow instructions on the Tech Info handout (PDF page printed and handed out recently, that can be found above) to create shortcuts inside a main folder named with your course code, and a sub-folder named "shortcuts". With an organized folder structure, you now have a place to save work to. You are to create the shortcuts below in your shortcuts sub-folder using similar suggested TIJ course codes for your own course code letters.
- Course Google Classwork (TEJ-GCW)
- Your course folder root directory (TEJ)
- Your back-up folder at Home (TEJ-BKH)
- Your back-up folder on the cloud (TEJ-BKC)
- Franzen website Home Page (mfranzen)
- Franzen website Course Details Page (TEJ-Det)
- Franzen website Course Journal Page (TEJ-C-Jou)
- Franzen website Course Marks Page (TEJ-Mrk)

Note Google Drive File Stream -G Drive (replacing H: Drive) should be avaliable when you sign in to TDSB computer with a Google sign-in window which will connect you to your G: Drive and place on your file browser as G: Drive letter. If you cancel or not sign-in, then just relaunch the Google Drive File Stream application from your start menu.
With all your shortcuts created and saved to your USB sub-folder-shortcuts, you can also copy these shortcuts to your desktop, so you can use them from multiple locations, but the desktop is not a safe place to save work from, as it could be deleted at any point in time.
To keep your electronic work for this course organized, you will need to create more folders for future projects as you continue with the course. The intent is to work off of your USB in school and save to your local or cloud drive when you are finished at the end of class either at home or at school, as a daily habitual back-up process. This way you can take your work with you and work elsewhere if needed and it is faster to access a flash drive then the board network or a cloud drive.
In school we also make use of and use the internal network for getting work and handing in work. These locations are found clicking on the Western Tech shortcut on your desktop on your school computer, then navigating to either selecting the "Pick-up" folder, for getting work from teacher or the "Drop-off" folder, for handing in work.
File Naming Conventions and Shortcut Demonstration
To finish you will need to use all three shortcut links in an exercise called "tij_d-joe_shortcuts-files-folders-v-txt" and copy and paste the correct shortcut addresses to demonstrate you have done this correctly. This is a good time to save the text file to your shortcuts folder (review file naming conventions in the Tech Info Handout and save it right away with the correct file name, then open it up, and update the correct course coded in 1 to 8 shortcut sample names.

- Type your header information which you are required to have, on all assignments when handing in,being aware that it is always in the top right of the page with you name having your just your last initial, first name name
- Update TIJ part of shorcut name to your course letters, then several shortcut target addresses will be needed from your recently created shortcuts by right clicking on shortcut to get to the properties, then copy the shortcut link address to paste into your project text file just underneath the related shortcut name/description
- You are also required to get the actual shortcut file location of the specified shortcut in the required folder locations you are keeping your files in. You can get the address location for the shortcut by right clicking on your web site shortcut link, click on properties, then the switch to the General tab to copy the location where you saved this shortcut link to, then add the actual shortcut file name and correct file extension (more here on File extensions). For Google drive, use the worded file location, not the link.
- Go to the Tech info page on the site and open up the PDF file and copy the section called "Organizing and saving your work" that explains about file naming conventions and paste below
- Check over your shortcuts assignment and ensure you have checked that your file naming convention is correct for this text file.
- Use your system snip screen capture tool to get a image of your desktop showing your class shortcuts on the right and your file browser on the left showing your main save location folder for this course, class topic subfolders, with shortcuts topic folder selected and showing all your created shortcuts, your shortcuts text file, and image file
- Convert your text file to a PDF by either putting your text file in a Google Doc along with your screenshot below, then download to a PDF,
or "printing" to a PDF, Adobe Acrobat Reader DC conversion tool, or using an online converter, then use online PDF Combine tool for both your text and image file to combine into one PDF file and then submitting
Evaluation:
These assignments are very important as they will benefit you throughout the rest of this course. You can see a student journal sample done by another class with limited expectations and reduced marks, but you will get the idea and see the learning process throughout. Journals are a very powerful tool when used with learning and if make the effort to fill out correctly and fully, this will not only earn you marks, but also significantly help you with all of your course work and learning. The following are paper entry student daily log samples (another class with different format, but similar entries) can be viewed here Assorted Journal Daily Logs, Full semester of Daily Journals, plus end-of-semester Weekly Summary Journal

| Evaluation Breakdown Component Descriptions | Marks |
|---|---|
| Always double check instructions and ensure all required work is done correctly. | |
| Survey - Answer all 23 questions fully | 23 |
| Course Outline Signed - Review, highlighting, and signed by parent | 15 |
| Tech Info - 10 course components, highlighting, and two peer contacts | 14 |
| General Safety Contract - Read, highlighting, signed by student & parent | 15 |
| Shortcut Test - Folders, shortcuts, file naming, and screen-shot | 26 |
| Daily Journal Entries - specific details, 10 marks daily @1/2 weight, entered weekly | 50 |

Conclusion
If you feel comfortable that you know all the details of the class/course details, you are ready to move on to the next activity. Be prepared to use what you learned in this unit activity to apply to future class work and process. At this point you should be ready for the rest of the course for use with computers, keeping organized with binder and digital files, routines, daily journals, and general safety. If you are still having trouble with specific things, PLEASE ASK!
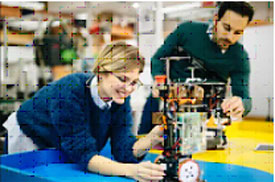
Unit 1, Act. 2: Related Career
Situation:
You are new to this field area, unfamiliar with possible career directions that this may offer and what steps may be taken to go into a related field.
Problem/Challenge:
Select a related career field that you may be interested in and research it to present in the form of a presentation 13 to 15 slides in length. The presentation must show a titles and key information in different forms such as text, charts, maps, illustrations, and/or images. Text points should be 50-60 % of slide while images and/or charts should be no more than 40-50% of slide. Content on slides to include the following topics (bracketed info is extra explanation of what is on those slides):
- Job Title and General Description
- Contents
- Responsibilities (daily expectations)
- Salary/Wage Levels (based on current entry, mid level, senior level positions, company, and location)
- Related Skills (soft and hard skills)
- Interests (hobbies, spare time, games, material things, sports, relaxation, health)
- Values (opinions, importance of specifics, beliefs, standards, commitment)
- Schooling (possible schools, program information, application, etc.)
- Preparation (what you can do now, resources, planning, all the facts, building maturity/responsibility, etc)
- Requirements (related association, certifications, what you need to accomplish, complete, learn, experience, etc.)
- Future forecast/outlook (3, 5, & 10 years down the road, stats on growth rate, comparisons)
- Summary/Conclusion
- Resources and Further Support (your research sources used, great places to check for more info, etc.)
An additional challenge for senior 12's is to take last years engineering career project or pick a new one and condense/summarize (3-5, 6-8, and 9-11) above section to make room for additional slide topics below. These additional topics intent to show a process of planed practical/realistic steps you would take from High School (now) to get to your career position through the following topics:
- Planning for Career (what you need to do, look at, consider, goals, etc)
- Time Line (Gantt chart with annual breakdown now to career)
- Major Step Details (your helpful in-depth key information expanded)
- Financial Support (loans, grants, scholarships, job possibilities, etc.)
- Budget plan (savings, expenditures, income, travel, accommodations, food, etc.)
- Other Considerations and Possible Options (more support, opportunities, internships, volunteering, ideas, etc.)
In other words, you are going to share all your ideas and plans on how you (or someone similar) would get to your destination career position starting from right now.
Investigation/Ideas:
The first task involves selecting a related field in Technological Design that you may feel interested in learning more about. If you are having trouble deciding on which area, you could try a Free Career Aptitude and Career Assessment Test to help you decide which field might be best suited.
Below are some resource links to get you started with finding more information on a career field.:
- Engineering job titles
- Try Engineering
- Engineers Canada
- Job bank
- Ontario college program find
- Salary & Careers
- Career cornerstone
- Current Engineering jobs
- Outline of Engineering
- Ontario job futures
- Universities & Colleges
- Ontario Colleges
- Engineering jobs in Ontario
- Eng. Jobs, Salaries, and Careers
- Becoming a Licensed Engineer
- Eng. Consultant News
- Eng. Institute of Canada
- Career planning
- Find a Career
- Career Planning Guide
- Education Planner
- TDSB > myBlueprint
Choosing a career as a student can be very difficult when you don't have enough information to make the right decision. Using Google Slides (sample template) will be your best practical option although Microsoft's Power-point, Prezi, or similar presentation software could be also used to design some really interesting and dynamic presentations. An important place to start, to get information on your career field, will be to look at related associations (official and unofficial) and school programs that support the industry, that area you are looking up. This Prezi I made up, has a lot of the questions student may have, not just on Engineering, but also steps students can take in High School to help you make the right decision in your career direction. An important place to start, to get information on your career field will be to look at reputable associations. In Computer Technology, there are a lot of unofficial but well named associations that can be used to support a plan towards that career. View the Prezi presentation here.
Prezi Related Career Videos

 S11, What is Engineering?, 9.36 --- Crash Course Engineering Playlist 47
- S19, Career Advice: How to choose the RIGHT career, 19.01
- S20, College Search: How to Choose the Right College, 1.42
- S21, What's FIRST Robotics Competition (FRC) 3.34
- S23, Six Destinations: Career Choices, 6.12
- S25, What Should I Do With MY LIFE?, 8.56
- Computer Engineering Careers and Subfields, 10.25
Choosing the Right Career
- The Reality of Career Exploration, 3.38
- Discover Your College and Career Pathway, 1.51
- How to Choose the Right Career Path in 7 Simple Steps, 4.05
- How to Build an Effective Career Plan, 4.52
Resource links
Check out these resources for your PPT creation and presentation:
- Reserch Tips, 3.04
- Google Search Tips, 6.42
- Custom Google Slides
- Google Slides Tutorial
- Google Slide Tips & video
- 20 PPT Great Designs
- 120 PPT Ideas
- PPT Design Tips, 4.04
- Rule Of Thirds, 7.08
 Effective PPT's, 16s
- Effective PPT's, 55s
- SlideMember Templates
- SlidesCarnival Templates
- Use Your Voice, 2.28
- Present competently
- Deliver presentation
- Present well, 4.22
- Give a great presentation, 7.04
Create/Construct:
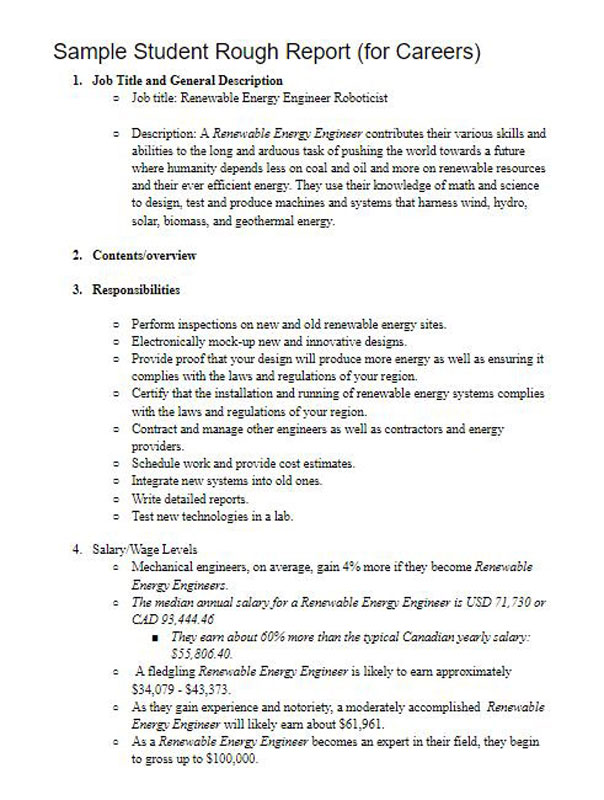
Sample Rough Report PDF
The Create/Construct step, is the point where you pick your best solution after you have exhausted all your investigation and ideas step to following through building or completing something. This is where you will find instructions/steps in these unit activities to complete the assigned project.
Major Steps
- Get a copy of the handout guide (or adv-handout guide) to review research project instructions, requirements, and mark breakdown for you to keep in your binder
- Choose a unique Computer Engineering related career, using the sign-up sheet that will be provided
- Use provided template,fill in header and page title to get started with rough research specific topics (template)
- Research your subtopic areas with multiple sources, compile all of your information (6-10 detailed points per sub-topic) into a rought report with specific detailed subtopic info
- Create a customized template for your presentation
- Add your content from your rough report to speaker notes, create 4-6 specific detailed points and image(s) for each of your slides
- Add additional talking points as needed (only presenters can see) for each of your slides
- Practice presentation for preparedness, clear communication, and timing (4-5 minutes)
Steps in Further Detail

Your presentation should have large printed points that you can use to expand and talk about during your presentation. Your presentation points should also answer/cover the required topics with some detail.
- You are to create a rough career report showing key points of your interested technology related career
- Remember any digital content to include title, name, date, section, along with file naming convention.
- Start your research by copying the requirement topics to a word processor application, change your topics to separate headers, then add your researched information below each of the header topics along with source links at the bottom as you get them, i.e. focus on your research first, the key information required for this presentation
- Next, create your presentation template/format that will accommodate, a header/footer, title, key points, and a supporting image(s) for each slide approximately 50/50 ratio. The key points must be large enough to easily read from back of room on class projected screen, have high contrast to background
- For the actual presentation, you are to talk about (do not just read presentation slide points) details of each topic in detail, and be prepared to answer questions details at the end of your presentation from your partner timing/peer marking you. Presentation to be approximately 14 slides with about 20 seconds per slide on average to cover the 4-5 minimum presentation time length
- Check out 20 Great Examples of Power-point Presentation Design, 108 Best Presentation Ideas, Design Tips & Examples for ideas and best practices
- When complete, submit your presentation in Google Classroom (export as a PDF) on or before the due date with standard file naming convention, ex: tej3m1-01_d-joe_my-career-eng-field-name.pdf
- Prior to presentation, use the self and peer evaluation table to double check that you have all required information. 2 marks will usually represent at least a minimum of 4 good detailed points of the related topic information, then you will need to work on presentation to the class, keeping the time between 4-5 minutes and extra time for questions/discussions if needed
Evaluation:
Ensure that you have completed all requirements, included related pictures, and lots of related resources. see ![]() handout guide for breakdown of marks, self and peer evaluation to be done at the time of presentation and handed in day of presentation. Also, you can check out these
handout guide for breakdown of marks, self and peer evaluation to be done at the time of presentation and handed in day of presentation. Also, you can check out these ![]() 2 self, peer, and teacher evaluation sample sheets.
2 self, peer, and teacher evaluation sample sheets.

| Evaluation Breakdown Component Descriptions | Marks |
|---|---|
| Always double check that you have completed all components for full marks. | |
| Researched Report - doc with all topics, related info, resources | 33 |
| Content - included all required information and resources | 20 |
| Layout - organized, visually appealing, and easy to read | 15 |
| Presentation - Content, communication, knowledge, and time | 20 |
| Self and Peer Evaluation - slides and presentation | 20 |
Unit 1, Act. 3: Custom Project Proposals
Situation:
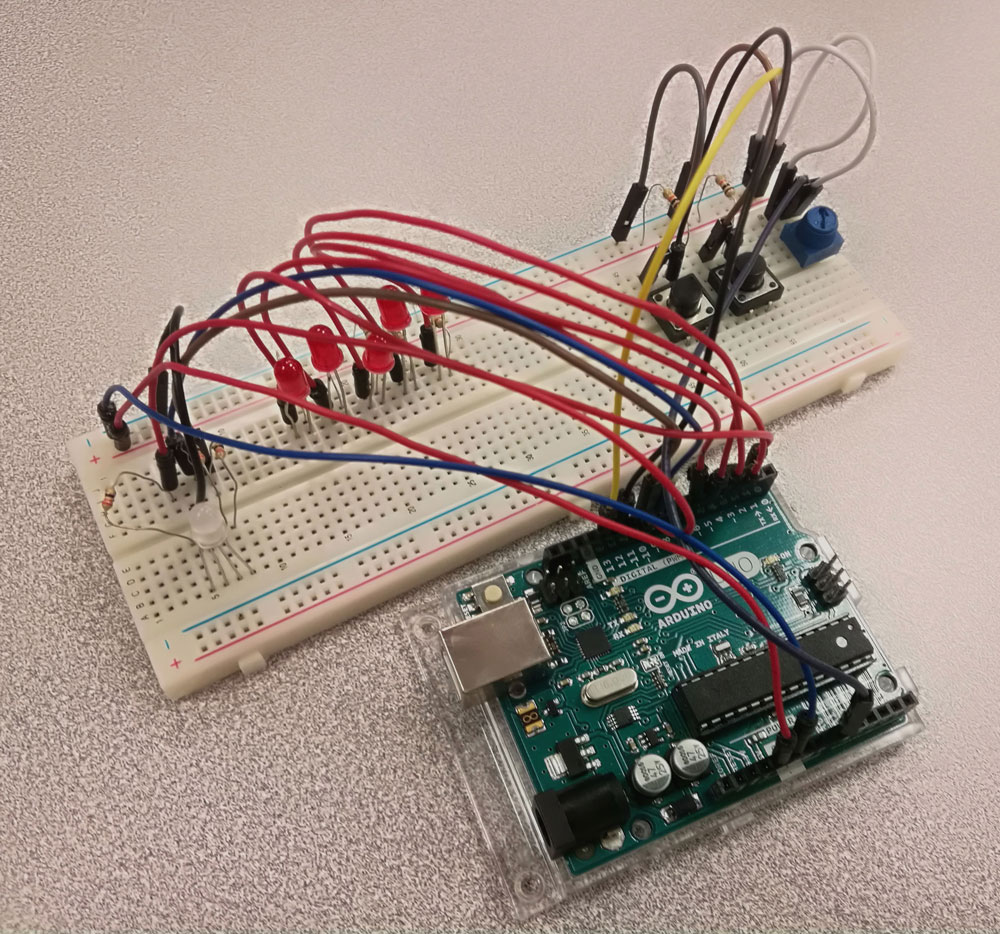
Arduino Uno project

Raspberry Pi project
A computer technology engineering class of students are learning about design process, computers, circuits, electronics programming, networking and interfacing as part of the course have started with circuits and need to continue with other components of the course. By using a microcontroller such as the Arduino Uno or a single board controller, the Raspberry pi (RPi) along with additional hardware components, will allow students to design and build customized projects, based on some pre-defined levels of complexity and their interests. Through research, design, programming and selection, students can learn more about requirements and how to complete related projects.
Problem/Challenge:
Working with hardware and programming requirements that must be completed, students are to use the Arduino Uno board (11's) or the RPi (12's) as a project base controller to work from. These devices have in common a programming port, input and output ports. Used with a prototyping breadboard, wire jumpers, and electronic hardware along with programming using Arduino C++ or Python coding will allow students to initiate different hardware/software interfacing and control.
Students will research three project ideas that will include the controller, use of breadboard, electronic hardware, and programming:
- Basic level to have a minimum of 2 inputs and outputs with 4 basic coding functions
- Intermediate level to include a minimum of 3-5 inputs and outputs with 8 coding functions
- Advanced level to create a combination of complexity of hardware and programming resulting in an automation and control practical project (can be simulated)
Each project idea is to include information, details, and related pictures in your report:
Key Information to Include for Proposal:
- Title page, picture, and project description
- Related Project Picture and Caption (3 levels)
- Project Description, and Operation (3 levels)
- Project Components Stock and Purchase (3 levels)
- Project Programming Code (3 levels)
- Overall Summary and Learning Expectations
- Resources
More Details
Project ideas can use basic hardware to simulate inputs/outputs we already have such as tact switches, simple sensors, LED's, and or piezo buzzers to simulate a game board, security system, or a traffic light as some examples. These project reports must be in your own words summarizing with the key points (i.e. not copied from a source document/tutorial), and be supported by images. Once complete, students will present their project ideas to the rest of the class to share and possibly gain further support, ideas, and interests.
Investigation/Ideas:

Project Level Complexity
Different projects can be all relative to each other, so the intention for a simple beginner level project, think low number of common inputs/outputs, minimal programing functions. Intermediate would have several inputs/outputs including some different types, moderate programing code, and may have some networking. Advanced project levels would include several inputs/outputs and of different types, programing, with networking involved. Another factor for the level of your project is the amount, size, and/or scope of the project, will also add to the complexity of the project.
Possible Ideas You Could Look At:

- Security system - sensors, cameras, contacts, etc
- Automatic lighting control
- Christmas lighting control
- Garden centre - irrigation, temperature, water, and lighting
- Heating control for home, room, indoor garden, etc
- Smart mirror - news, searches, feedback, weather, time, agenda, etc.
- Weather station
- Garage remote
- Small robot (like a vacuum cleaner or similar) - servos, sensors, lighting, etc.
- Home theatre - screen, feeds, control
- Home Automation - sensors, voice, time, control lighting, blinds, coffee, heating, security, plants, media, etc.
- Alarm clock
- Traffic light control
- Integrated board game
- Phone app. remote control
- Parallel/Super computer
- Game emulator - hand held, desk, station, etc.
- Portable computer
- Large format drawing
Design Considerations
When desiging an computer engineered solution, there are several considerations you should keep in mind such as:
- Type of controller
- Prototyping
- Materials
- Standards
- Modularity
- Design Simplification
- Allowances
- Joineary/fasteners
- Hardware components & electronics
- Programming
The topics below, give you a little more information on each of the listed considerations above, when designing, building, and coding a computer engineering solution:
 Microcontrollers
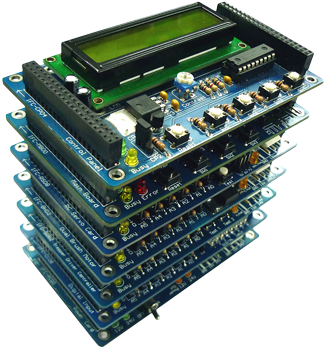
You may have had some initial experience with Parallax's Boe-bot and/or Arduino microcontrollers. Both are similar, and can be used for a lot of different types of projects. Another popular one is Raspberry Pi, which has a little more options to it and is considered a single board computer vs a microcontroller. Depending on what you plan to do with the controller will help you decide on the type of board you will need. Although some boards may look better, you want to look closely at the complexity, programming languages, price, ease of use, community support and its specifications. Arduino is know for it's ease of use and popularity for a wide range of tasks, and for this reason we have several already, for students to start on. Life hacker goes through three popular microcontroller boards as an example, to pick one for a specific project. Here are some links to board types:
- Parallax Boards
- Boe-bot Kit
- Arduino Boards
- Red bot Kit
- Raspberry Pi
- Teensy Board
- Trinket
- Beagle Board
- Maple board
- Panda Board
- Cubie Board
- APC Rock
- Hackberry
- OLinuXino
- Gooseberry
Parallax
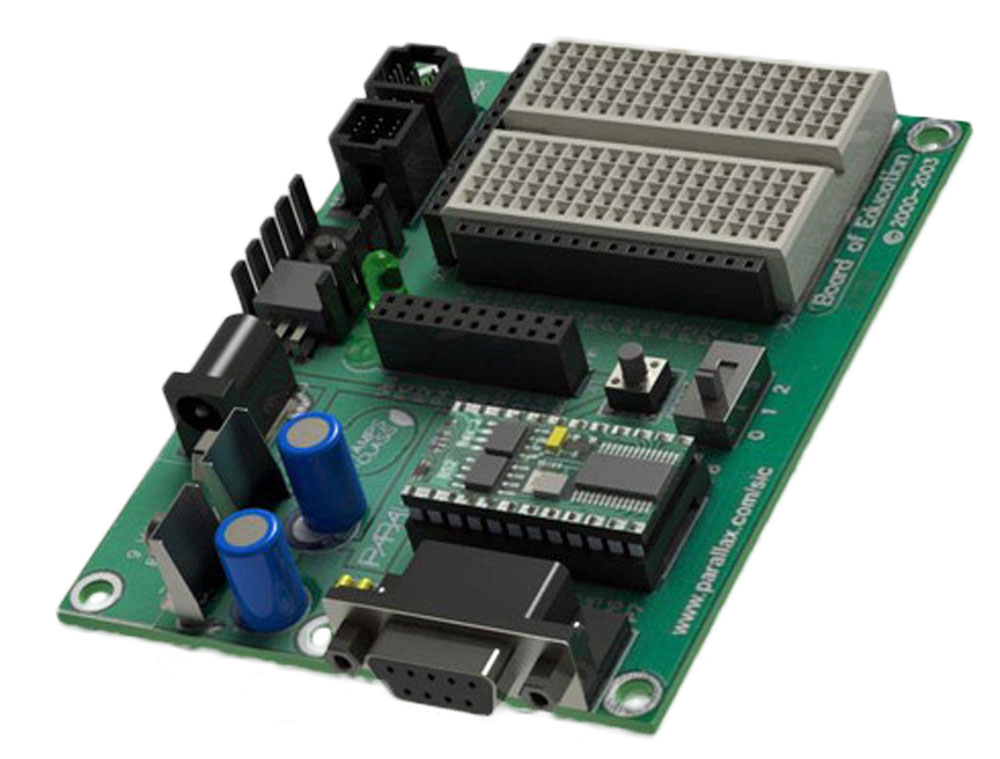 This is a great introduction to microcontrollers. If you have not worked with them, this board comes in a kit called the Boe-Bot and has a basic microcontroller board with built in breadboard that is programmed with PBASIC. This was used as an introduction to programming by Parallax in grade 10 Computer Technology course. Now students learn to work with our new Tetrix kit with Arduino.
 Arduino
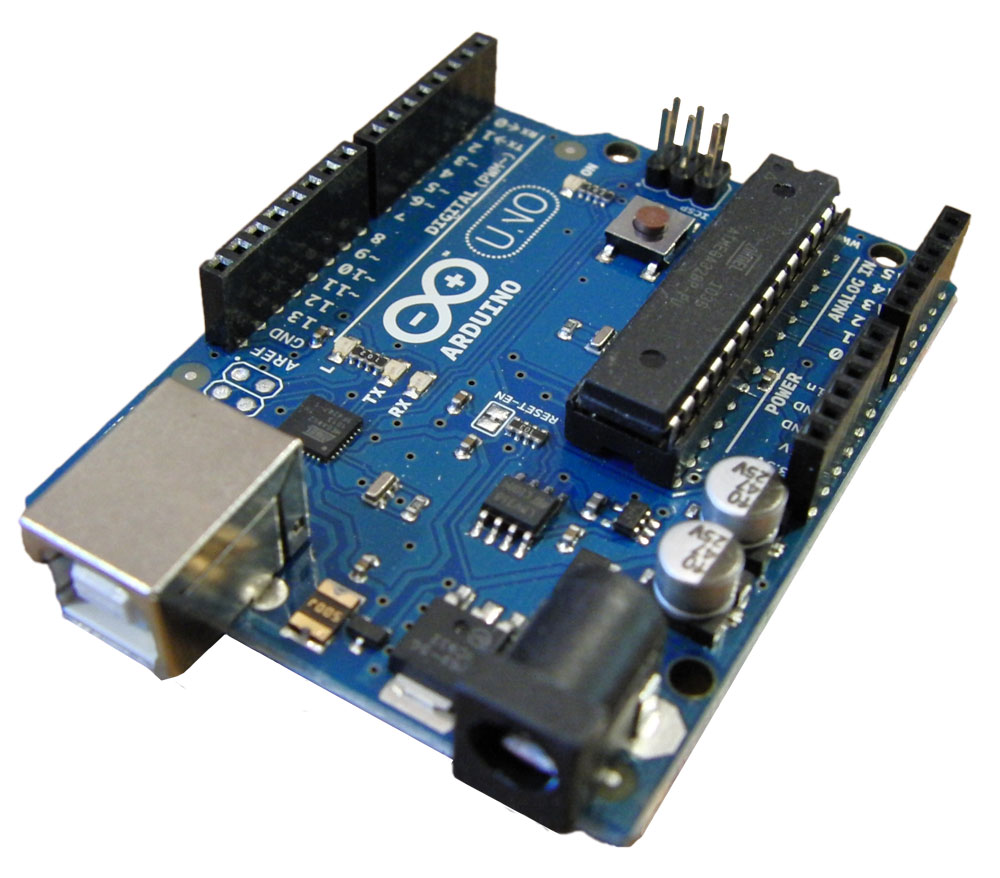
Arduino is one of the most common and easy to learn languages. Here are some resource links to help you with this hardware.
- Arduino Software
- Intro to the Arduino
- Wikipedia on Arduino
- Site Tutorials
- Site Language Reference
- ladyada Arduino Tutorial
- Flos Science Tutorials
- Arduino Forum
- AdaFruit Forum
- Most Common Boards
- Getting Started
- Xbee Project Blog
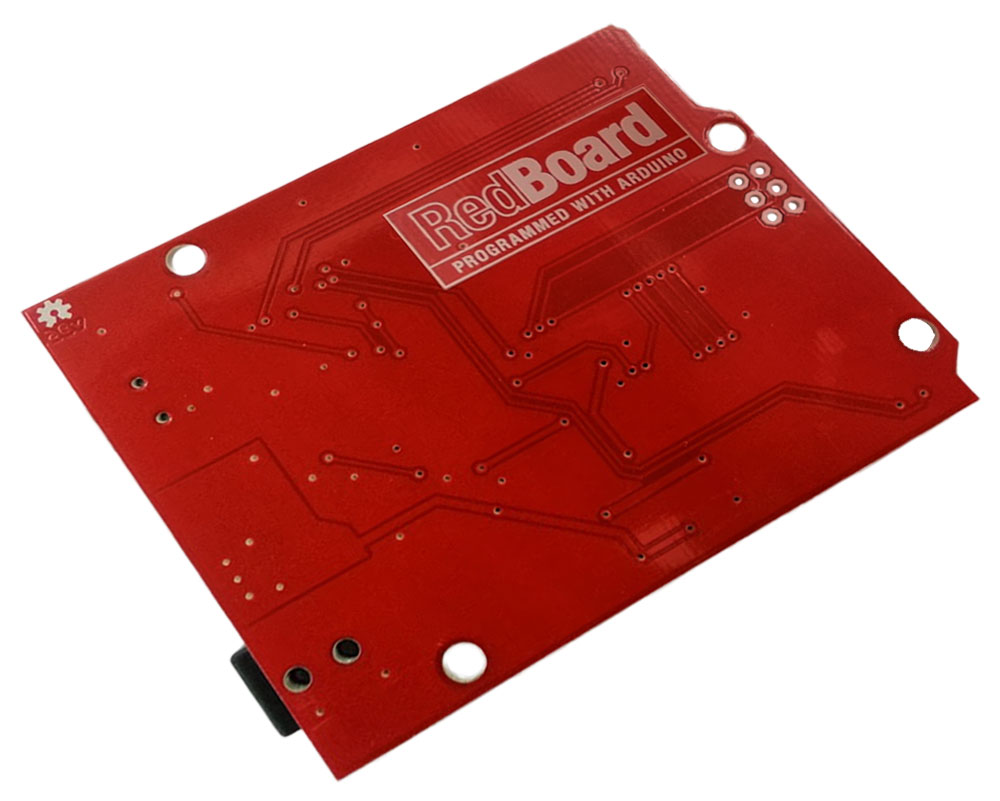
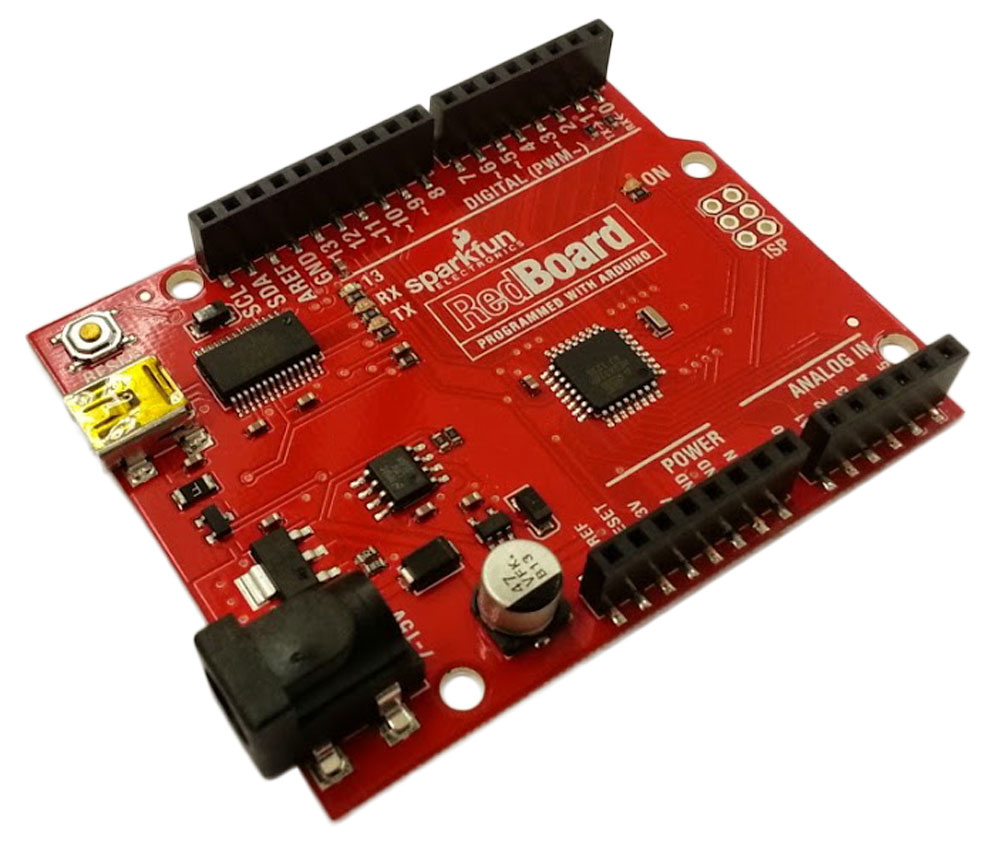
We had purchased several RedBoard - DEV-11575 microcontroller boards that are a mix of UNO's Optiboot boot loader with FTDI and R3 shield compatibility. As this is open source hardware/software the schematic ![]() is readily available for your to view along with free the IDE coder to program and upload your C or C++ code to your Arduino microcontroller. The back of this board is a lot smoother and less prone to scratching and shorting out because of the electronic surface mount design (SMD) instead of pin through hole (PTH). This method is cheaper, but if you want to replace microcontroller chip, you can't. Short of the above, the two boards have the same microcontroller and can be programmed the same way. Here is a link that talks about the differences, advantages of the Arduino and Raspberry Pi.
is readily available for your to view along with free the IDE coder to program and upload your C or C++ code to your Arduino microcontroller. The back of this board is a lot smoother and less prone to scratching and shorting out because of the electronic surface mount design (SMD) instead of pin through hole (PTH). This method is cheaper, but if you want to replace microcontroller chip, you can't. Short of the above, the two boards have the same microcontroller and can be programmed the same way. Here is a link that talks about the differences, advantages of the Arduino and Raspberry Pi.
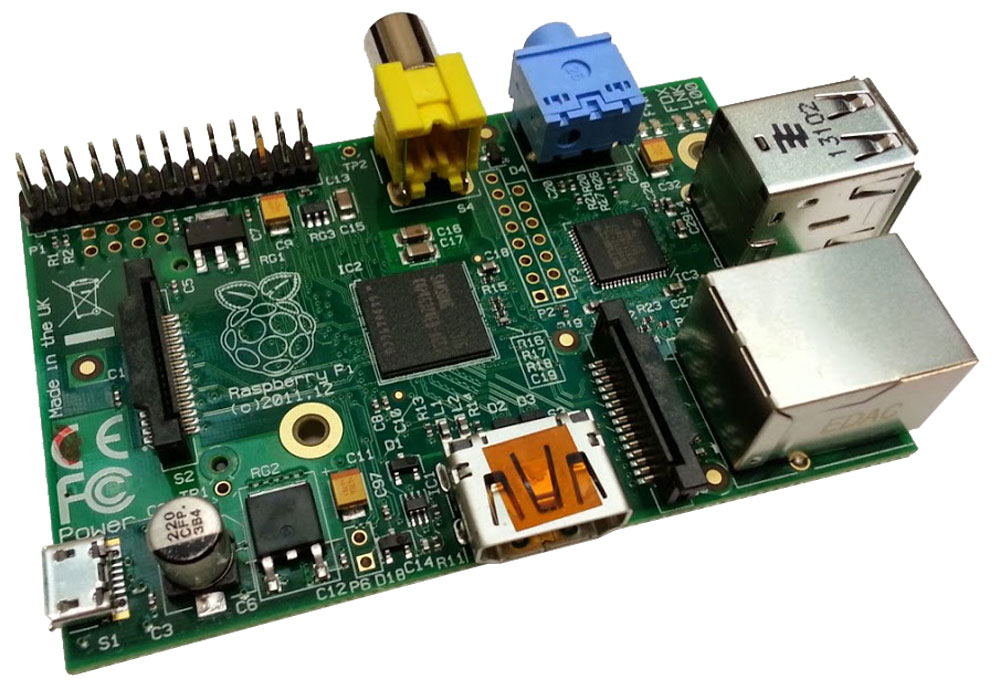
Raspberry Pi
Raspberry Pi (Model B Revision 2.0 (512MB), is a powerful little computer that fits in the palm of your hand. Powerful enough to offer basic office computing, low-level gaming, Internet and e-mail access, media playback and many other features.
- Raspberry Pi
- Raspberry Pi Versions
- Intro to RPi 2
- Exploring Raspberry Pi
- From Box to App
- Using the GPIO Port
- Using Python
- Unofficial Tutorial
- Adafruit Tutorials
- Life hacker
- PiCon
- Quick Start Tutorials
- Raspberry Pi Tutorials
- Adafruit's Raspberry Pi Tutorials
- GPIO Setup
- GPIO Tutorials
- Python (programming language)
Prototyping
This is allows you to see what your project idea is going to look like or how it works before taking an extensive amount of time, materials, and build process. There are companies that do this as a businesses and commonly have "rapid prototyping" as part of this process. It is critical to do, prior to a final build using appropriate CAD drawings, appropriate materials, and build process. By making a prototype before your final build will save you time, cost, and resources.
For your own project, try to see what could be prototyped before attempting to go straight to the final build. Showing some pictures of your prototyping in your wiki would go a long way in showing more process in your documentation to help others see your steps. Trying to build a final in one shot is not only a waist on time, but a waist of all of your resources.
Materials
You will need raw materials to support your hardware. Understanding material properties, advantages, ease of use, weight, strength, cost, etc will help with the selection process. There are two major areas that you can look up to get information on materials namely:
- Material Classifications
- Material Properties
- Physical Properties of Materials, 4.06
- Choosing the right materia, 44.17
When you select materials for your project build, always look into which will work best for your project build. Take a look at your project and start thinking about the materials you would prefer to use for your final build. Remember for your prototype, to use other materials that will allow you to build and test easily. Knowing how to work with materials such as soldering, brazing, gluing, bending, cutting, etc are considerations you must look at.

Standards
We use standards to keep things simple, save money, organization, good practice, safety, reliability, quality, minimize waste, increased productivity, etc. When working with your project using standards is going make your project easier to work with and build. This also includes programming as your code has standards also you should be adhearing to. For example, size and spacing standards can be used to allow more parts to be adapted to your project frame and for programming using indentation to show program loops.
- International Organization for Standardization
- Engineering standards
- Advantages Engineering Standards
- ISO standards, 2.05
- Technical Standard Organization
- Standards Council of Canada (SCC)
- International Electrotechnical Commission
Your project should use common standards found internationally. Take the time to use common standards in whatever your project is going to be. Everything, from using a standard power supply, to common sized fasteners will make your project build that much better..
Modularity
Whenever possible, design and building in modules can be advantages. Parts can be interchanged and replaced when needed easily and quickly giving you flexibility. There are many examples of using modular components or blocks of code. Whether it is parts that fit into your computer or a sketch of code... without it, things would be a lot more difficult to work with.
There are a lot of great examples of the advantage of designing and building with modules. See what parts, programing, and components you can turn modular on your project.
Simplify
 If your design seems complex, look to see if you can simplify, whether it is to streamline your design, materials, build,or process, taking the time to do this will save you a lot of trouble down the road. Simple speaks to everyone as more user-friendly, easier to use, cheaper to make, easier to build, and more accepting.
With your project development and process, take the time to simplify wherever you can to make things simply.... easy.
Allowances
Allowances are key to things fitting. Fitting meaning things such as parts fitting, allocating enough time for a project to be completed, and having extra material just in case. As obvious as this may seem, it is common to find yourself a little short, whether it is the part not fitting, something cut too small or big, extra timing on code for more flexiblity with inputs or sensors, or not having enough parts or time to finish a project. Too much allowance can also be a problem, and tolerance becomes another important aspect to consider. Try to keep this in mind with your projects.
Joining & Fastening
There are lots of options for joining and/or fastening. Some are more permanent then others. Using fasteners, it makes sense to keep the same sizing standard and minimize the number of different sizes in a project to keep it simple and easy to work with.
If you have a kit, you will most likely have everything you need, but custom projects, you will need to make decisions on what to joint/connect project components. Above are some links to refer to for more details on what might work best for you.
 General Programming
Programming is a key part of these projects, as we are working with microcontrollers which require programming in order to work. Depending on the type of microcontroller will determine the type of code that will be needed with it. Common to all programming involves a number of key areas that fall under best techniques and coding practices. This will help with reading the code, prevent mistakes, and keep similar standards expected in programming.
- Techniques & Practice
- Best Coding Practices
- Coding Techniques
- Programming Practice
- Good Programming Practice!
Ubiquitous Computing.
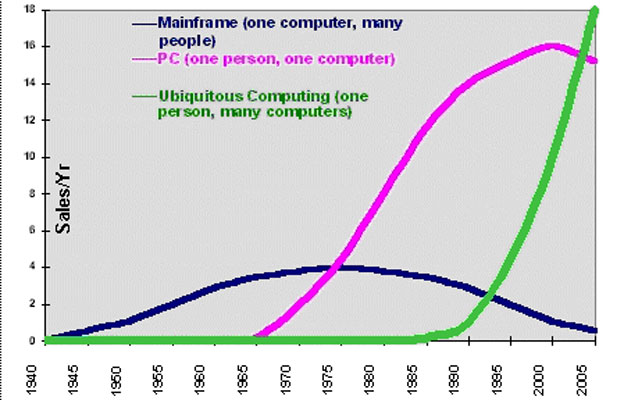
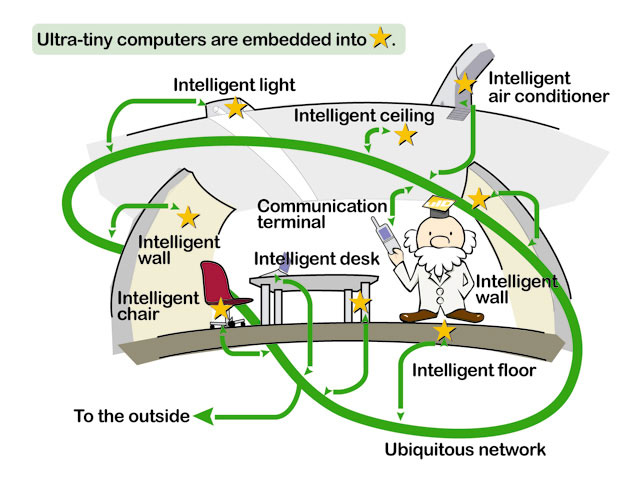
Ubiquitous computing is a more common term in the computing industry that relates to computers all around us and described as the next wave of computers. Below show further information that relates to this area..
- Ubiquitous Computing
- Ubiquitous Computing, 11.01
- What is Ubiquitous Computing,?, 4.13
- Ubiquitous Computing Future, 6.28
Common Hardware and Accessories
There are several hardware components that could be used with your controller that include pre-made integrated circuits, assorted inputs, outputs, and power control, which you can also see in common kits you can get online. The following is a small list of some of these components that can be used with a controller to create a controller with hardware and programming interface.
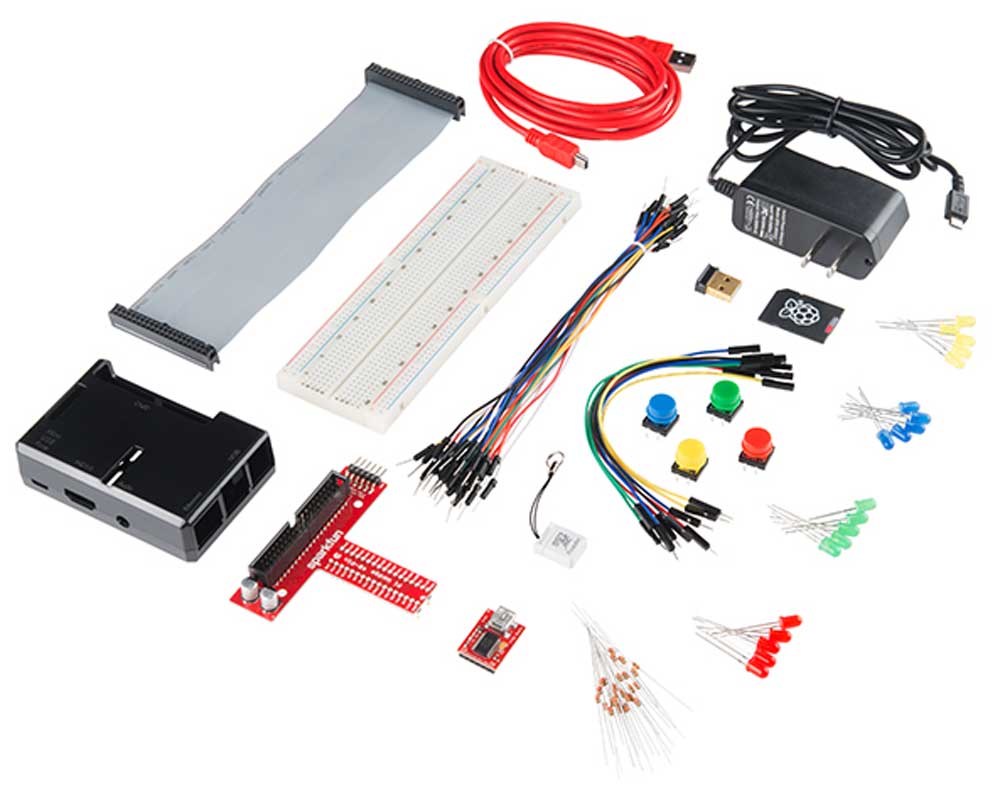
Raspberry Pi Starter Kit
Arduino Starter Kit
- Prototyping bread board
- Female/male, male/male wire jumpers
- Tact Push buttons - momentary, switch
- Slide buttons
- LED's solid/RGB and resistors
- Potentiometers
- Piezo buzzers
- Joystick
- Relay modules
- Photo-resistor
- Tilt sensor
- Number entry pad
- 7 segment display
- LCD display
- Integrated and logic gate circuits
- Transistors
- Photo diode
- Servos - continuous/non
- DC motor
- Passive infrared sensor (PIR motion sensor)
- Infrared emitter/sensors
- Temperature sensors
- Ultrasonic sensor
- Mouse and keyboard
- Speakers
- Power supplies
- SD cards (storage)
- Cases, frames, and housings
- Mini WI-Fi dongle
- Mini Blue tooth dongle
- Monitor displays
- Motor controller
- Transceiver
- I/O extension/expansion
- Radio frequency receiver
- Sensors - orientation, pressure, humidity, and temperature
- GPS (Global Position Satellite)
- Accelerometer
Resources
Below are several resource links that you can checkout to help you with your project, design, ideas, costing, process builds, tutorials, etc.
General:
Electronics and Arduino
- Electronics, 38.05
- Basic projects
- Breadboard Projects
- 20 projects ideas
- 5 projects, 4.44
- Top 12 elect, 42.17
- Connect LED , 24.00
- Tutorials
Raspberry Pi
- Raspberrypi.org
- PCB Versions
- Wikipedia
- Lazarus on RPi
- MUO Blogs
- Setting Up, 9.09
- RPi Tutorials
- Intro to GPIO, 17.47
- Python sketches
- GPIO Inputs, 18.40
- GPIO Control, 15.38
- RPi Projects
- Make
- elinux
- Adafruit
- GitHub
- Instructables
- Gen Search
- Washroom notification, 8.14
- Home Theater, 8.15
- Amazing Gadgets, 13.44
- Auto Lighting, 2.29
- Fav RPi Projects. PL
Local suppliers you will find in the area:
On-line suppliers:
Use the first three for actual orders through the school (*Approved Vendors)
- Digi-Key Corp.
- Studica
- Creatron Inc.
- Newark element14
- Hobby King
- Adafruit
- Maker Shed
- Robot Shop Distribution
- Mouser
- Futurlec
When Pricing Parts
When building a new project, you will need to purchase certain materials. Here are some things to keep in mind when planing your material purchases:
- Some larger companies have only *approved vendors that you are allowed to order from
- Purchase from local or places that have decent shipping charges
- Ordering from other countries can have hidden cost and time associated with customs and additional taxes
- Comparative price shopping, to see which supplier is going to sell it the cheapest
- Save on shipping, by ordering from one supplier
- Ensure supplier has the part in stock, otherwise your order could be held back for days if not weeks at a time
Create/Construct:

![]() The following steps will help guide you to complete the proposal report and prepare you for your future project direction:
The following steps will help guide you to complete the proposal report and prepare you for your future project direction:

- Review the Custom Project Proposals (CPP) Summary Eval HO and the related website information
- Decide on your final unique custom project proposal and sign-up with your unique idea based on a first come bases
- Using the supplied Custom Project Proposal template, breakdown your final advanced level project into two smaller supporting projects to end up with a basic, intermediate, and advanced level project
- You will require images for front title page, related images for each project breakdown, description/operation, components needed, code, overall summary, learning expectations, and resources
- For additional custom components on top of miscellaneous kit parts already offered, use the supplied Google spreadsheet template to locate, document, and price those part(s) from a School approved vendor later insert into your report
- Note: specialized parts not available may possibly be ordered and/or simulated with simple input/output components to test code and program automation operation
- Check that you have added all required information for your report proposal and is complete, update the table of contents, and use the CPP summary eval sheet to self evaluate the content, then have a unique peer partner review for feedback prior to presentation
- You will present/share with the class your MCU custom project proposal, for a 3-4 minute presentation with the intention of later getting general feedback, further possible ideas, and support discussions
- Finish your CPP Summary/Eval sheet by sharing with your peer reviewer to get peer evaluated on your presentation and once back, un-submit your Google Custom Project proposal, to re-submit both your Google Custom Project Proposal and Self/Peer eval sheet
Evaluation:
The following is a breakdown of marks related to this custom project report and presentation project.
| Evaluation Breakdown Component Descriptions | Marks |
|---|---|
| Always double check that you have completed all components for full marks. | |
| Custom Project Proposal - sign-up | 10 |
| Custom Project Proposal - content for 3 project levels, summary, learning, & resources | 80 |
| Presentation - 4 minutes on content -communication & knowledge | 20 |
Unit Conclusion
Understanding about the course, routines, expectations, safety, assessment and evaluation, digital organization, journal entries, you will be able to maximize your learning and understanding. With your researched career and many related ones presented by your peers, will help you decide on possibles with your own future. Looking at possible practical projects will broaden your awareness of the amount of knowledge, learning, and skills required to design, build, code, and interface a related computer engineering challenge. With this unit, learning about organization, careers, and project interfacing will make you more aware of where you want to take your future and what you need to do, to get there!