Unit 1: Grade 9 Foods, Tourism.Com - Intro and Photo Editing
Welcome to the the grade 9 Foods, Tourism.Com course. This is the Graphic Communications Technology (Com-Tech) section,with the other two sections being Tourism and Foods. The Com-Tech and Foods will have more focus with Tourism integreated with each.

You will notice each unit activity below is broken down into five subtopics, SPICE, to guide and help you through the project and assignments related to the unit activity:
- Situation - This is the introduction, big picture, or you can think of it as the setting of story/novel
- Problem/Challenge - What must be resolved or completed, i.e. what you will need to accomplish
- Investigation/Ideas - includes gathering ideas, research and organizing information to help create, construct, and/or complete the Problem/Challenge
- Create/Construct - take your best idea and complete and/or build the needed solution
- Evaluation - did the Problem/Challenge above get resolved and/or completed
This unit will introduce you to the course, routines, safety, expectations, and introduction to photo editing.
Course Units and Descriptions
Use this table for an overview and navigate to each of the course unit pages.
| Unit | Description |
|---|---|
| Review course outline for more details | |
| 1 | Intro & Photo Editing - intro, routines, pictures, and photo editing |
| 2 | Graphic Communications - graphic editing and manipulation |
| 3 | Food Intro, safety, & Prep - intro to industry, safety, food prep and practice |
| 4 | More Foods - different food preps and methods practiced |
| 5 | Portfolio - web page creation and culminating work to showcase |
| 6 | Tourism - select a location to market using a brochure |
Unit Activity Quick Links, Click to Jump to the Specific Activity!
- Unit 1, Act. 1: Organization, Routines, and Course Information
- Unit 1, Act. 2: The Tourist Brochure
- Unit 1, Act. 3: Graphic Course Logo Design
 Unit 1, Act. 1: Organization, Routines, and Course Information
Situation:
Class of students starting a new course-rotation to learn about Graphic Communications
Problem/Challenge:
Getting familiar with what the course is all about, class routines, expectations of the course and the teacher, general administration of class, and safety are all important issues to know and understand, so that the learning process can begin.
Investigation/Ideas:
The following is list related to this course and should be reviewed by students:

- Course Details
- General Safety
- Detailed Safety Issues
- Shop/room Layout
- Shop/room Resources
- Emergency Procedures
- Expectations
- Evaluation
- Class Policies
- Routines
- Attendance and Lates
- Moodle Log-in
It is important that students feel comfortable with the above points and should know what is happening in the course.
Create/Construct:
 Start by organizing your school equipment and supplies for taking and storing your notes. Review the course outline and class routine, write down any questions you have about the course, requirements, or responsibilities you need to be clear on.
The following list of links are details that students are to review, after going over them in class:
- Foods, Tourism.Com Course Outline
- Introduction to Technical Classes
- General Safety Presentation
- General Safety Contract
- Course Achievement Breakdown
- Evaluation and Tips Breakdown
- Moodle Log-in
USB Memory Stick, Folders and Shortcuts
One of the first things in class we do is review the Tech Info page, point number 2 above. The top section with 10 blanks is to be filled in with the important things we will cover in this course. You will find this information by reviewing the course outline and listening to the teacher discussing what is happening in the course. The bottom section will also need to filled out with two in class peers for contact information and support with in the class to help foster teamwork and responsibility.

Next you will need to get a USB memory stick, for saving your work on to. You will need to follow instructions on the tech info page to create three shortcuts inside a main folder with your course code, and a sub-folder Shortcuts.:
- Pick-up Folder
- Hand-in Folder
- mfranzen web
You will also need to create more folders for future projects as you go, to keep your work organized. The intent is to work off of your USB in school and save to your H: drive when you are finished at the end of class as a back-up. This way you can take your work with you and work elsewhere if needed and it is usually faster to access then the board network.
File Naming Conventions and Shortcut Test
To finish you will need to use all three shortcut links in an exercise called Shortcut Test:

- Go to the pick-up folder and get a file called Shortcut Test
- Save the text file to your shortcuts folder, and open it up
- You need to type your name in, then go to each of your shortcuts, right click and select properties, then copy the shortcut link address and paste it into the text file in the required location
- Go to the Tech info page on the site and open up the PDF file and copy the section that explains file naming conventions, i.e. how to properly name files you hand in (just above the shortcut instructions
- Re-name your file according the the section you just copied into your text file, then hand in the hand-in folder for your class using your hand-in shortcut.
Make sure all work you put in the hand-in folder is saved first in your USB, then drag and drop into the right sub folder in the hand-in folder. It will have a due date at the front and then the related project name.
Safety Passport
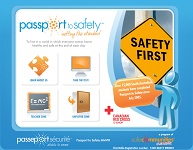
Not only learning about safety in the workplace but being able to show that you completed the certificate will be able to show this to employers and keep in their portfolio. This is worth almost $15, but through this opportunity, it is free to students who get a code from the teacher. This will make you aware of several safety issues, concerns, and your rights as a young worker. Here are some resource material you can use:
To start, go to the main Passport to Safety page and click on quick register and enter the registration code you received from your teacher, fill in your information and you will receive an e-mail with your username and password to login with and get started. . A tutorial with quiz questions will allow you to earn your safety passport certificate which you can use in your portfolio/ resume. Ensure you keep your user name and password safe for future access when needed.
To hand /show your instructor that you have successfully completed the Passport to Safety program, you will need to print to a PDF file and hand-in.
Evaluation:
Although these are not heavily weighted, they are important project assignments that will benefit you throughout the rest of this course

| Evaluation Breakdown Component Descriptions | Marks |
|---|---|
| Always double check that you have completed all components for full marks. | |
| Survey - Answer all 7 questions fully | 7 |
| Course Outline Signed - Take home to show your parents and get signed by parent | 5 |
| Tech Info - Filled out with weight %, 10 course components, and two peer contacts | 10 |
| Shortcut Test - All 3 shortcuts done, shortcut test file handed in correctly | 10 |
| General Safety - Class reviewed, read through and sign, parent signature also | 5 |
| Safety Passport - Certificate saved in web page format with file and folder named correctly | 15 |
| What Did you Learn - Test your knowledge here: | |
| Moodle Quiz - Based on above work covered, log-in here, help with quiz access/process | 10 |
| Total Marks | 62 |
Unit 1, Act. 2: The Tourist Brochure
Situation:
Using Adobe Photoshop is one of the biggest components of graphic communications and can be used to do a lot of things with raster images. It is for this reason that learning about this program and how to edit, manipulate and enhance photo images, is an ideal way to be introduced to graphic communications.
Problem/Challenge:
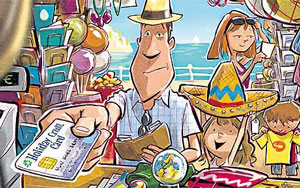
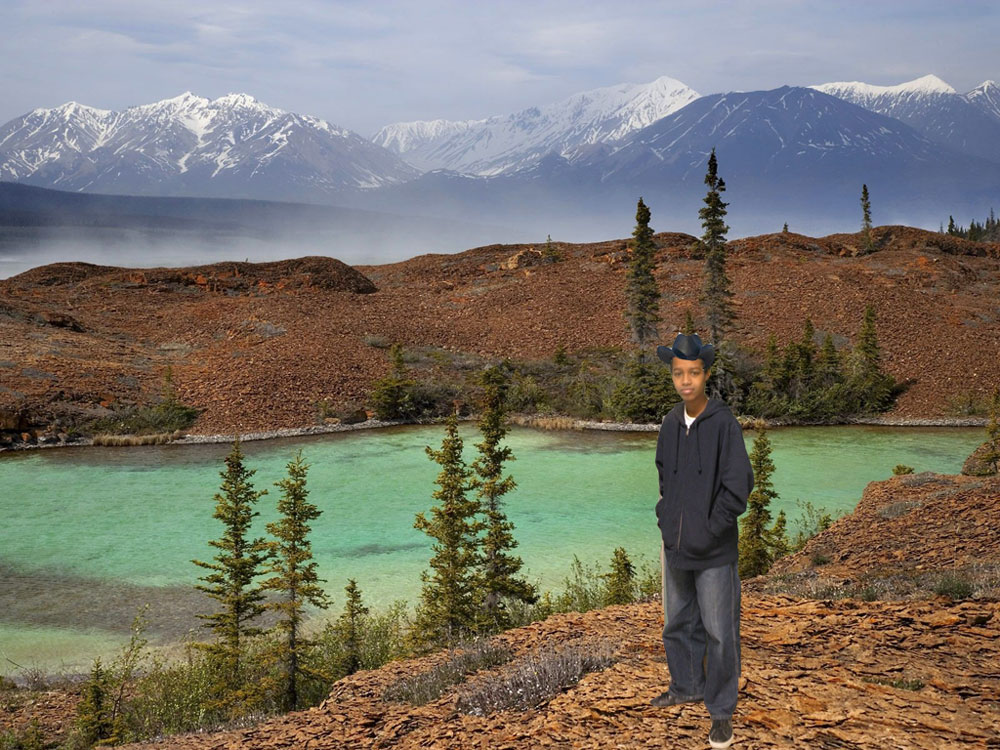
Create travel picture to be used later in a travel brochure You will need to find your favorite destination and insert an action shot of yourself into this picture looking like a tourist. As a tourist you will need to also add a related hat with your picture. Your picture must show at least half to a full body shot taking up about 25% of final image. The image size is to be 1024*768 pixels at 72 dpi in RGB colour mode. Careful attention to accurately selecting objects once images have been properly sized and moved into your travel destination background, will create the best results.
Investigation/Ideas:
As this is the first time using Adobe Photoshop, you will need to familiarize yourself with the program and its image edition tools. Here are a some images showing the interface of this program:

Main Interface
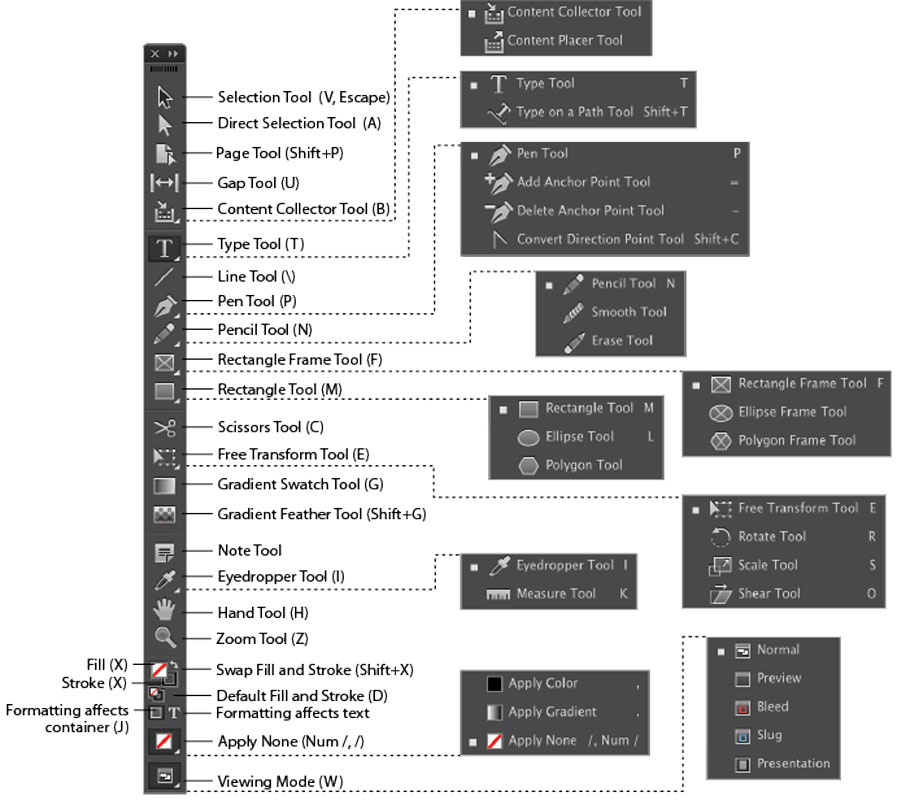
Tool Bar Icons
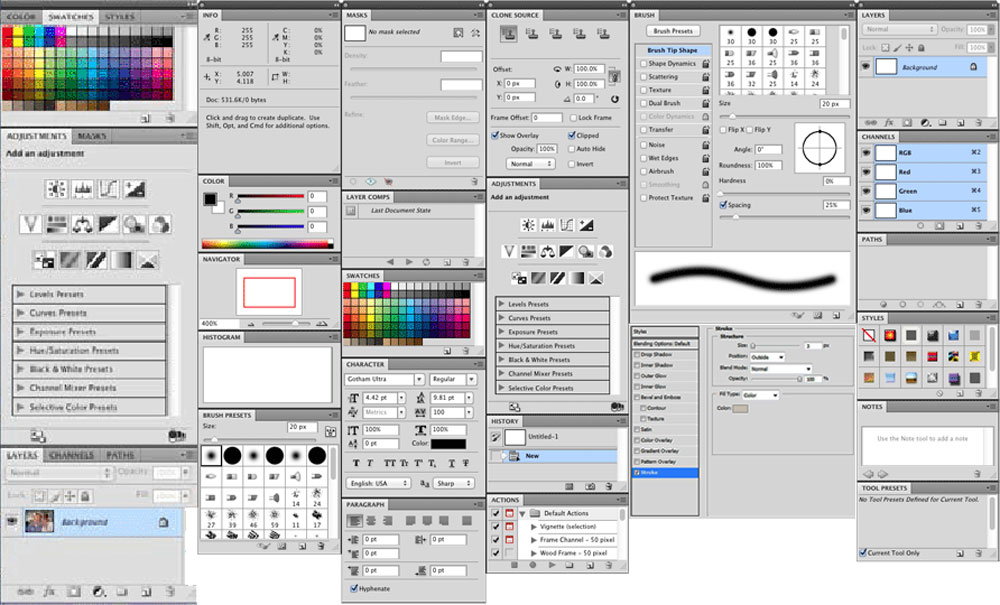
Some Pallets
Layer Pallet
There are several components of Photoshop that need to reviewed. The following is a list of those items:
- Basic Screen Interface
- Tool Bar Icons
- Tool Pallets
- Application Menu
- Workspace
- New File Creation
- Preferences
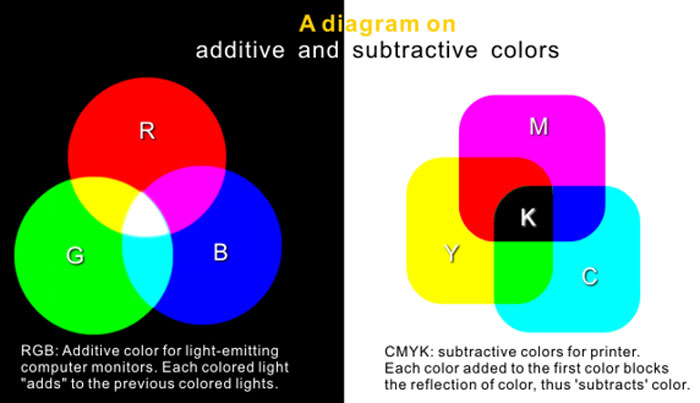
- CMYK vs RGB
- Photo Resolution
- Dots Per Inch, dpi
- Selection Tools
- Inverse
- Viewing Tools
- Transformation
- Image sizing
- Canvas sizing
- Cropping
- History Pallet
- Layer Pallet
- Save
- Save As
Below are some linked resources that will help with your introduction to Photoshop
- Photoshop CS4 Tools
- Photoshop Tutorials
- Intro to Photoshop

- Photoshop shortcuts
- Royality free image sources
It is important for all of us to make sure we are following all laws and protecting the rights of others. This includes learning about and following through with attributions and acknowledgements of the source of an image when required.
![]() It is always a good idea to edit images in higher resolution if possible, such as removing a person from the background, do this with the original larger file first, then re-size down to the size you will need. Because this brochure is for the web, the image only needs to be 72 dpi, but you are better again to edit any images in their native original higher resolution first. Careful separation of images from there background is very important, in order for your travel brochure to look realistic.
It is always a good idea to edit images in higher resolution if possible, such as removing a person from the background, do this with the original larger file first, then re-size down to the size you will need. Because this brochure is for the web, the image only needs to be 72 dpi, but you are better again to edit any images in their native original higher resolution first. Careful separation of images from there background is very important, in order for your travel brochure to look realistic.
Here are some samples of past student work showing themselves inserted into a travel destination with one extra item, a hat:

Sample 1
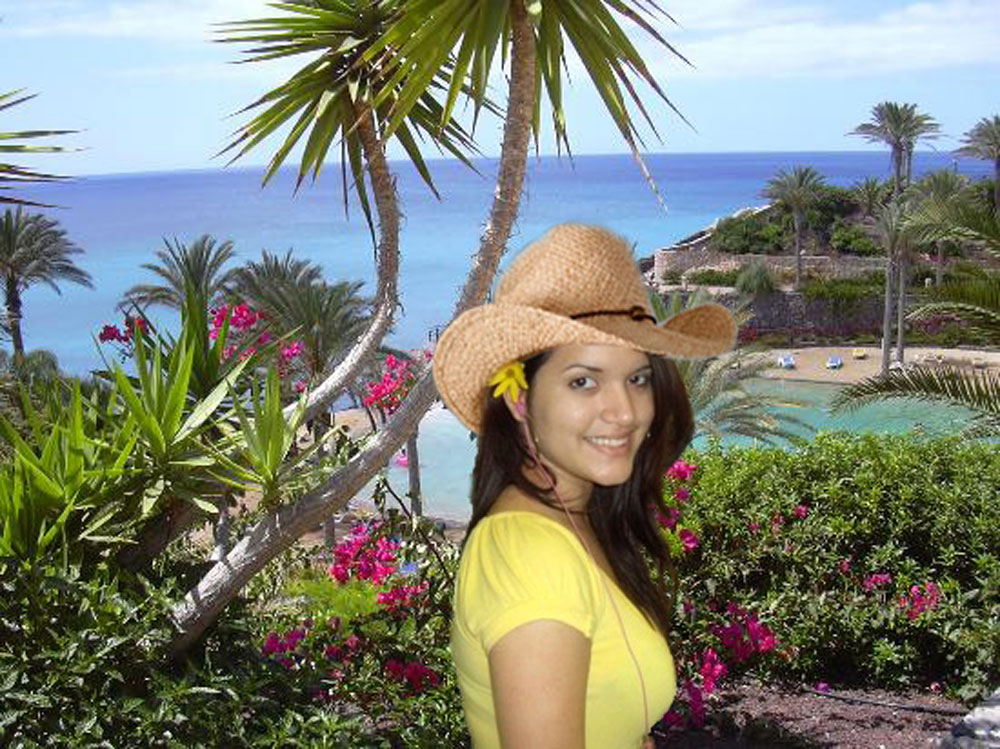
Sample 2
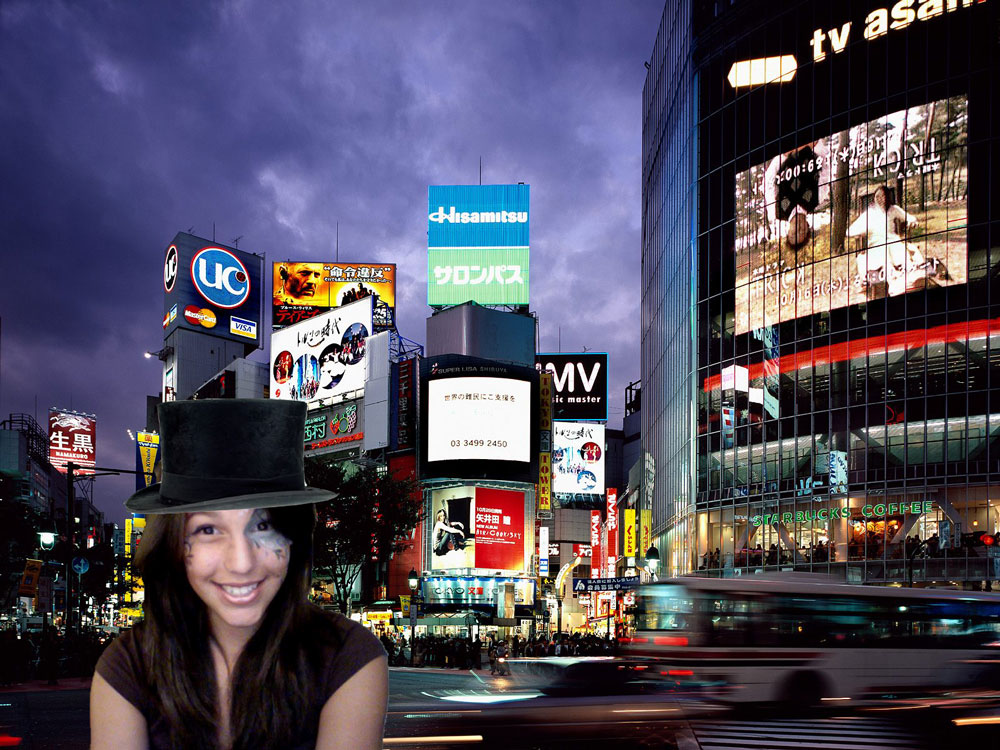
Sample 3
Sample 4
Create/Construct:
A handout assignment, Photoshop Introduction and Interface work sheet ![]() has been created for you to explore specific tool icons and menu commands that will help you complete your tourist brochure Review and answer the questions. Above are some additional linked resources that will help with your introduction to Photoshop, but remember to answer each question not only with what the tool is, but an example of how/where you would use this tool with the travel brochure project.
has been created for you to explore specific tool icons and menu commands that will help you complete your tourist brochure Review and answer the questions. Above are some additional linked resources that will help with your introduction to Photoshop, but remember to answer each question not only with what the tool is, but an example of how/where you would use this tool with the travel brochure project.
![]() Review the steps to understand what needs to be done to complete the travel brochure first, then answer the questions on the work sheet handout.
Review the steps to understand what needs to be done to complete the travel brochure first, then answer the questions on the work sheet handout.
Here are the steps you should be following to properly complete the tourist photo image brochure project:
- First ensure you have finished the Photoshop Introduction and Interface work sheet
- Review resource links and explore new information
- Get your full body picture taken in various positions and angles (try 5 minimum) with a solid colour wall or door behind you
- Picture will be available in the pick-up folder once instructor has transferred image over
- Use resource links to find your perfect travel destination and ensure it has a resolution to meet project requirements
- Open travel image up in Photoshop and crop and re-size if necessary and save work
- Decide on which image you will use of yourself, and open it up, crop what you need,
- Accurately using selection tools, select the background using the magic wand, refine, inverse, and then mask yourself from the background
- Save image then temporarily re-size image to fit into travel background by having both open, drag and drop yourself into the travel background tab
- Do the same for a hat, once done save PSD and also save as a JPG with proper file naming convention (j-joe-tourist.psd and .jpg)
Evaluation:
Extra marks for added tourist objects if time permits, but maximum marks are first earned through quality selections. Ensure you hand your work into the appropriate hand-in folder as reviewed in the last activity with the correct file naming convention.

| Photoshop Interface Assignments | Marks |
|---|---|
| Always double check that you have completed all components for full marks. | |
| Interface Tool bar Answers - image size, trave destination, colours | 10 |
| Interface Menu Answers - image size, trave destination, colours | 10 |
| Tourist Brochure Image Handed-in | |
| Travel Background - image size, trave destination, colours | 5 |
| Person(you) - well cut out showing just person with no rough edges | 15 |
| Hat - Related and appropriate travel hat fitted to head properly | 5 |
| Technical - Layers named, PSD and JPG handed in, file name | 5 |
| What Did you Learn - Test your knowledge here: | |
| Moodle Test - Based on above work covered, log-in here, help with quiz access/process | 20 |
| Total Marks | 70 |
Unit 1, Act. 3: Graphic Course Logo Design
Situation:
Photoshop has many tools for working with graphic images. and learning how to work with multiple images is one of the most important skills to have with this program. Media today, if you look closely, you will find logo's identifying the source or supplier as part of market branding.
Problem/Challenge:
Create a course logo based on your interests. It must include the following requirements:
- Setup: 800 * 600 pixels web page with transparent background
- Minimum of three course related image objects cleanly cut, with at least one photo and one clip art/illustration
- Outside edge to be an odd custom shape, not a square or round type shape and use a minimum of 75% of the page space
- Text clearly showing your initials
- Brush strokes to be included as part of the logo build process
- Gradient used as a major fill
Investigation/Ideas:
You will need to think about the three areas of the course, and come up with some images that interest you and would show a little bit about what this course is all about and your interests.. You could use the course outline to search key words to think of images you would like to show in this course logo. When deciding on an odd custom shape for your outside logo shape, make sure that it is going to be able to fit 75% of the page size, i.e. a carrot shape will not work but a fat fish shape would.
- Tourism - travel, Tour operator, Tourist destination, trending topics, etc.
- Foods - chef, different foods, cooking, baking, chef wikis, cooking wikis, etc.
- Com-Tech - photos, design, graphic enhancement, computers, Com-tech wikis, etc.
There are several components of Photoshop that need to reviewed. The following is a list of those items:

- Relative image sizes
- Standard web sizes
- Print vs Screen
- Adv. Image selection
- Fills
- Gradients
- Shapes
- Pen tool
- Pathways
- Bézier Curves
- Custom Shape
- JPG vs GIF
- Inverse
- Type
- Brushes
- Rotate
- Scale
- Layers
Resource links from the last activity will also be helpful in this project. Selecting images from backgrounds can be challenging some times and different tools can be used to acquire needed image. The pen tool is a very important tool to master and helps with this process. Below are some linked resources that will help with this project.
- Removing Backgrounds
- Pen Bézier Exercises
- Creating custom Shapes

- Gradient And Paint Bucket Tools
- Difference between JPEG and GIF
- When to Use the JPG or GIF
- Royality free image sources

it is important for all of us to make sure we are following all laws and protecting the rights of others. This includes learning about and following through with attributions and acknowledgements of the source of an image when required.
![]() Some pen tool tips while using to create a pathway, single click for sharp corner, click, hold, and drag for curve handles, ctrl to adjust during pathway selection, alt to change anchor point to curve or sharp corner.
Some pen tool tips while using to create a pathway, single click for sharp corner, click, hold, and drag for curve handles, ctrl to adjust during pathway selection, alt to change anchor point to curve or sharp corner.
Here are some samples of past student work, note the area around the odd shape logos are the same colour as the background:
Sample 1
Sample 2
Sample 3
Sample 4
Create/Construct:
Below is the suggested steps you should take to complete this project in a timely manner. Although you will want to create your outside odd shape first wait till step 8 below to create it.
- Get three images from each of the course sections. Use the course outline, and/or the google internet serarch terms for your image ideas
- Separate each of your chosen images from their backgrounds carefully using the selections tools you learned in class
- Setup a 800 * 600 Pixel web page with a transparent background
- Bring all your clean cut images into the page, naming each layer according to the image object
- Decide on which object will be in front and behind and move layer accordingly
- Create some kind of visual interaction amoung them
- Locate and place using transformation scaling, rotate, etc.
- Create a a custom course related shape from one of the course topic areas using the pen tool (to fit a minimum of 75% of page)
- Use the brush tool and pathway to add effects or looks
- Use the type tool to leave your initials
- Refine your design/images and add if necessary
- If you have more time think about additional graphic components
- Save a both a PSD and GIF file
Evaluation:
Ensure you hand your work into the appropriate hand-in folder as reviewed in the last activity with the correct file naming convention in both PSD and GIF formats.

| Photoshop Graphic Course Logo Design | Marks |
|---|---|
| Always double check that you have completed all components for full marks. | |
| Minimum of three Images -well sized/selected images -photo/illustration, cut out well | 15 |
| Custom Odd Outside Shape - image size, shape detail, Gradient fill | 10 |
| Added Touches - rotation, gradients, type, colours | 5 |
| Final Image - Integrated and related images, course theme, overall look, PSD and GIF | 10 |
| What Did you Learn - Test your knowledge here: | |
| Moodle Test - Based on above work covered, log-in here, help with quiz access/process | 20 |
| Total Marks | 60 |