Unit 5: Portfolio
A previously made background will be used to create a web page for culminating work into a showcase of their work completed.
Course Units and Descriptions
Use this table for an overview and navigate to each of the course unit pages.
| Unit | Description |
|---|---|
| Review course outline for more details | |
| 1 | Intro & Photo Editing - intro, routines, pictures, and photo editing |
| 2 | Graphic Communications - graphic editing and manipulation |
| 3 | Food Intro, safety, & Prep - intro to industry, safety, food prep and practice |
| 4 | More Foods - different food preps and methods practiced |
| 5 | Portfolio - web page creation and culminating work to showcase |
| 6 | Tourism - select a location to market using a brochure |
Unit 5, Act. 1: Culminating, Putting it All Together
Situation:
Semester is drawing to an end and students have had an opportunity to work with the computers leaning about basic computer operation and organization, safety passport, graphic communications using industry standard Photoshop CS4, printed T-shirt collages, cooking a number of different recipes and a number of related food theory. Now it is time to bring it all together with a new tool, an electronic portfolio.
 Problem/Challenge:
Create a multi-page web portfolio using work already done and combining it with tourism and web design authoring. The portfolio is to showcase your work, current course related information, and tourism: Portfolio to include the following information:
- Computer organization and use
- General safety information
- Graphic communications - Photoshop tools and techniques, layers, selection, filters, adjustments, blending, colours, pathway/pen tool, T-shirt printing, etc.
- Show evidence of your projects, major concepts learned in each and future possible projects
- Food topics on safety, terminology, kitchen equipment and utensils, knife use, measuring and math, food labels and nutrition, and careers in the food industry
- Show evidence of recipes cooked, insight, know how, variations, pictures working, food dishes cooked, a close-up of a career position
- Intro to tourism showing a breakdown of the 8 different sectors and their related jobs.
The web portfolio build to include the following:
- Use your web page background project as your background image for your web portfolio pages
- Each page sized to 960 pixels wide, include a header and footer navigation menu, expandable centre to allow for vertical expansion
- Using Adobe Dreamweaver, create an STE project file, use hyper text markup language (HTML) and cascade style sheets (CSS)
- To include dynamic navigation buttons for Home, Profile, Projects, Gallery, and Links
- Layout to include 4 areas header, header-menu, content, footer-menu, and footer sections
- Site organized in a folder named last initial, first name-web-portfolio
- Font size to be 12, with a 20 line height with a clear contrast against the background
- Insert related text and graphics at a ration of 50/50
- Pictures to be downsized to small, less than 300 * 300 linking to full page larger images sized 1000 pixel wide
Investigation/Ideas:
Portfolio information is to be based on areas already covered in class. Review notes, get those projects out to fill in information base on them.
Although Dreamweaver is a new program for students of this class, it is a cross between a Word and Photoshop known as a type of program known as Authorware. This program allows you to build web pages and insert resources, such as links, text, and pictures. Follow the tutorial steps below to transform your web background page project into a web page build with HTML and CSS coding. It is possible to use the sample code, and modify, if you understand where you need to modify the code such as the size of your graphic cut-outs, file naming, text, and background colours.
![]() Remember to keep all your file names lower case and no spacing. Characters used must be Alpha or numeric only.
Remember to keep all your file names lower case and no spacing. Characters used must be Alpha or numeric only.
There are three possibilities to transform your image designed in Photoshop into a HTML/CSS based web page. All three obviously include making your graphic web page design, then selectively cutting out using the knife tool into appropriate sections in order that the page can be laid out properly with navigation, header, footer, and whatever else is needed.
Photoshop
- re size to 960*720
- note best font colour, and background colour code numbers
- hide sample text
- turn on snap to guides
- Create guides for header menu and footer menu
- cut tool -cut out header, header-menu, content, footer-menu, footer
- Name each slice using slice select with the above names
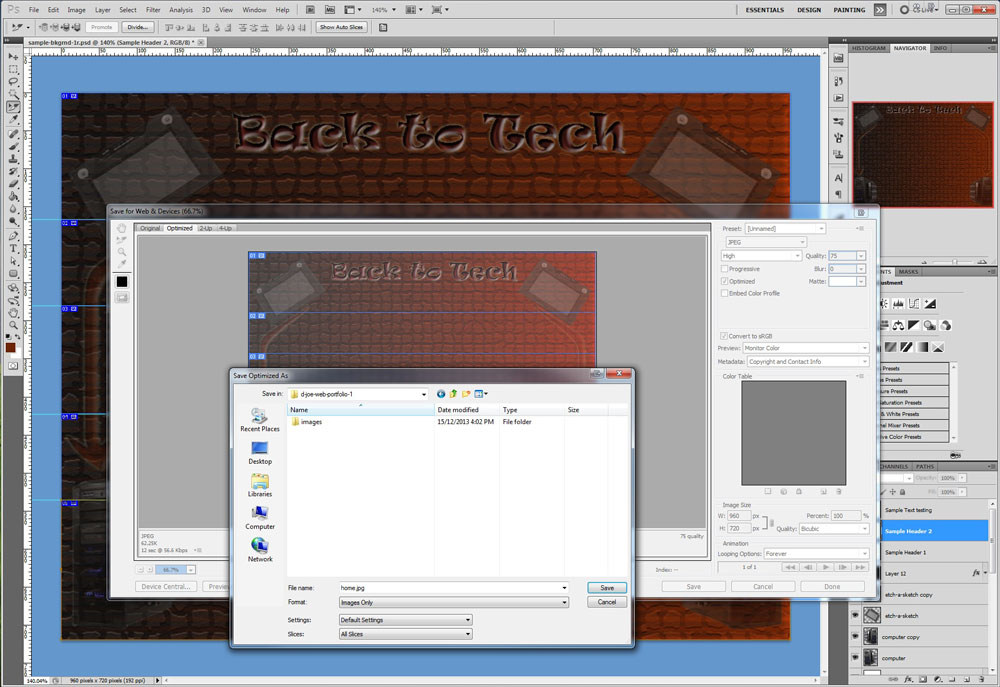
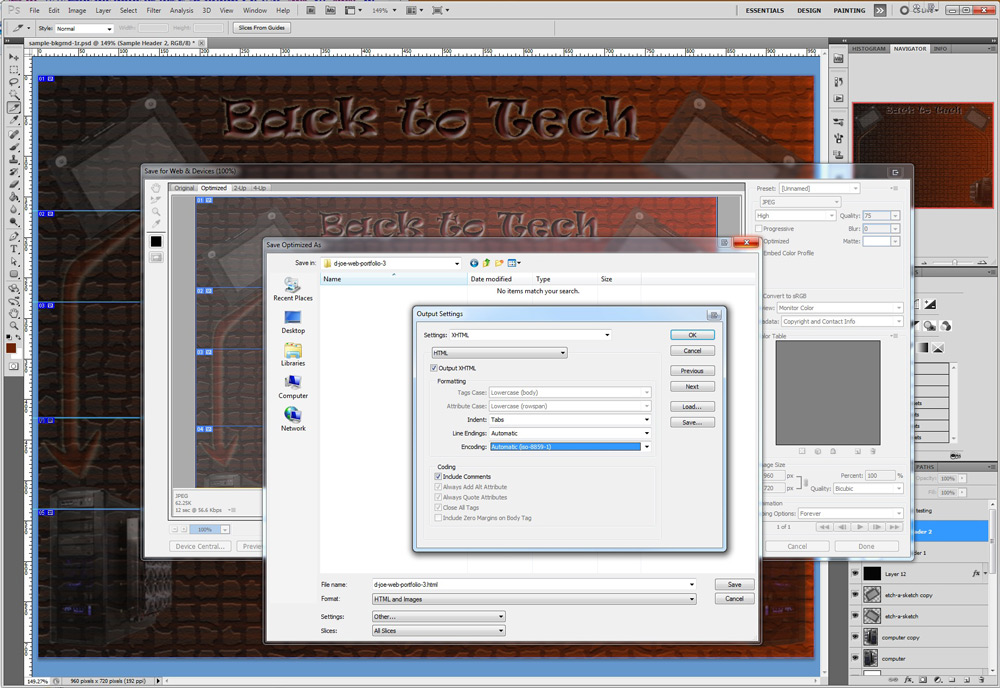
- Save for web & Devices as preset JPGhigh
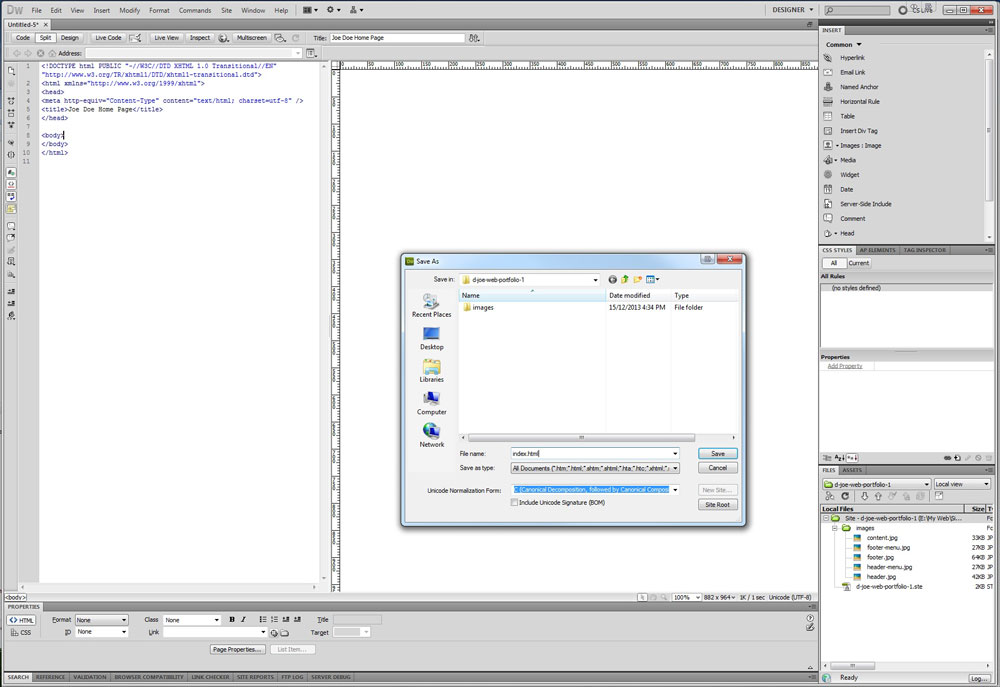
- Save Optimized with file name 'index' (lower case), format: Images, Settings: Default Settings, Slices: All, in root directory of your your site name, ex: d-joe-web-portfolio (image folder will be created and images put inside)
Here are some visual samples to follow along with the steps:
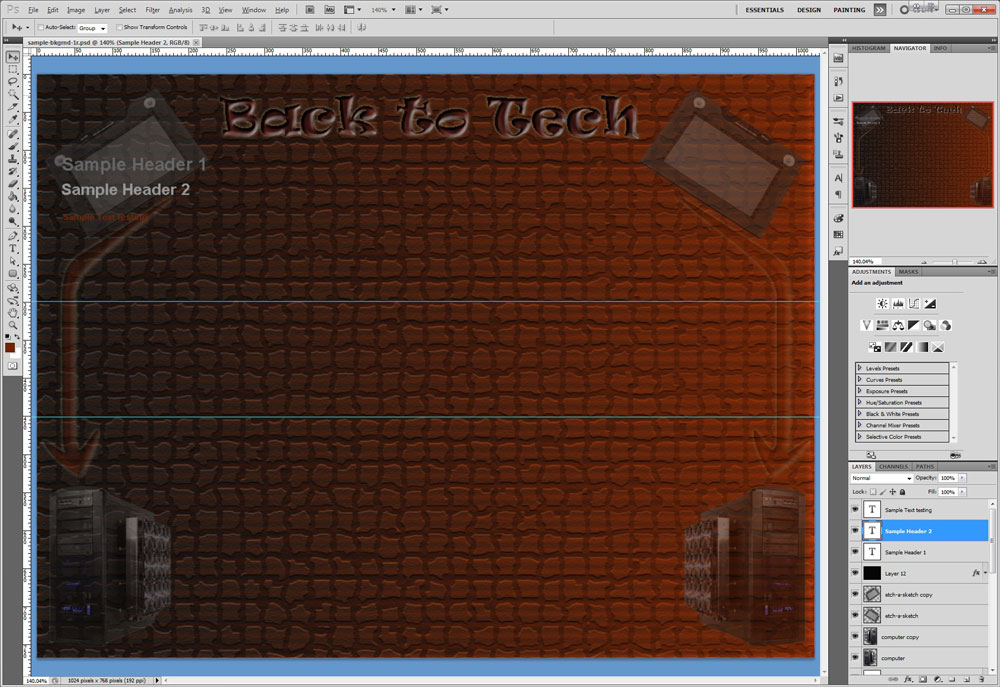
Step 1
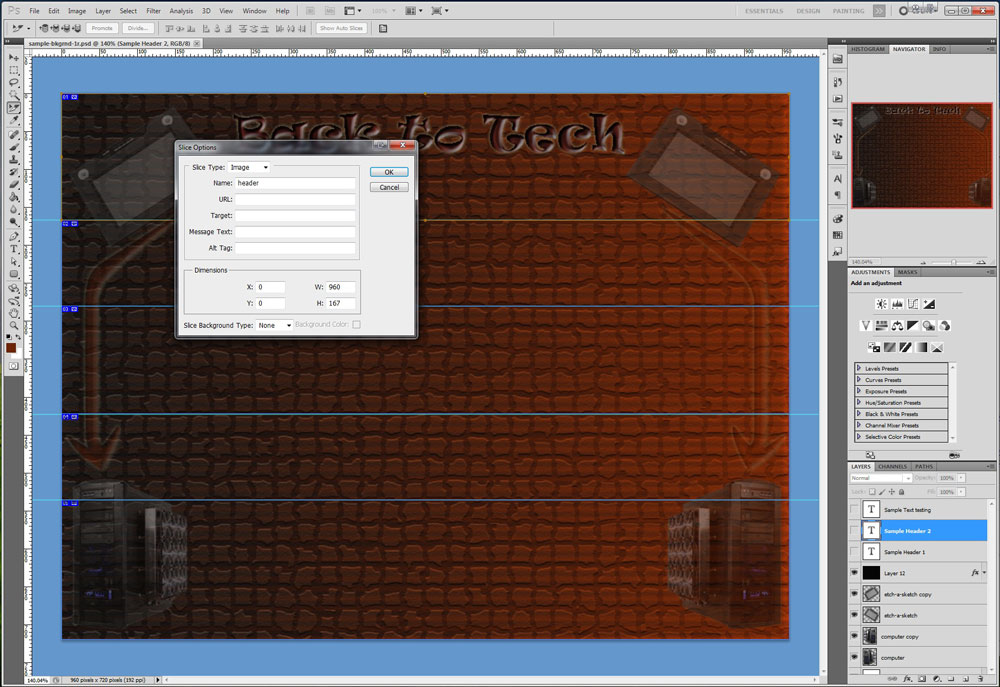
Step 2
Step 3
Dreamweaver
Here are the three possibilities to turning your web page background into an actual web page:
- Create manually from scratch using Dreamweaver and CSS to size and place images in the web page
- Export out using Photoshop with "other" (step #9 above), to include CSS and Div tags in HTML, then move CSS style sheet commands to an external/central file
- Take a current working page with similar layout, and modify to accommodate your graphic design
A. CSS Manual Page Set-up From Scratch
The following steps can be seen reviewing similar steps in the following play list of videos called CSS Layout ![]() . Although these steps take longer than the other two possibilities, the process is easier to understand as you are building your web page step by step.
. Although these steps take longer than the other two possibilities, the process is easier to understand as you are building your web page step by step.
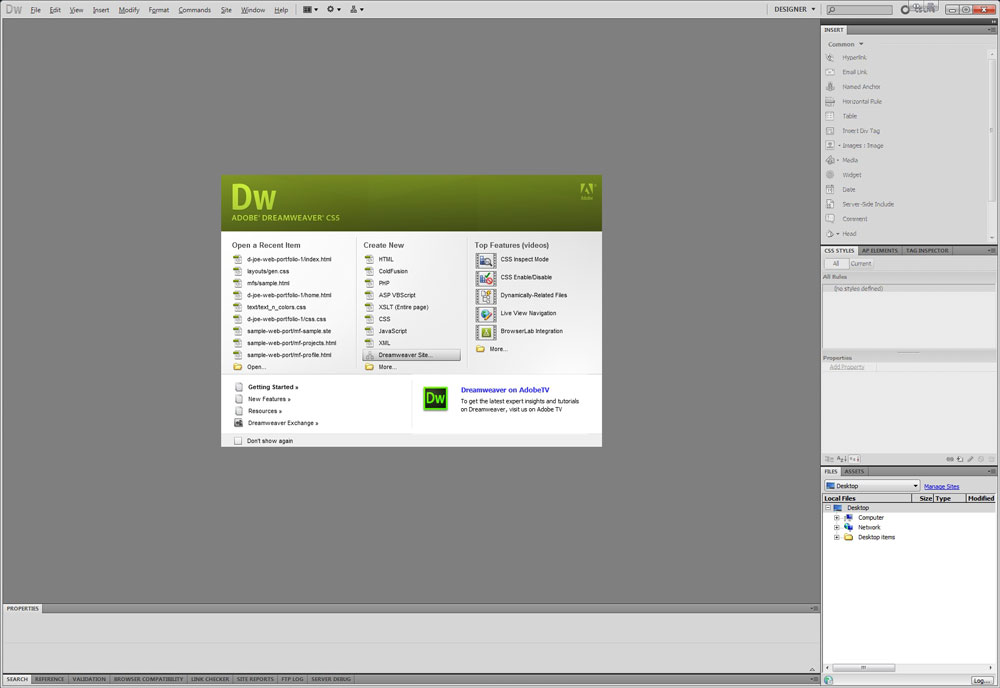
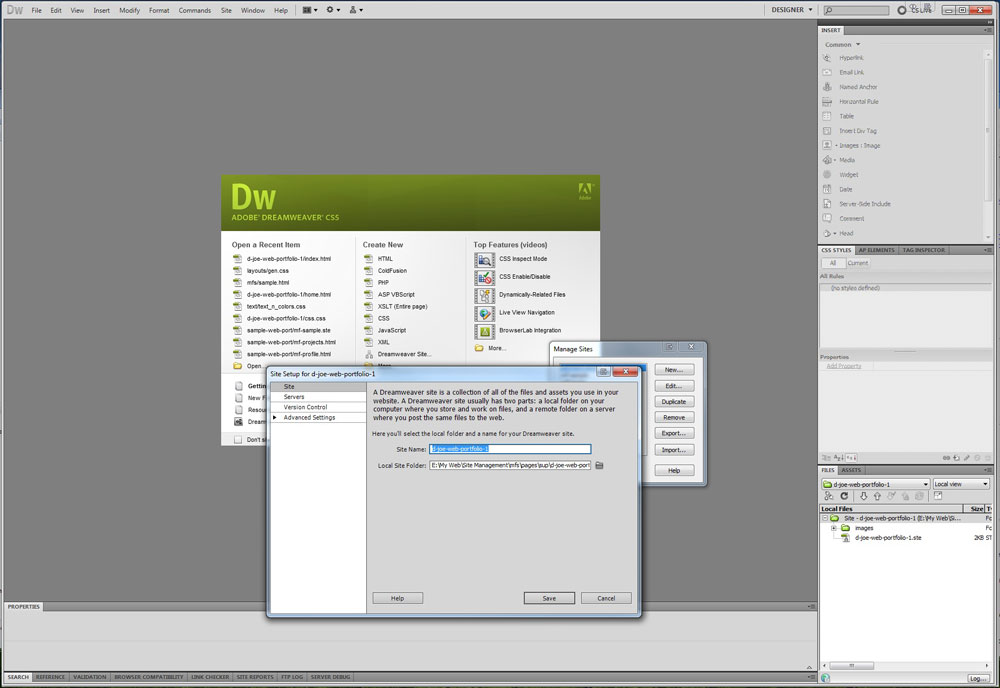
- Create new Dreamweaver Site, select new, then fill in your site name, ex: d-joe-web-portfolio and second box select root directory of your site for location and in advanced settings select your image folder
- Click on Done to create web project STE file, export (back-up) to your root web directory
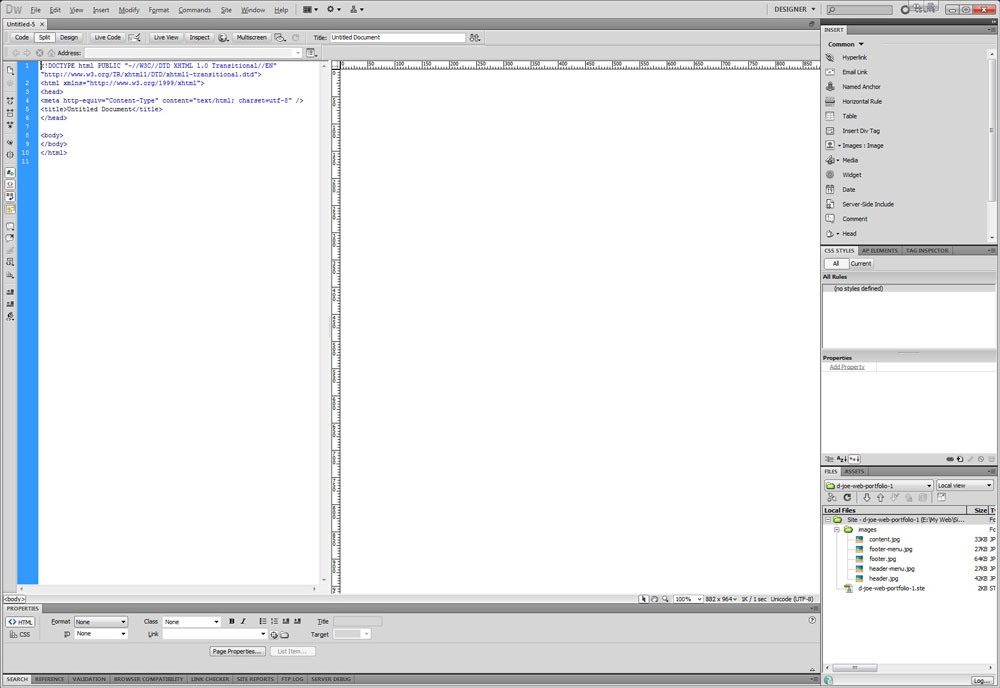
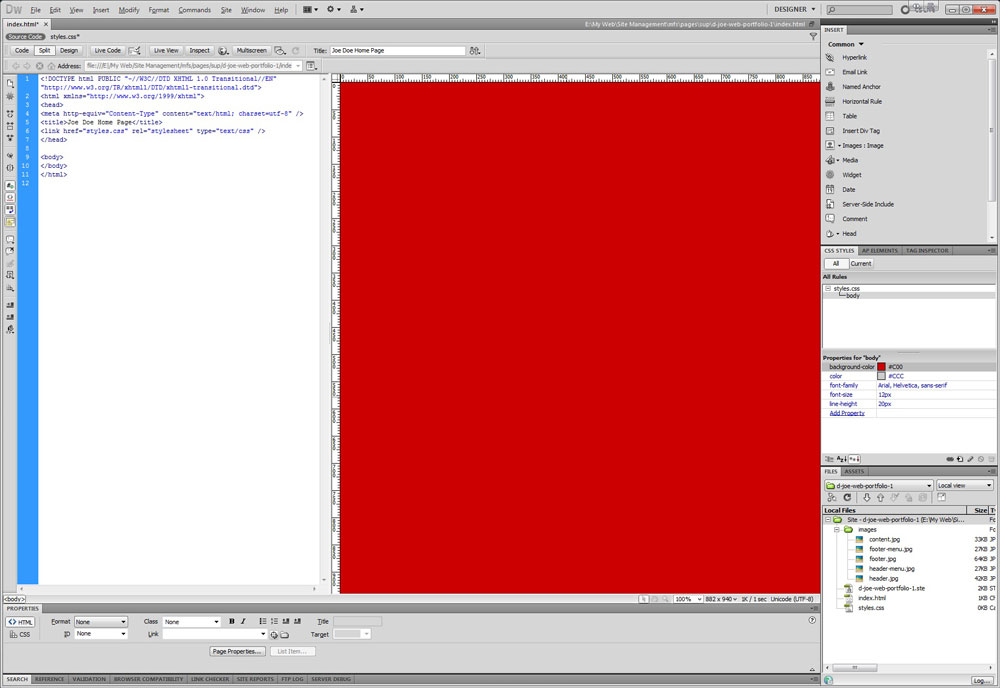
- Page Layout, in title code, enter in 'portfolio home' (This will be your home page),
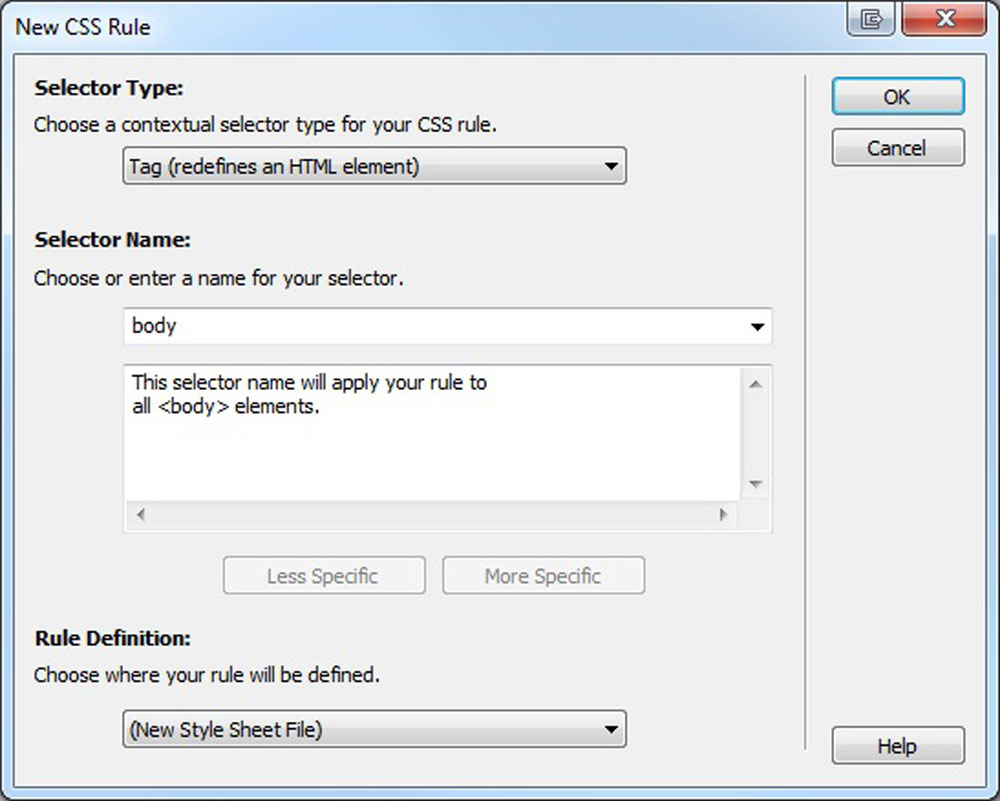
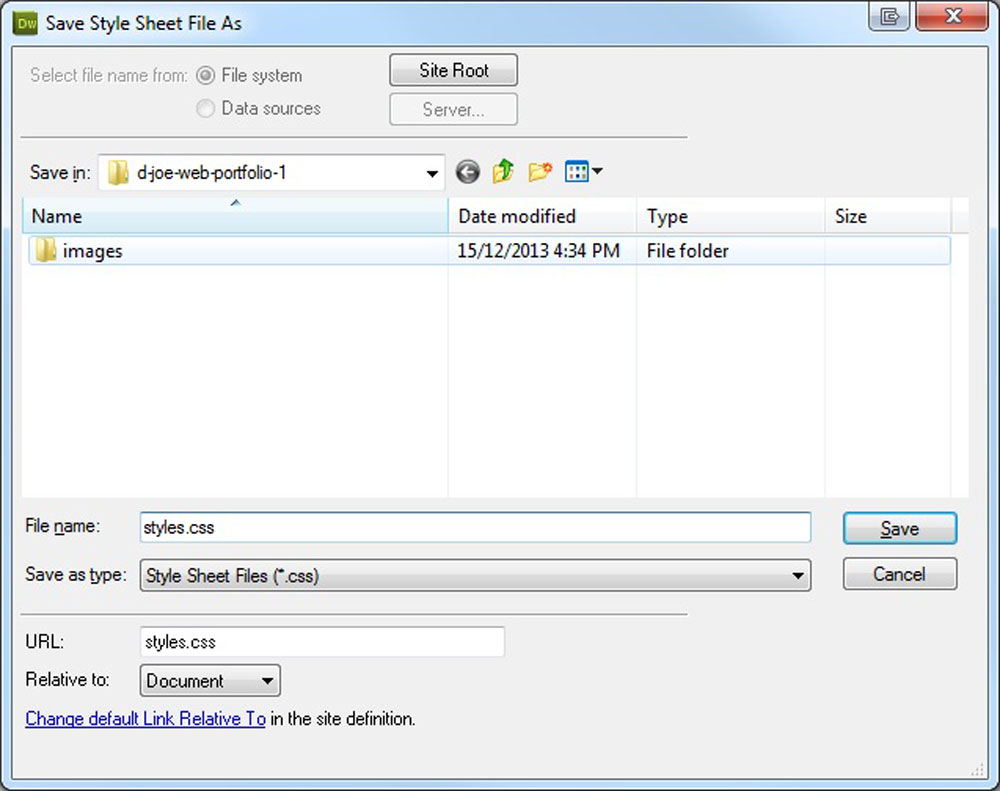
- New Style Sheet - Expand css pallet, click on new css rule icon, in dialog box select tag option and select new rule sheet, OK, then in new dialog window create a styles.css file name and save to root directory
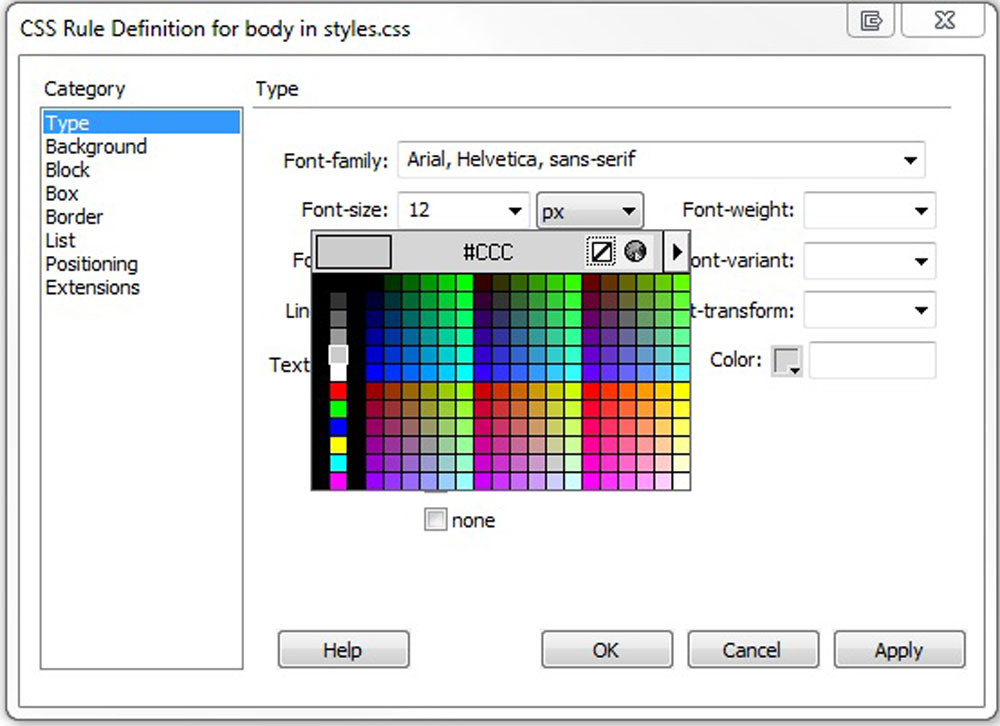
- Web Page General - In the next dialog window, you need to pick your font-Ariel, size-12, line height-20, colour-(colour of your text), background colour(behind your page matching colour), OK
- Should see new css properties, save all file tabs - do this by right clicking on one tab and select "Save All" to save all work
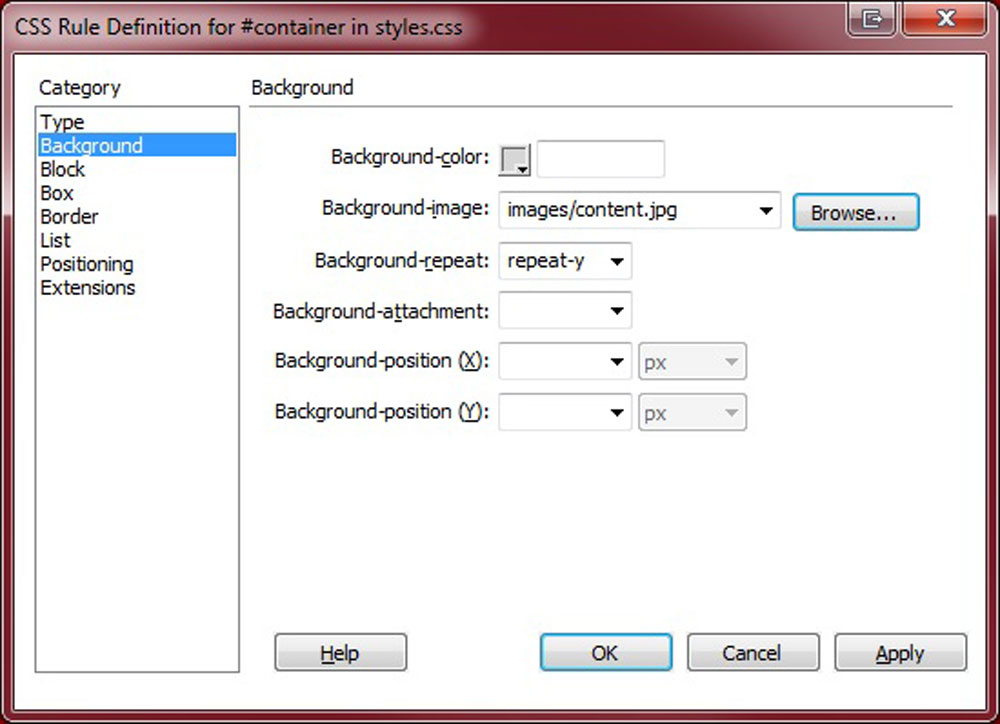
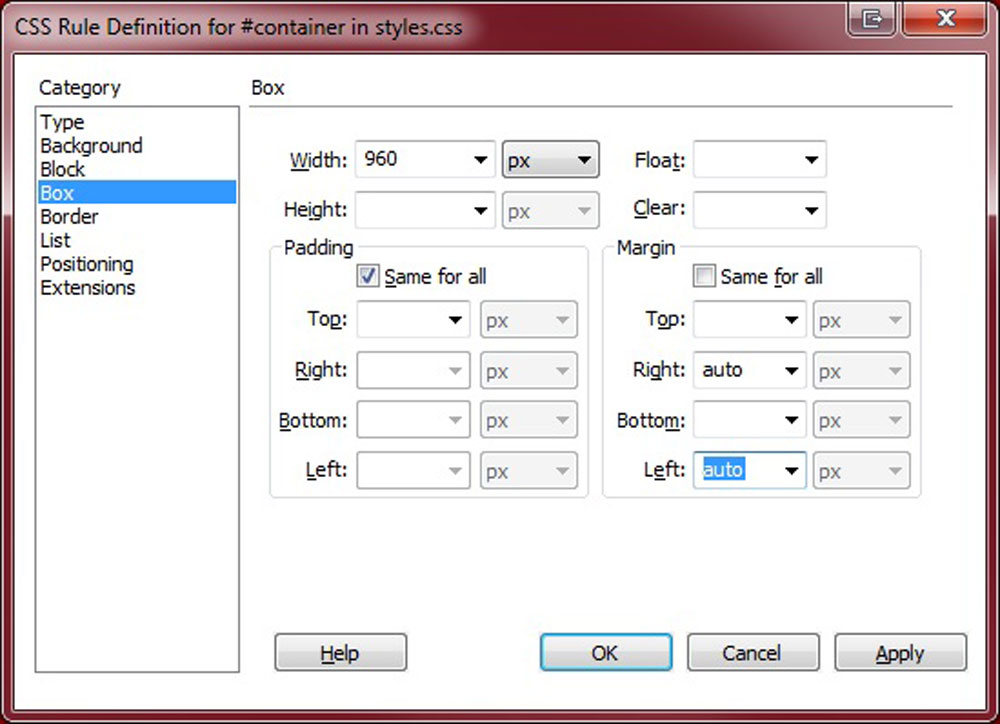
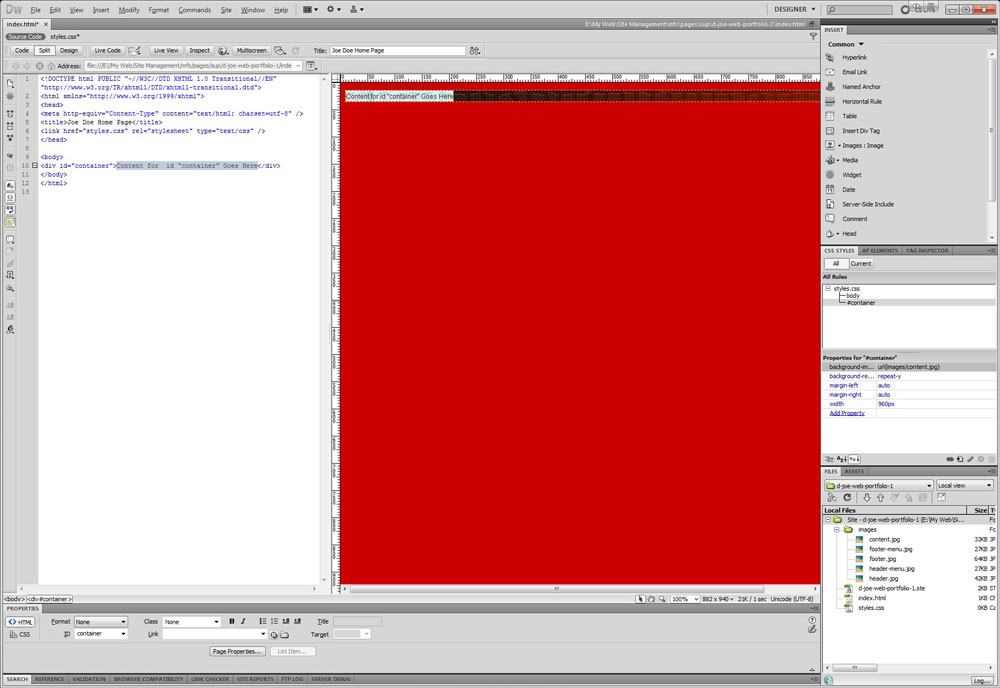
- Container (holds all the CSS entities together), select new css rule icon, select id type css rule, type container in name, OK, new dialog comes up, in background image, browse and find your centre content image, in the Box Category, add a width of 960, select repeat -y, and set your margin by un-checking save for all, and put auto for right and left margins to centre your web page in browser window
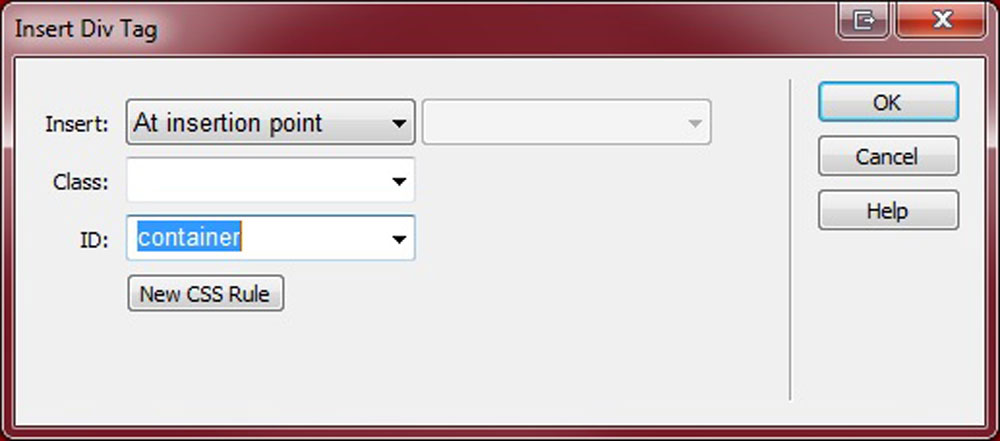
- To apply this css rule we need to insert it into the HTML code using Insert Div Tag icon or menu command under Insert>Layout Objects, leave --Add Insertion Point--, select ID, and OK, your content will show up on the design page, and save all your files
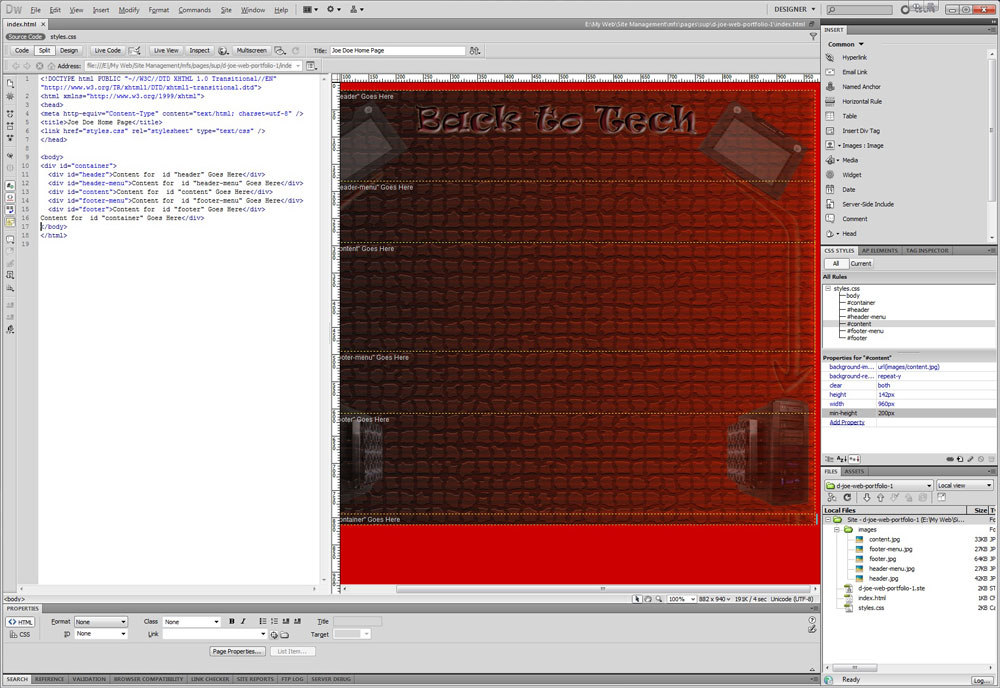
- For your header graphic area, select new css rule icon, select id type css rule, type header in name, OK, then a new dialog comes up, in background image, browse and find your header image, in Background Repeat, select no repeat in Box Category, width 960, and the height of your header, then select Clear Both, OK
- To apply this css rule we need to insert the Insert Div Tag within the inside of the container by selecting --After Start of tag--, in the adjacent box select the div id container, then select the ID header, OK, and save all your files
- For your header-menu graphic area:, (same steps as above with some minor changes) select new css rule icon, select id type css rule, type header-menu in name, OK, new dialog in background image by using browse and find your header-menu image, in Box Category, width 960, the height of your header-menu, then select Clear Both, OK
- To apply this css rule we need to insert the Insert Div Tag within the inside of the container by selecting --After tag--, in the adjacent box select the div id container, then select the ID header, OK, and save all your files
- For your content graphic area: again same as above, but in the css code, you need to include repeat -y and not include the height along with the content image name. Once done, you will also need to add a min-height property by selecting the add property link in the css pallet and select if from the drop-down menu, and save all your files
- For your footer-menu graphic: same as header-menu with the exception of image file names, once done save all your files
- For your footer graphic: is also the same steps, just different image names, once done save all your files and you are done your page layout.
Here are some visual samples to follow along with the steps:
Step 1
Step 2
Step 3
Step 4
Step 5
Step 6
Step 7
Step 8
Here are some visual samples to follow along with the steps:

Step 9
Step 10
Step 11
Step 12
Step 13
Step 14
Step 15
Step 16
Here are some visual samples to follow along with the steps:
Step 17
Step 18
Step 19
Step 21
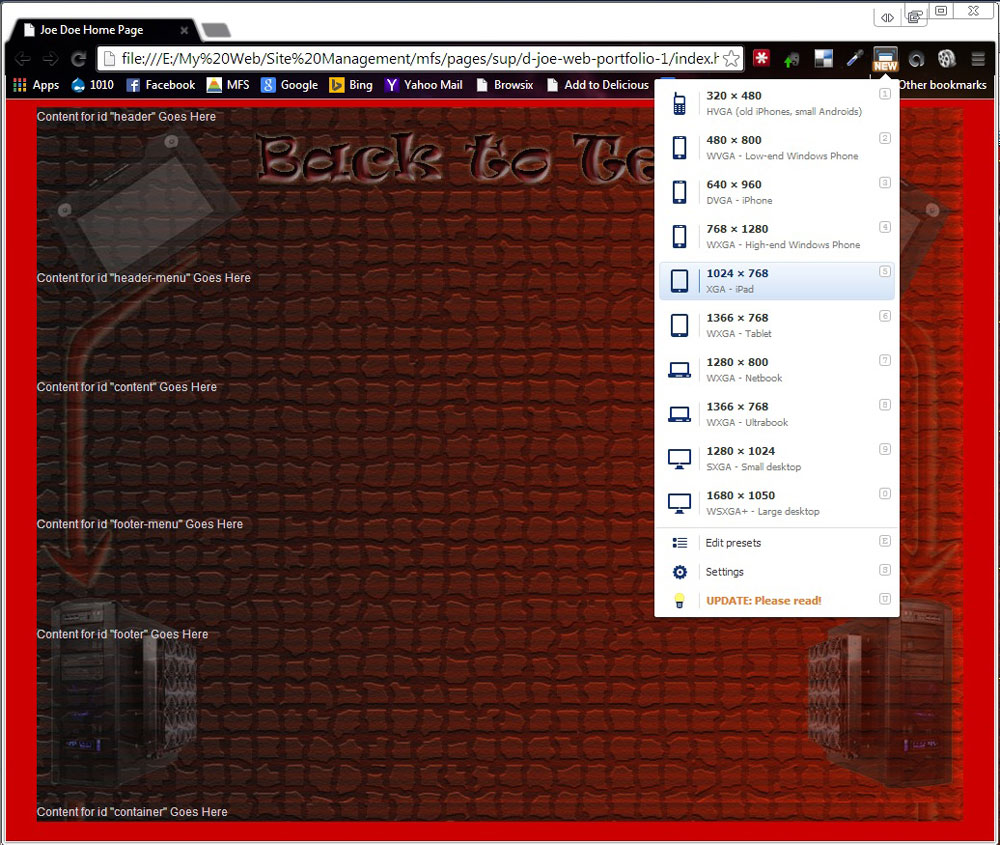
The above steps will work with any graphic and result in a complete web page with an expandable vertical body .
B. Photoshop CSS Div Tags Export
This process is pretty quick, but does not give you an external CSS file. Having an external file, and centrally controlling all of your pages from one location is far more advantages then having to make changes to each of your separate pages in terms of colours and the way the page is presented. For this reason it would make sense to take the time to create a separate/external CSS file and move the in-line CSS to it, and put a link at the beginning of your HTML directing it to the external CSS page.
CSS XHTML

CSS Slices
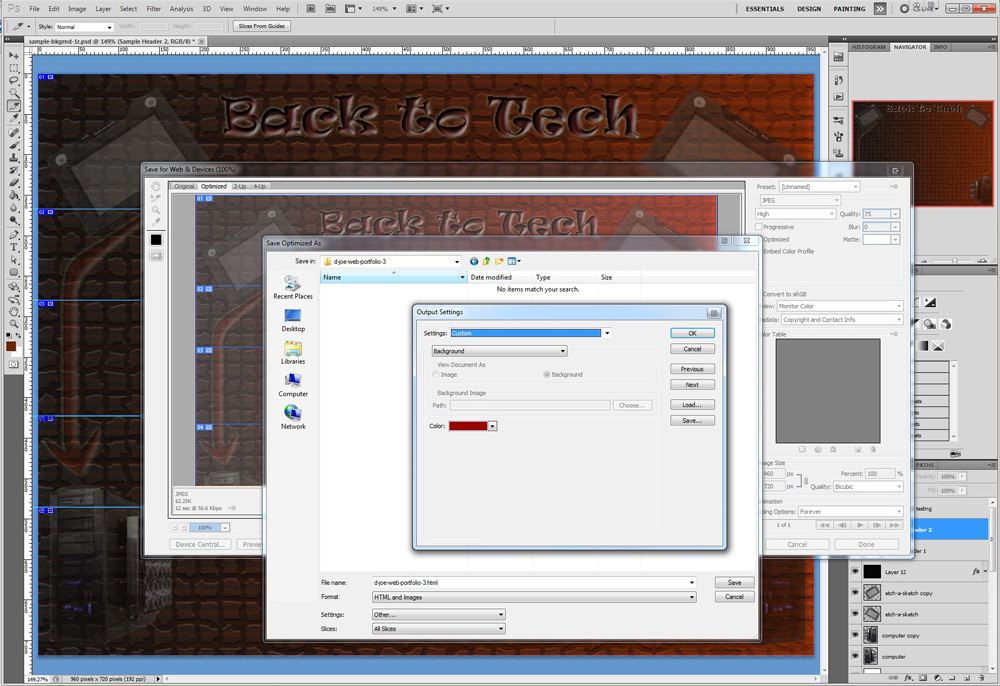
CSS Background

CSS File Name
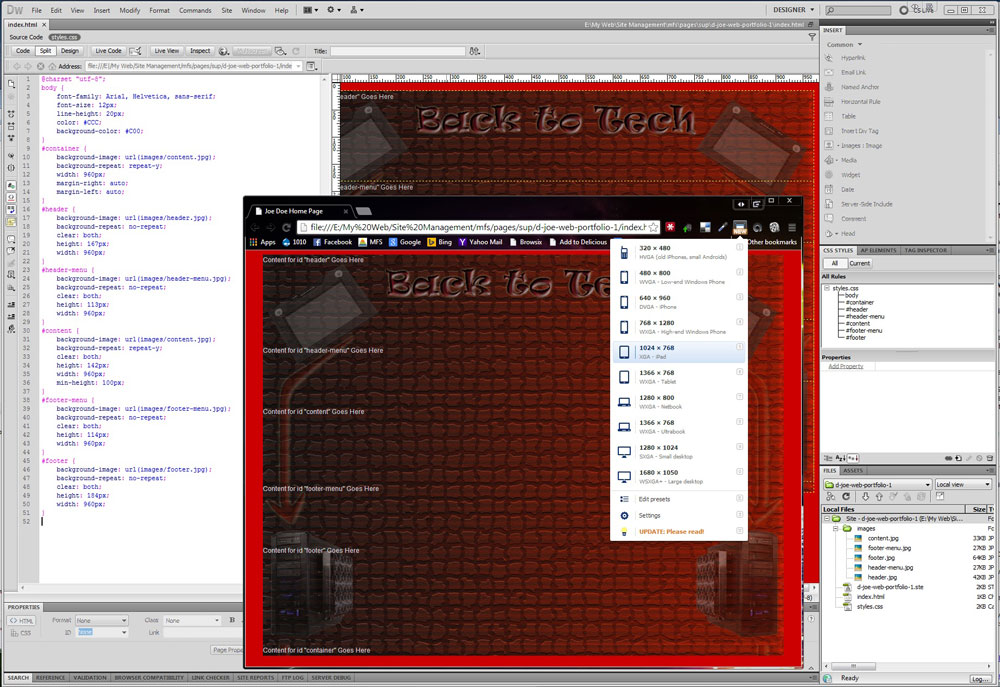
Once you have exported your graphics out using the above settings, you will end up with a web page that has the CSS coding in the same HTML page. You can then create an external CSS file, then copy the background images of your web design to each of the CSS ID rules in the external CSS file. The external file should end up looking somethng like this.

C. Web Portfolio Sample
Looking at a finished sample web page, you can see the navigation, text, and pictures and how they can fit together. This has the full HTML and CSS coding you need to complete the rest of your page. You can download the whole sample portfolio and then using Dreamweaver import the site STE file, then update it to the new location you saved the sample site to, and then you can use Dreamweaver to edit the sample portfolio to form your portfolio page. Modifying will be quicker, but you do need to understand what you need to modify in the CSS file, so that your layout fits properly.
To make your own navigation step by step, or to see how it is done check out this online tutorial.
As for the content, in the CSS code, you will find picture-float code to allow for placing pictures to the right and left of your page. Text formatting and a preset 5 column gallery grid to help present pictures and information on your portfolio. For the gallery, the pictures must be sized into two sizes, 138 by 138 pixels for the thumbnail and 1000 by a reasonable height for maximum width at 72 dpi to fit on a common screen size of 1024 by 768 standard. This will allow the whole gallery to load the small 138 by 138 pixel thumbnails quickly, and if the person viewing wants to see a specific picture up close, they just click on it.
In-class live tutorials with Dreamweaver will show you how easy it is to:
- create text hyper link to another site or file
- create a picture hyper link to a larger image
- how to work with design and code view
- modify colours in the CSS file
- modify settings in the css file to suit what you want
- how to modify and or add more HTML code
![]() It is really important to copy all your pictures into your image folder that is in the root directory of your web page folder, so that when you move your web portfolio folder the pictures in the image folder move with it and your picture links will work properly.
It is really important to copy all your pictures into your image folder that is in the root directory of your web page folder, so that when you move your web portfolio folder the pictures in the image folder move with it and your picture links will work properly.
Specific Resource Links

These links are directly linked to what we are doing for our basic web portfolio design
- Tabless Web Design with DIV Tags and CSS in Dreamweaver

- CSS Tabbed Menu
- How to Create a Thumbnail that When Clicked Opens a Larger Version of the Picture in Dreamweaver
- Online Live Grid Designer (for making your picture gallery)
- Floatutorial
General Resource Links
- 15 (Mostly) CSS Code Generators to Make Your Life Easier
- Beautiful Portfolio Website Design examples
- My (Simple) Workflow To Design And Develop A Portfolio Website
- 10 Steps To The Perfect Portfolio Website
- 6 Steps To Creating A Knockout Online Portfolio
- 25 Photoshop Tutorials for Designing Portfolio Sites
- Making your own portfolio web page
- Important Factors To Consider When Building A Website
Create/Construct:
Use the resources above to complete the major steps below:

- Finalize image in Photoshop, then cut out sections for export to images folder
- Open Dreamweaver and create a STE site file
- Two options, either follow the steps using Dreamweaver to create your layout or use the sample web portfolio and modify the code to suit your image design
- Starting from scratch using Dreamweaver:
- Start on page layout using CSS and HTML to place graphic sections cut out earlier in Photoshop
- Set-up background, css container, header, header-menu, content, footer-menu, and footer
- Create your top nav bar following sample tutorial above, then duplicate code for the footer-menu
- Once you are sure your nav buttons are done, have the right colours, rollover, text , duplicate the 5 pages using ctrl D in the Files pallet, and finish off nav links by turning the onlink on for each of the owned pages.
- Copy code from the sample portfolio, or the above supplied links with all the code, and paste into your pages for ready to fill presentation material
- Modifying sample web portfolio using Dreamweaver:
- Remember this method is faster, but learning web page build process is limited and may find difficulty modifying for this lack of process
- Download sample zip file, extract, then using Dreamweaver import STE site file and update it with new location
- Open CSS file and modify image cut sizes to match your image cuts in Photoshop - need to know your image sizes 960 by ???
- Update colours for background and text for body, nav bar, links, boarders, etc
- Gallery fill: For your gallery, you will need to create 2 sizes of images for each image you are going to show. Make one 138 by 138 pixels, and the full size one 1000 pixels wide maximum by about 700 pixels high at 72 dpi . This can be done prior to page being created. Name your images short but descriptive with a -s for small, -l for large at the end of the file name. Remember no capitols, spaces, keep file name short and simple using only alphanumeric characters.
- Fill in content with related pictures and text information
Evaluation:
Ensure you hand your work into the appropriate hand-in folder with your .

| Photoshop Web Page Background Design | Marks |
|---|---|
| Always double check that you have completed all components for full marks. | |
| Portfolio Build - navigation links working to all pages, contrast, colour, sizing, design | 60 |
| Portfolio Content - computers, safety, coma tech, and food related topics | 50 |
| Moodle Quiz - Based on term semester work, log-in here, help with quiz access/process | 40 |
| Total Marks | 150 |