Unit 1: Grade 09 Exploring Technologies - Careers and Safety
Welcome to the Exploring Technologies course. This course enables students to further explore and develop technological knowledge and skills introduced in the elementary science, technology, and Design programs. Students will be given the opportunity to develop solutions to various design challenges, fabrication of models or prototypes of those solutions, create products and/or provide services related to the various technological areas or industries, working with a variety of tools, equipment, and software commonly used in industry. Students will develop an awareness of environmental and societal issues, and will begin to explore secondary and postsecondary education and training pathways leading to careers in technology-related fields. Focus will be on project-driven, hands-on, supporting future related technology courses here at Western. The course will be 18 weeks in duration with your final mark made up of a 70% term and 30% culminating mark.
Course Units and Descriptions
| Unit | Description |
|---|---|
| Review course outline for more details | |
| 1 | Careers & Safety- Intro, computers, organization, safety, and careers |
| 2 | Design Process - SPICE- Faulty towers, logo design, and project box |
| 3 | Materials, Machines, Tools, & Process- Acubend, key ring holder, key ring accessory |
| 4 | Project Research, Design, & Build- Bridge/tower, mag-lev, co2 dragster |
| 5 | Web Portfolio- Showcase course work, projects, and understanding with web portfolio and presentation |
Unit Activity Breakdown Format
You will notice each unit activity below is broken down into five subtopics using ![]() SPICE, to guide and help you through the project and assignments related to the unit activity:
SPICE, to guide and help you through the project and assignments related to the unit activity:
- Situation - This is the introduction, big picture, or you can think of it as the setting of story/novel
- Problem/Challenge - What must be resolved or completed, i.e. what you will need to accomplish
- Investigation/Ideas - includes gathering ideas, research and organizing information to help create, construct, and/or complete the Problem/Challenge
- Create/Construct - take your best idea and complete and/or build the needed solution
- Evaluation - did the Problem/Challenge above get resolved and/or completed
This unit will introduce you to the course, class routines, safety, expectations, organization, and related careers.

Unit Content Activity Quick Links, Click to Jump to Specific Activity!
- Unit 1, Act. 1: Introduction, Computers, Organization, and General Safety
- Unit 1, Act. 2: Technology Career Pathways
 Unit 1, Act. 1: Introduction, Computers, Organization, and General Safety
Situation:
Students are starting a new course in Exploring Technologies and will be introduced to the course, practice some organization and file saving, introduced to the computer lab, computers and software use, and look at some general safety concerns.
Problem/Challenge:
Getting familiar with what the course is all about, class routines, expectations of the course and the teacher, general administration of class, appropriate use of computers, software, file saving standards and organization, and general safety are all important issues to know and understand to get the most out of this course. This activity will allow students the opportunity to organize and prepare for course work, understand expectations, evaluation, marks, routine, and student responsibilities for optimal leaning and allow classes to run smoothly.

Investigation/Ideas:
The following is list of items that are to be reviewed by students to understand what is going on in this course:
- Course Details
- General Safety
- Detailed Safety Issues
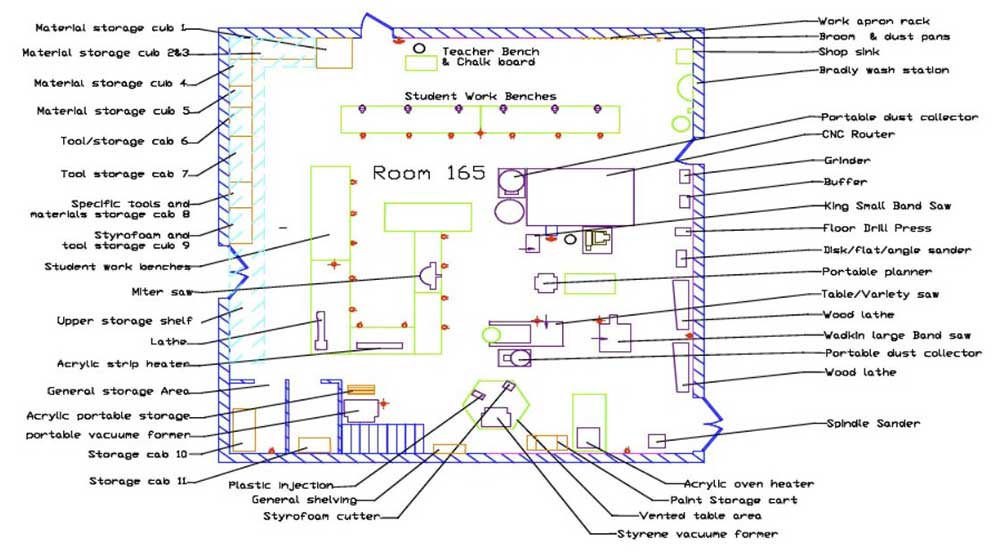
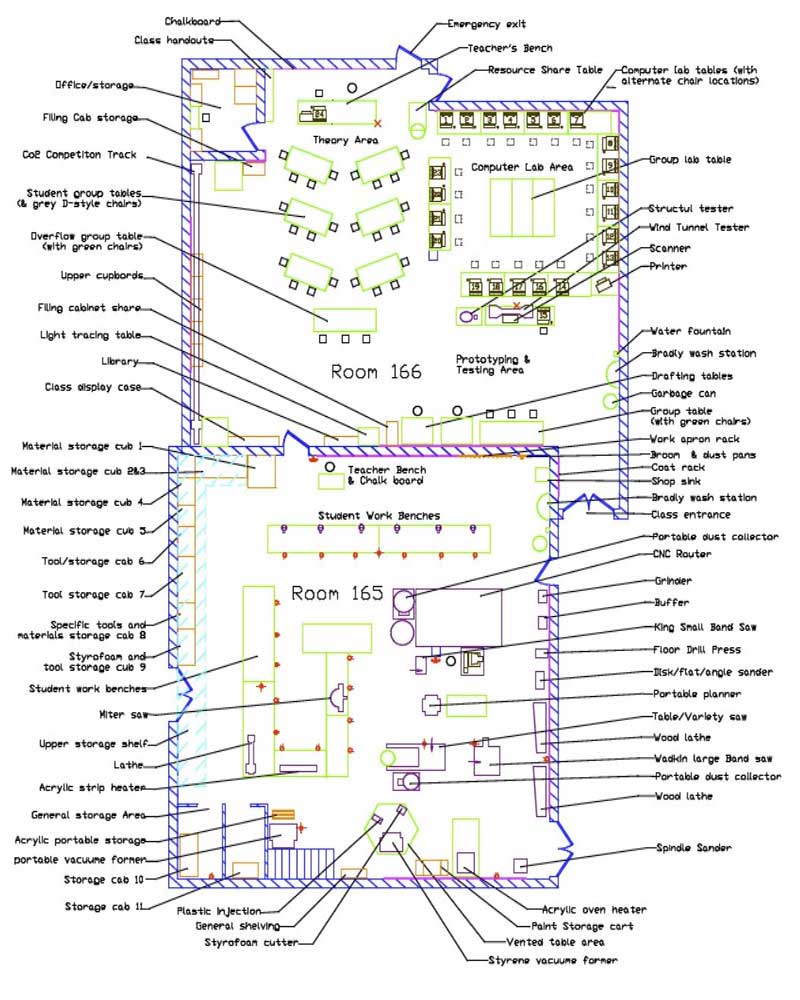
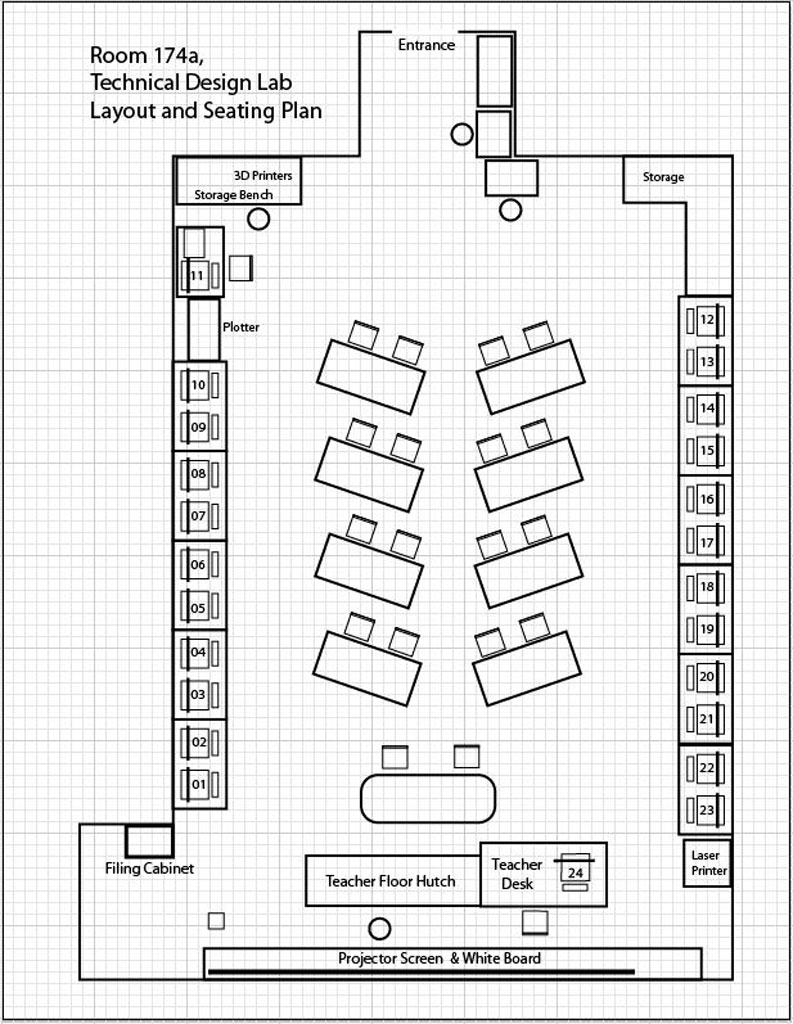
- Shop/room Layout
- Room Resources
- Emergency Procedures
- Expectations
- Assessment & Evaluation
- Class Policies
- Routines
- Journals
- Attendance & Lates
It is important that students feel comfortable with the above points and should know what is happening in the course.
Create/Construct:

Introduction
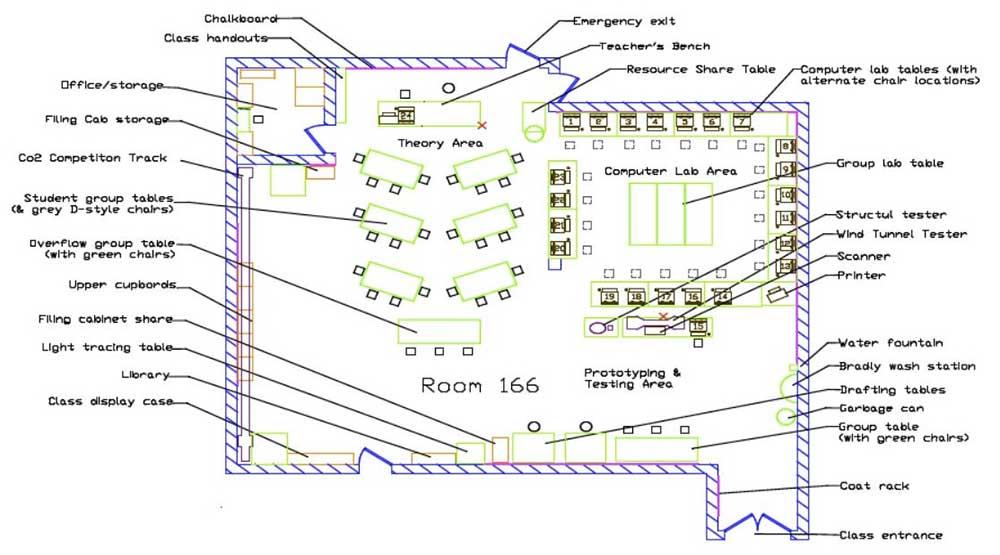
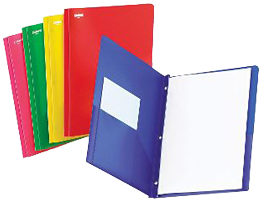
Start by organizing your supplies and materials for taking and storing your notes and assignments in a binder. A duo-tang will be provided for your in-class journals and safety related paper work and stored in the classroom filing cabinet share. Review the course outline and class routines and write down any questions you have about the course, requirements, expectations, or responsibilities you need to be clear on. Timetable and school policies will also be reviewed using your agenda as a guide. A room and school tour will be conducted to familiarize students with our facilities. Students will fill out room map layouts to familiarize themselves with the room and resources.
A ![]() Survey - Getting to know you will be handed out for students to fill out in-class so that the instructor can get to know you and allow you to write down any important information that you feel the instructor should know about such as extra support, health, social, and/or interests you may want to pass on..
Survey - Getting to know you will be handed out for students to fill out in-class so that the instructor can get to know you and allow you to write down any important information that you feel the instructor should know about such as extra support, health, social, and/or interests you may want to pass on..
The following is a list of related support document links for students, which will be reviewed in class:
 Exploring Technologies course outline
- Course Achievement Breakdown
- Learning skills work habits
- Evaluation and Tips Breakdown
- Foreperson Responsibilities
- Peer Evaluation Process
Work Redo?
If work is done poorly resulting in less than 50% of a mark, students may have an opportunity to redo. Before submitting a second time:
- use teachers feedback as a checklist here and show/report back what is done, fixed, and/or updated,
- double check the instructions,
- share with a peer mentor that has already done well, to get a peer comment with feedback on your work
This process should result in a close to if not perfect assignment to hand in. If you still need further support, go see the teacher in the morning prior to classes, for extra help.
Tech Info Page
One of the first things in class we do is review the ![]() Introduction to Technical Classes, point number three above which gives you a great overview of the course operation. The top section of the page has ten blank boxes to be filled in with the important things we will cover in this course. You will find this information by reviewing the course outline and listening to the teacher discussing what is happening in the course. The bottom section will also need to be filled out with two in-class peer partners for contact information and support with-in the class to help foster team support. collaboration, and responsibility.
Introduction to Technical Classes, point number three above which gives you a great overview of the course operation. The top section of the page has ten blank boxes to be filled in with the important things we will cover in this course. You will find this information by reviewing the course outline and listening to the teacher discussing what is happening in the course. The bottom section will also need to be filled out with two in-class peer partners for contact information and support with-in the class to help foster team support. collaboration, and responsibility.
Important Information, Routine Details, and Support
To help everyone understand daily routines, expectations, student responsibilities there are some steps that you must be aware of, that we will discuss in detail such as:

Paper Hand-in Bin
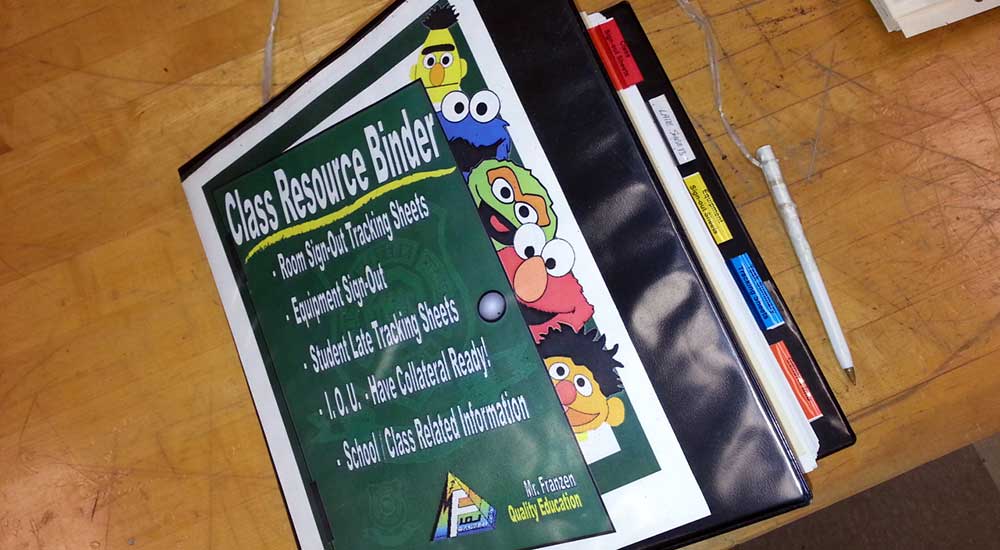
Resource Binder
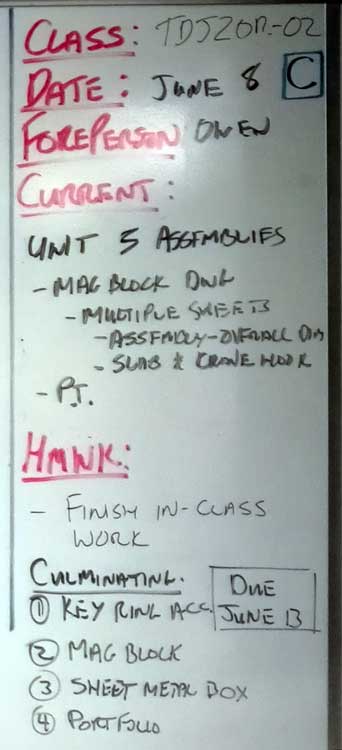
Current Events
- Class schedule day 1/2 (Wed - late start)
- School/room map layout (tour)
- Late arrival process and class entry
- Pre-project preparation
- End of period journals
- Paperwork hand-in bin
- Class share resource table
- Extra handouts & digital copies
- Daily current events board
- Supply teacher respect and learning
- Multi-room/supervision
- Due date - beginning of class
- Leaving the room - process (ex. - washroom)
- Class Sign-out resource binder
- Seating - support, proximity, and behavior
- Partners, groups, and leaders - collaboration
- Late/missed class lesson/work responsibilities
- Clean up process - yours and others
- Contact process - e-mail
- Extra support/help options
- Don't know, or not sure? ... ask!

Safety
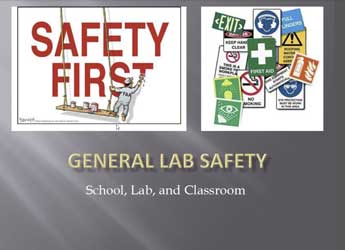
In this unit, we will review the ![]() General Safety Presentation to get an overview of safety concerns students should be aware of in the school and classroom. Students will review and sign a
General Safety Presentation to get an overview of safety concerns students should be aware of in the school and classroom. Students will review and sign a ![]() General Safety Contract then take home to parents to also review and sign. Safety awareness and lessons in this class will be on-going throughout the course, and specific to each project so that it is fresh in your minds when starting work on that specific project. To assist with this a
General Safety Contract then take home to parents to also review and sign. Safety awareness and lessons in this class will be on-going throughout the course, and specific to each project so that it is fresh in your minds when starting work on that specific project. To assist with this a ![]() Safety Passport Checklist is also handed out for an overview of specific safety concerns in the shop and classroom to organize and keep track of when and who has been successfully taught and has demonstrated safe use of that tool, equipment, and/or process.
Safety Passport Checklist is also handed out for an overview of specific safety concerns in the shop and classroom to organize and keep track of when and who has been successfully taught and has demonstrated safe use of that tool, equipment, and/or process.
Mini Safety Posters
Students will create two 4.25" wide by 3.75" high (inches) coloured safety posters advertising a unique and specific shop safety rule/concern. For sizing use 1" = 25.4 mm to convert to mm if using the rulers in class. They are to have large text representing 30% of space and the other 70% for the related image. The poster must be easily seen from a distance, so less detail and more of a simple design is the focus. Sketch lightly 6 different thumbnail ideas on a single blank sheet, then refine and darken your sketch with colour scheme ideas labeled, then narrow down to your best two, and actually colour those in to hand in as your rough. For your final posters, start by measuring and using a pencil to draw two square boxes (approximately 4") with the above exact sizing, then block in your text and and related image(s), their locations, and then colour in with some primary colours giving contrast and vibrancy so they can stand out, These 2 posters will be used as with a future project for part of the design and communications unit of the course, so make sure you hold on to them.
USB Memory, File Naming Conventions, Folders, Back-up, and Shortcuts

It is highly recommended that you get a USB memory stick, for saving your work on to. It does not have to be large, 2 Gig or larger (use your school drive temporarily if you do not have your USB flash drive). You will need to follow instructions on the Tech Info handout (PDF page printed and handed out recently, that can be found above) to create shortcuts inside a main folder named with your course code, and a sub-folder named "shortcuts". With an organized folder structure, you now have a place to save work to. You are to create the shortcuts below in your shortcuts sub-folder using similar suggested TIJ course codes for your own course code letters.
- Course Google Classwork (TDJ-GCW)
- Your course folder root directory (TDJ)
- Your back-up folder at Home (TDJ-BKH)
- Your back-up folder on the cloud (TDJ-BKC)
- Franzen website Home Page (mfranzen)
- Franzen website Course Details Page (TDJ-Det)
- Franzen website Course Journal Page (TDJ-C-Jou)
- Franzen website Course Marks Page (TDJ-Mrk)

Note Google Drive File Stream -G Drive (replacing H: Drive) should be avaliable when you sign in to TDSB computer with a Google sign-in window which will connect you to your G: Drive and place on your file browser as G: Drive letter. If you cancel or not sign-in, then just relaunch the Google Drive File Stream application from your start menu.
With all your shortcuts created and saved to your USB sub-folder-shortcuts, you can also copy these shortcuts to your desktop, so you can use them from multiple locations, but the desktop is not a safe place to save work from, as it could be deleted at any point in time.
To keep your electronic work for this course organized, you will need to create more folders for future projects as you continue with the course. The intent is to work off of your USB in school and save to your local or cloud drive when you are finished at the end of class either at home or at school, as a daily habitual back-up process. This way you can take your work with you and work elsewhere if needed and it is faster to access a flash drive then the board network or a cloud drive.
In school we also make use of and use the internal network for getting work and handing in work. These locations are found clicking on the Western Tech shortcut on your desktop on your school computer, then navigating to either selecting the "Pick-up" folder, for getting work from teacher or the "Drop-off" folder, for handing in work.
File Naming Conventions and Shortcut Demonstration
To finish you will need to use all three shortcut links in an exercise called "tij_d-joe_shortcuts-files-folders-v-txt" and copy and paste the correct shortcut addresses to demonstrate you have done this correctly. This is a good time to save the text file to your shortcuts folder (review file naming conventions in the Tech Info Handout and save it right away with the correct file name, then open it up, and update the correct course coded in 1 to 8 shortcut sample names.

- Type your header information which you are required to have, on all assignments when handing in,being aware that it is always in the top right of the page with you name having your just your last initial, first name name
- Update TIJ part of shorcut name to your course letters, then several shortcut target addresses will be needed from your recently created shortcuts by right clicking on shortcut to get to the properties, then copy the shortcut link address to paste into your project text file just underneath the related shortcut name/description
- You are also required to get the actual shortcut file location of the specified shortcut in the required folder locations you are keeping your files in. You can get the address location for the shortcut by right clicking on your web site shortcut link, click on properties, then the switch to the General tab to copy the location where you saved this shortcut link to, then add the actual shortcut file name and correct file extension (more here on File extensions). For Google drive, use the worded file location, not the link.
- Go to the Tech info page on the site and open up the PDF file and copy the section called "Organizing and saving your work" that explains about file naming conventions and paste below
- Check over your shortcuts assignment and ensure you have checked that your file naming convention is correct for this text file.
- Use your system snip screen capture tool to get a image of your desktop showing your class shortcuts on the right and your file browser on the left showing your main save location folder for this course, class topic subfolders, with shortcuts topic folder selected and showing all your created shortcuts, your shortcuts text file, and image file
- Convert your text file to a PDF by either putting your text file in a Google Doc along with your screenshot below, then download to a PDF,
or "printing" to a PDF, Adobe Acrobat Reader DC conversion tool, or using an online converter, then use online PDF Combine tool for both your text and image file to combine into one PDF file and then submitting
Evaluation:
Although these are not heavily weighted, they are important project assignments that will benefit you throughout the rest of this course. Here are some student samples to check out that show some teacher feedback and marks in ![]() PDF's; Safety Mini Poster Thumbnails, Safety Mini Poster Finals, Assorted Journal Daily Logs, Full semester of Daily Journals, plus end-of-semster Weekly Summary Journal, and Gothic lettering samples
PDF's; Safety Mini Poster Thumbnails, Safety Mini Poster Finals, Assorted Journal Daily Logs, Full semester of Daily Journals, plus end-of-semster Weekly Summary Journal, and Gothic lettering samples

| Evaluation Breakdown Component Descriptions | Marks |
|---|---|
| Always double check that you have completed all components for full marks. | |
| Survey - Answer all 8 questions fully | 16 |
| Course Outline Signed - Review, show parents, and get signed by parent | 5 |
| Tech Info - 10 course components, and two peer contacts | 14 |
| General Safety Contract - Read, agreed, and signed by both student & parent | 5 |
| Safety Passport Checklist - Student and parent signed and put in duo-tang | 5 |
| Shop Safety Posters - 6 thumbnails, 2 sized with 30/70 ratio of text/graphics, and colourful | 30 |
| Room Layouts - Label all parts of the classroom and shop areas | 20 |
| Shortcut Test - 3 shortcuts done, folders, file named correctly | 30 |

Conclusion
If you feel comfortable that you know all the details of the class/course details, you are ready to move on to the next activity. Be prepared if a quiz is given on the key elements of each of the sections. At this point you should be ready for the rest of the semester for use with computers, keeping organized with binder and digital files, routines, daily journals, and general safety. If you are still having trouble with specific things, PLEASE ASK!
Unit 1, Act. 2: Technology Career Pathways

Situation:

A class of Grade 9s needs to make an informed choice as to which technical subjects they wish to select for the next year to allow them to explore related subject/career areas. As the subjects taught at Western are not very well known to students, they do know what their educational strengths, skills and future interests are. Some form of information must be created, in order to make an informed decision about their future.
Problem/Challenge:
The challenge is to create an eye-catching, informative, Google Slide presentation, based on one career related technical subject pathway. The presentation is to inform and market your selected career and related school pathway using slide titles, key points, pictures, illustrations, charts, diagrams, etc. done over two to three weeks with check points to include:
- Main Title Slide
- Contents/Overview
- Description and Responsibilities
- Post Secondary Schooling
- Salary/Wage Levels
- Grade 10 Course Outline
- Related Grade 10 Course Information
- Course Flow Chart
- Current, Future Preparation, and Options
- Future Outlook and Demand
- Summary and Conclusion
- Source/References
Investigation/Ideas:

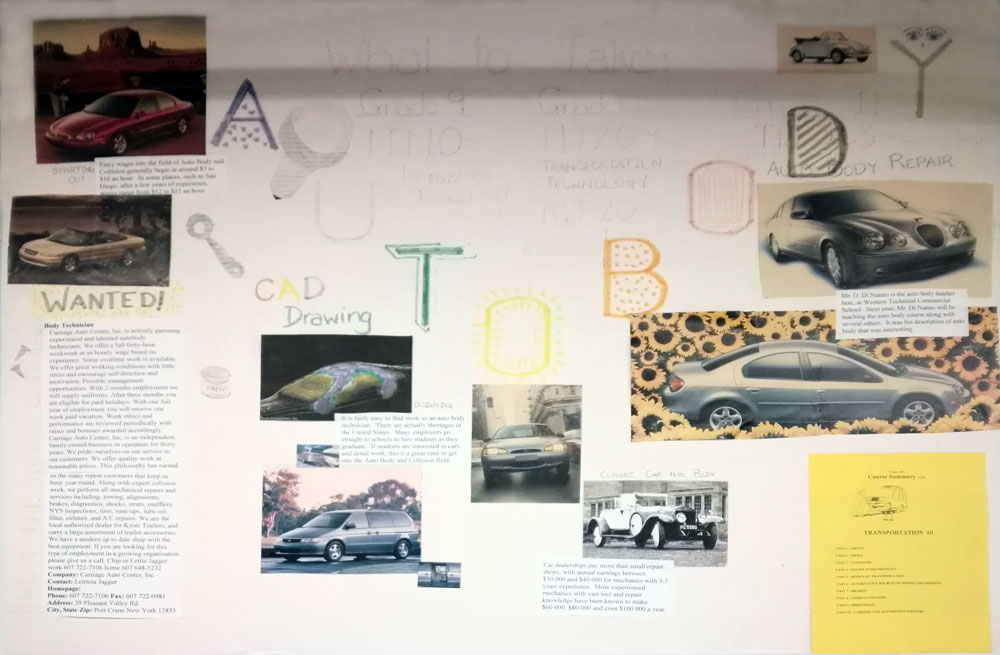
Sample Technology Career Display Poster

General
There are several areas that you may get resources from. Some of these could include the subject teacher, Guidance, Library, Co-op, school agenda, people in that career, parents, current related magazines, and newspapers, school course list, and the Internet.
Using the Internet may be one of your main resources, so remember to keep the resource links you use for later reporting. It is always important to use information from different sources for the same topic you are researching to ensure you get correct and accurate information that you can use to explain in your own words.
Helpful Tips

- Keep topics on focused using major points about researched area
- Use school resources - Guidance, Library, teachers, students, Co-op, online info, etc.
- Use a consistent contrasting text colour, size, font, format and theme that is easy to read
- Use a mimium of 2-3 sources with local up-to-date information
- Review good presentations for ideas and samples
- Know your topic and information for presentation with clear loud voice
- Keep your rough work (put in speaker notes in slides) and resource links as you research key areas
- Images should be of excellent quality, closely related to topic slides, limiting cliparat
- Size images 40 to 50% of slide, rest being text and white space
- Slide talking detail points is not your rough notes, but generated from your rough notes
- Rehearse you talking points for about 20 seconds a slide
- Work with partner(s) to share ideas, exchange view points, and opinions on information and presentation

Resource links
- WTCS -Tech courses
- Job Bank GC
- Salary Data
- Find a college program
- Search job profiles
- Hot jobs in technology
- Tech jobs boom
- Canada Jobs
- Career trends
 Reserch Tips, 3.04
- Google Search Tips, 6.42
- PPT Design, 4.04
- Effective Slides, 4.00
 Effective PPT's, 16s
- Effective PPT's, 55s
- Great Examples of PPT
- More PPT examples
- Use Your Voice, 2.28
Choosing the Right Career
- The Reality of Career Exploration, 3.38
- Discover Your College and Career Pathway, 1.51
- How to Choose the Right Career Path in 7 Simple Steps, 4.05
- How to Build an Effective Career Plan, 4.52
Create/Construct:

Time line
First day sign-up for your subject area to fill the first column, then the second column with a previous selection can be done. Time line is approximate and may change but generally is as follows:
- One day for sign-up and copy required su topics to G doc (steps 1-3)
- Three - four days for research in your rough doc - info, and links (step 4)
- Two days for presentation sketched layout (step 5)
- Two days for presentation template - themed consistent general layout (step 6)
- Two days for presentation (stes 7-11)
- Two days for talking points (step 12)
Order of presenting your career with class will be a random draw, with the option to volunteer for the first three presentations for extra marks.
Steps To Take

A printable handout will outline the activity and give you an idea on mark breakdown. You will see that focus on this project will be on process and final presentation. To earn the most marks, follow the steps, follow the time line, to complete work on time. The following steps are for your benefit and a good process to practice when completing a research project like this:
The process to creating your presentation (about 12 slides & steps) is as follows:
- Overview, SPICE, Select your subject area and related career field (keeping in mind linking with WTCS grade 10 course offering)
- Find out which related grade 10 course, Western offers and start getting required information about that course
- Take the required research sub-topics (listed below under Presentation Slide Breakdown section) and paste into a Google doc, turn into headers for your rough document, create a page title, and header info to include career title, name, date, section
- Find information on each of your sub-topics just copied (required research in bulleted detailed points being specific, on target of sub-topic-i.e. no vague or general points) for marks and feedback
- Create presentation template layout theme (2 sketched rough layouts for 40-50% graphics, the rest text) - to show a practical and creative view for presenting your information with title, main contrasting colours, subject related icon, footer with career name, your name, date, and page number
- Create final Google slide template with your final selected desgin to include all above rough details
- Copy rough key points to your Google Slide speaker notes, refine, then transfer key focused points to slides and add related quality graphics (40-50% of each slide)
- Ensure each slide has sub titles and related images are included
- Create title page and contents overview slides
- Create summary/conclusion slide - highlights and opinion
- Finish resource page with links back to your sources of information
- Talking detail points (expanded slide points) to be put in separate Google Doc for your guide when discussing each slide and included top of speaker notes of each slide above rought notes, to assist with presentation)
Part 1: Selection and Rough Points
Part 2: Sketched Presentation Template Ideas
Part 3: Final Google Slide Template
Part 4: Final Presentation Content
Part 5: Speaking Points
As you complete the above parts, you will be submitting that work for marks and feedback to keep you on track with your career project. This way when it comes time to present, you are not rushing the whole project and on track for a great presentation. Taking the time to properly prepare for a presentation by managing the steps required to complete the presentation will allow you to complete your work on time, have great information/resources, and present more confidently.
Presentation Slide Breakdown

Once you have found all of your text content, you should be looking for practical quality related career and topic images, related charts, and/or illustrations that will support and further market your Career pathway from grade 9 Exploring Technologies all the way to your related career, so you can include in your presentation to enrich and create more depth to your information.
The following are the key slides that must be included in your presentation with more details on each subtopic:
- Main Title Slide
- Contents/Overview
- Description and Responsibilities
- Post Secondary Schooling - local schools, program information, and application
- Salary/Wage Levels - entry, mid level, senior level positions, company, and location
- Grade 10 Course Outline - 1st 1/2 of page showing strands/themes
- Related Grade 10 Course Information - course code, learning, projects, and instructor(s)
- Course Flow Chart - showing course pathway for high school to prepare for that career
- Current, Future Preparation, and Options - what you can do yourself now
- Future Outlook and Demand - 3, 5, & 10 years into future, stats on growth rate, and comparisons
- Summary and Conclusion - 2 highlights and 2 critical opinions
- Source/References - web links, book citations, people, etc.
For specific requirements in each of the components above, review the Problem/Challenge section above and Steps to Take above.
Evaluation:

Follow the steps and time line to earn the most marks, as this project is not just assessed on the finished presentation slides and presenting to class, but also the steps to complete this project. To understand more about the mark breakdown sections, refer to the ![]() SPICE process flow chart. Using time-line due dates, research project steps (components) will be marked at due dates for direct feedback support to keep students on track and prepared for completion and presentation. Here are some student
SPICE process flow chart. Using time-line due dates, research project steps (components) will be marked at due dates for direct feedback support to keep students on track and prepared for completion and presentation. Here are some student ![]() sample rough notes,
sample rough notes, ![]() sample templates, and
sample templates, and ![]() sample presentations.
sample presentations.

| Evaluation Breakdown in Handout as a guide, but individually marked components at time-lines above. | Marks |
|---|---|
| Always double check that you have completed all components for full marks. | |
| P1: Rough Report - Career, doc template, SPICE, Rough points | 65 |
| P2: Two Rough PPT - Page layout, sketched slide ideas | 15 |
| P3: G Slide - Final title and info slide | 15 |
| P4: Final PPT - All slides, notes refined, points, pics | 30 |
| P5: Talking Points - Separate G doc for talking points, also in slide | 24 |
| Evaluation Breakdown for Final Presentation | |
| F1: Content - Key topics all covered | 23 |
| F2: Layout - Organized, visual appealing, & easy to read | 15 |
| F3: Preentation - Content, communication, knowledge, & time | 20 |
Conclusion
Now that you have researched a career and seem many related ones, this may help you decide on where to go with your future. Knowing this information will empower you and make you more confident where you want to take your future and what you need to do, to get there!