Unit 1: Intro and Graphic Design/Production
This unit will introduce you to vector related projects using Illustrator CS4. Vector type applications use points, lines, and fills to create graphic solutions with the advantage of high resolution and small file sizes relative to raster/picture type applications/media.
Unit Content Activity Quick Links, Click to Jump to Specific Activity!
- Unit 1, Act. 1: Safety, Organization, and Course Information
- Unit 1, Act. 2: Design Your Dream House
- Unit 1, Act. 3: Onomatopoeia Brain Teaser
- Unit 1, Act. 4: Logo Design
 Unit 1, Act. 1: Safety, Organization, and Course Information
Situation:
Starting a new course here at school
Problem/Challenge:
Getting familiar with what the course is all about, class routines, expectations of the course and the teacher, general administration of class, and safety are all important issues to know and understand.
Investigation/Ideas:
The following is list related to this course and should be reviewed by students:
- Course Details
- General Safety
- Detailed Safety Issues
- Shop/room Layout
- Shop/room Resources
- Emergency Procedures
- Expectations
- Evaluation
- Class Policies
- Routines
- Attendance and Lates
It is important that students feel comfortable with the above points and should know what is happening in the course.
Create/Construct:
Start by creating a full page basic sketch of your dream house showing doors, windows, levels, landscape, driveway, background, etc. Try to add perspective to your house and with different settings.
The following list of links are details that students are to review, after going over them in class:
- Communications Technology- CyberArts Transfer Course Outline
- Introduction to Technical Classes
- General Safety Presentation
- General Safety Contract
- Course Achievement Breakdown
- Evaluation and Tips Breakdown
Evaluation:
If you feel comfortable that you know all the details of the class/course details, you are ready to move on to the next activity. Be prepared to be able to write a quiz on the above details.
Unit 1, Act. 2: Design Your Dream House
Situation:
Imagine you are a new illustrator assistant of a residential developer and the boss would like you to use your experience and creativity to draw him a dream house concept to be used as a design idea to help the architects. All he wants is a elevation perspective view from the front. This is the perfect opportunity to work with some of illustrator's tools to come up with an awesome design. For this reason you will have the opportunity to experiment and make what you think your dream house should look like.
Problem/Challenge:
The dream house you are to create must have the basic necessities such as a door, windows accompanied with landscape, sky, moon or sun, trees, bushes, driveway, etc. Remember to keep in mind Principles and Elements of design recently introduced.
Investigation/Ideas:
The following list of concepts and Illustrator tools should be used while completing this task such as:
- Sketching and Techniques
- Principles and Elements of Design
- Vector vs bit map drawing
- New file size: web profile 1024*768, guide set-up
- Shapes, pencil, pen, shape, brushes
- Paths, colour/strokes, layers, transparency, styles
- Stroke, fill, and gradients
- Special tools
Review the principles of design, which include major concepts such as; contrast, emphasis, balance, unity, pattern, movement, and rhythm. You will also want to keep in mind the elements of design which include; line, shape, form, colour, value, texture and space.
Here are some resource links you may use to assist you with your drawing/illustration:
- House Illustration Ideas
- Drawing Coach.com
- Learn How To Draw/Sketch
- Information on Latest Adobe Illustrator CS
- Tutorials Introducing Illustrator CS
- 40 Fundamental Illustrator Tutorials You Must Know
- List of Adobe Illustrator Information Resources
- Creating Vector Landscapes
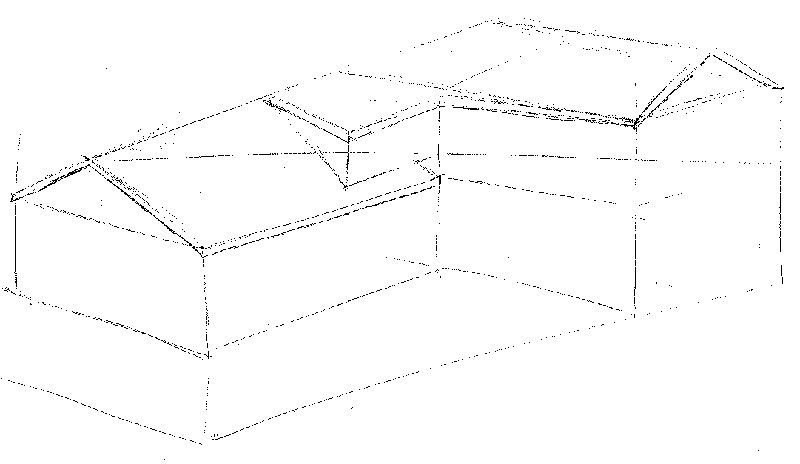
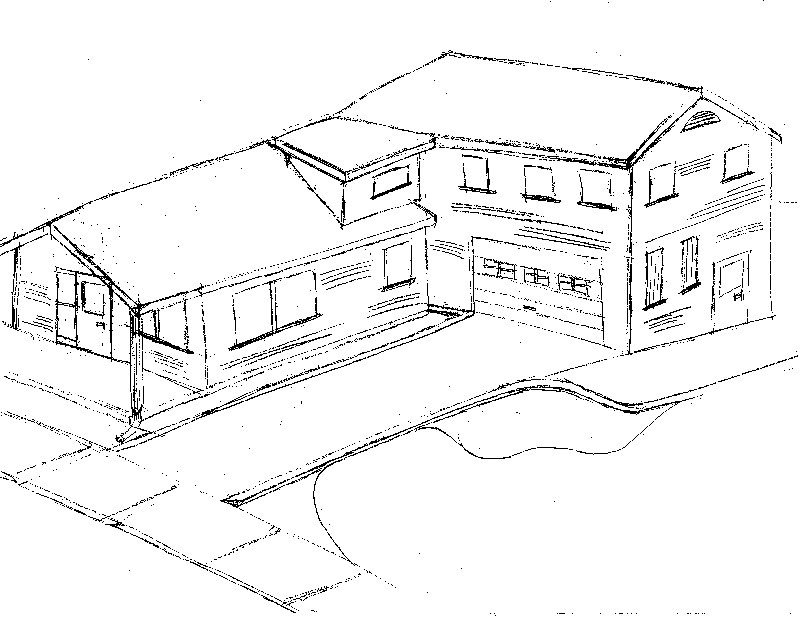
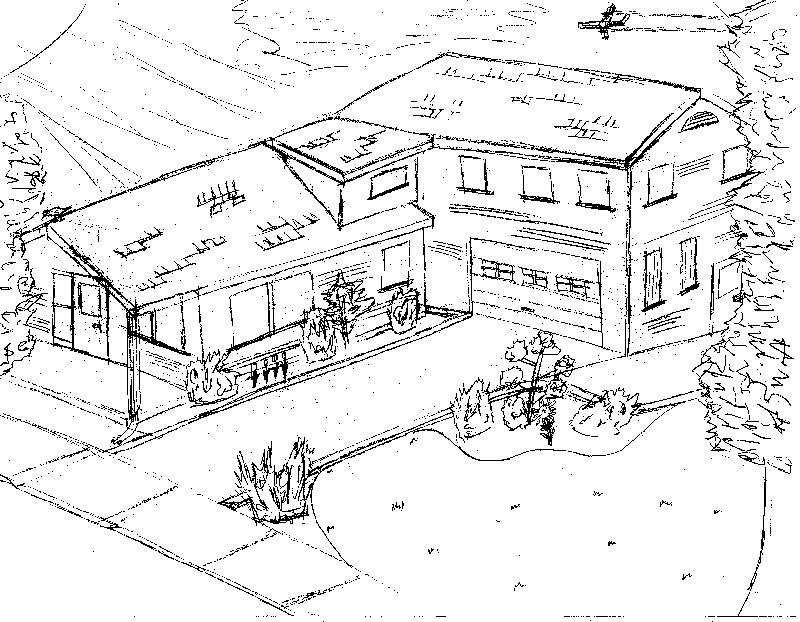
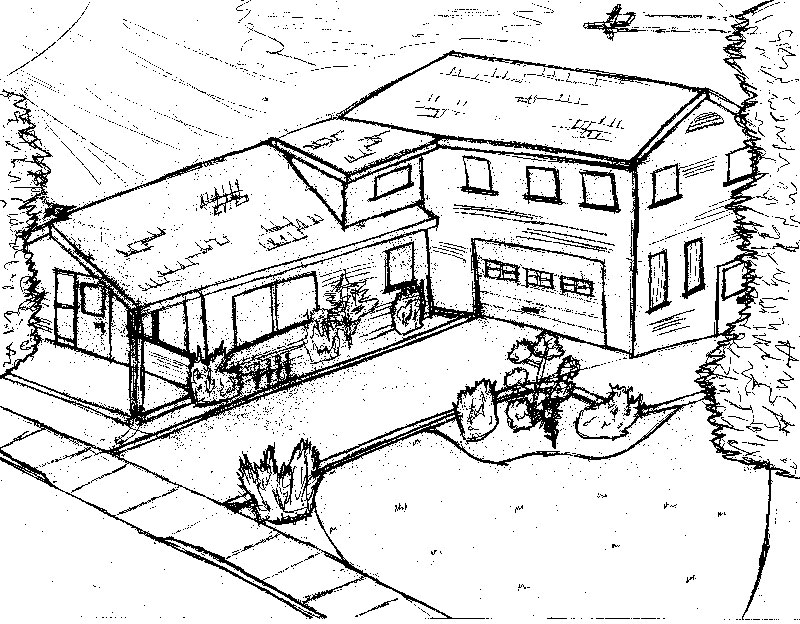
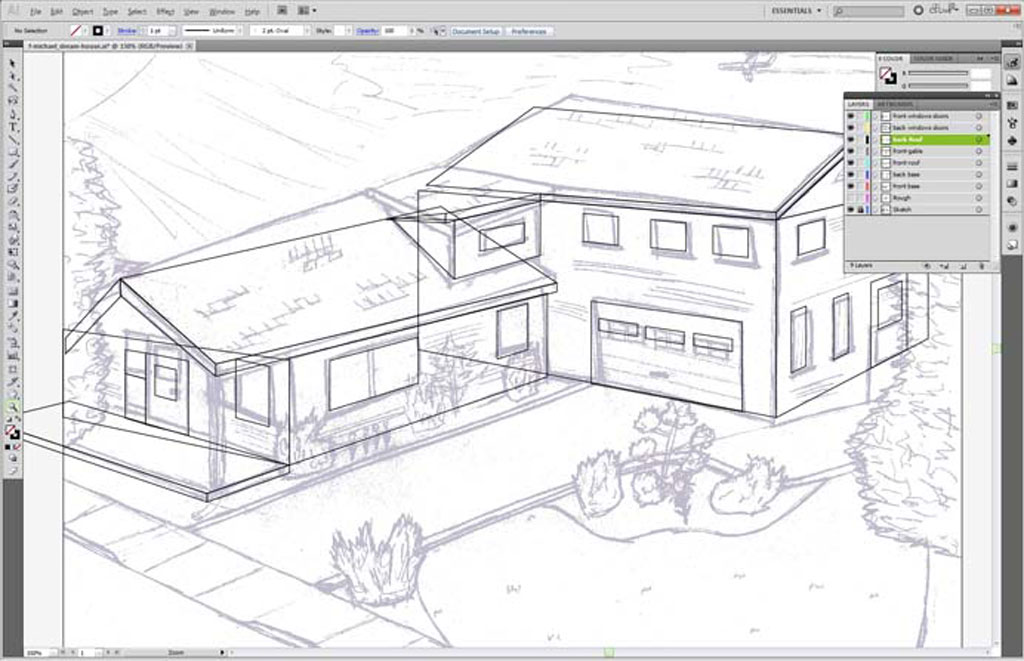
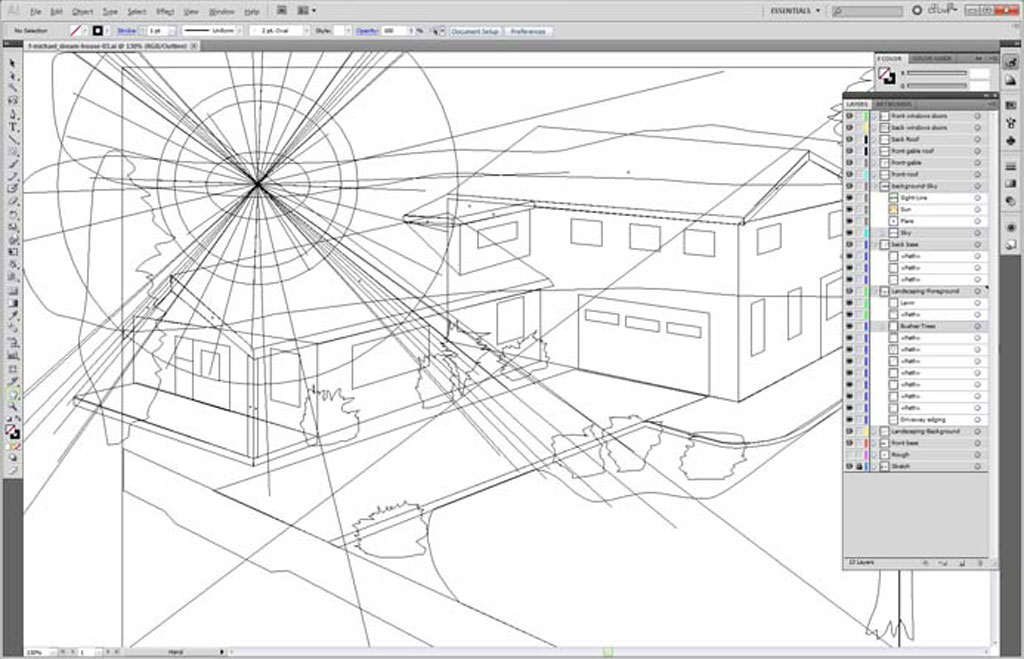
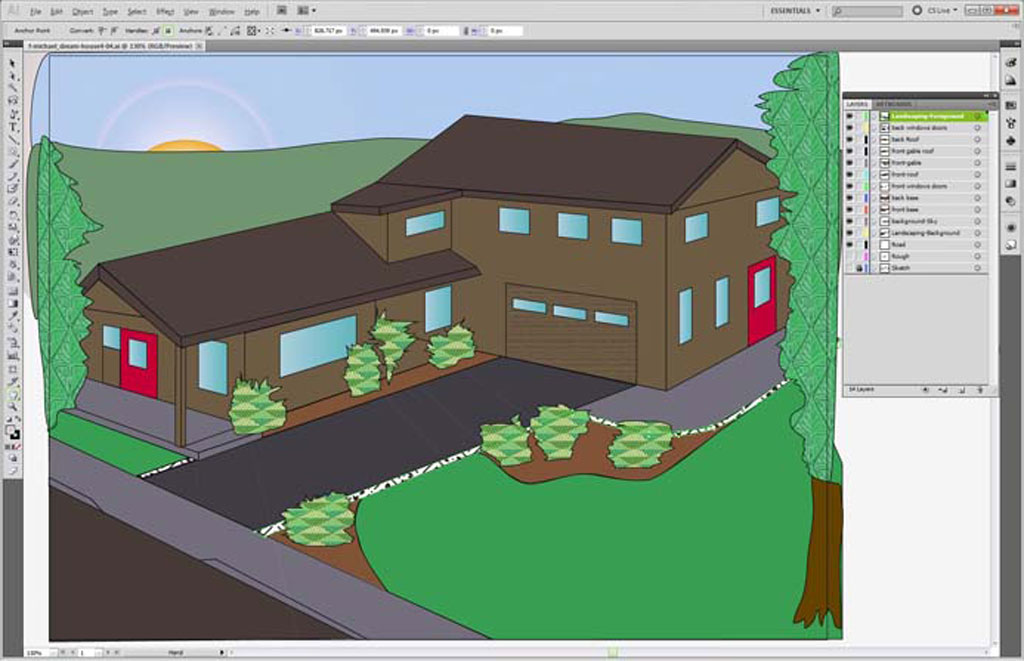
The following are some samples that were done in the past using a similar vector/illustration software application. Try to include perspective with your own creative design, showing your use of the many colours, patterns, brushes, gradients, text tools that illustrator has.
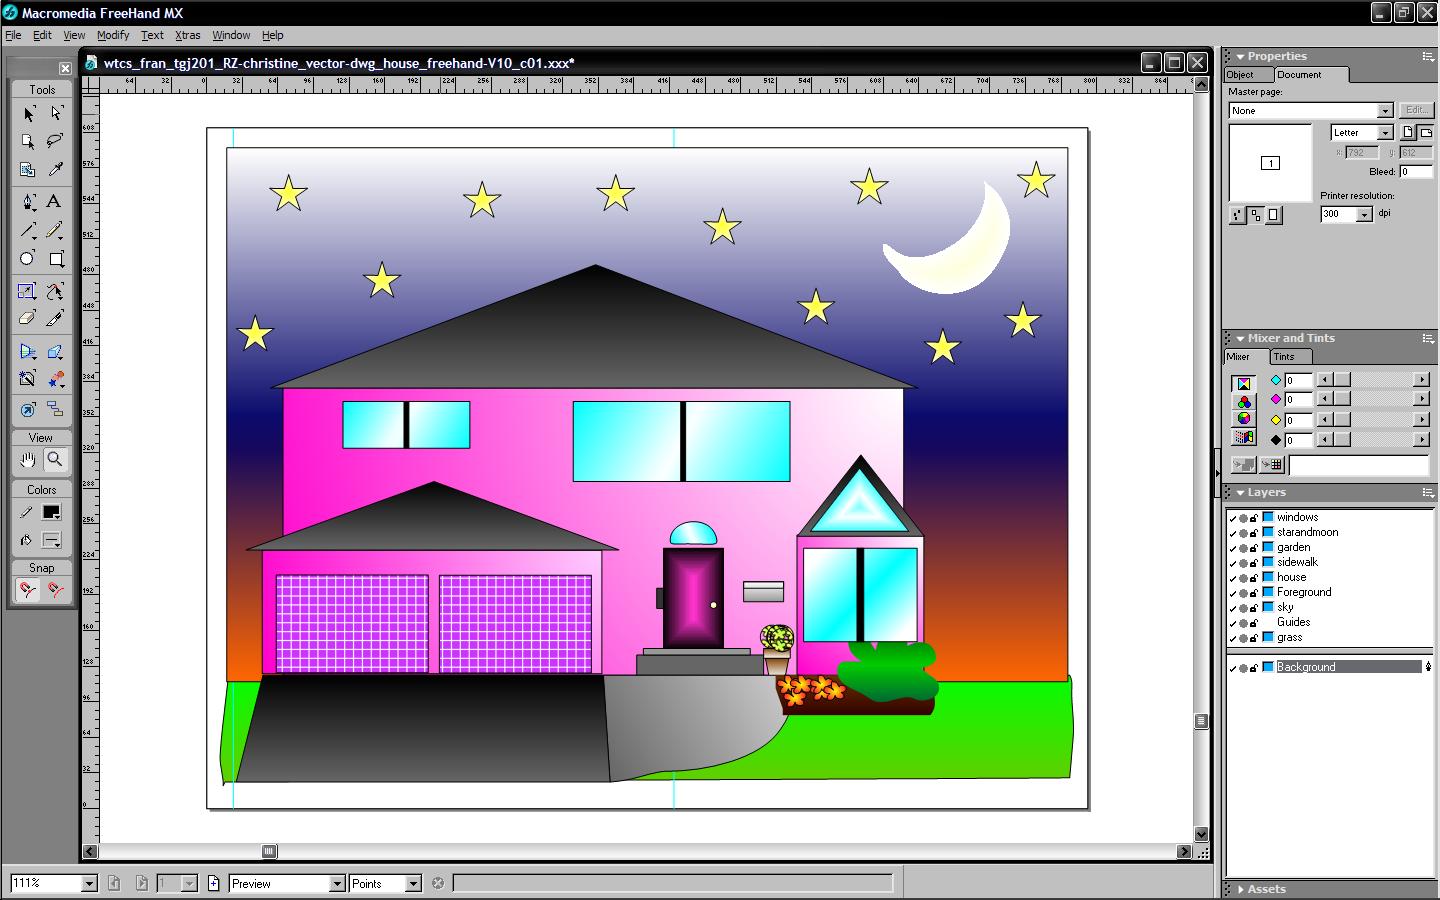
Sample 1
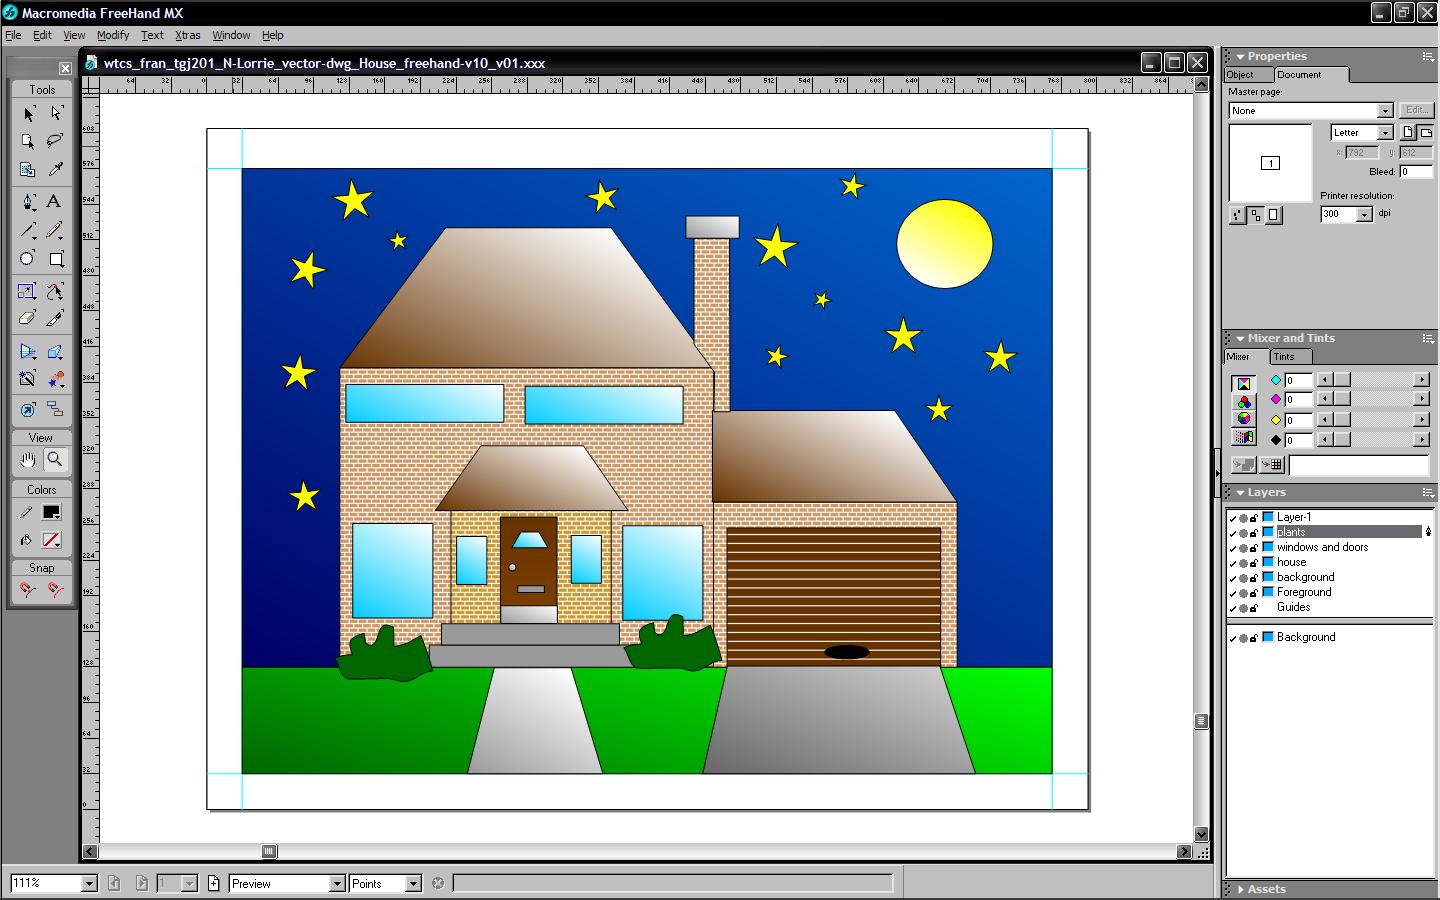
Sample 2
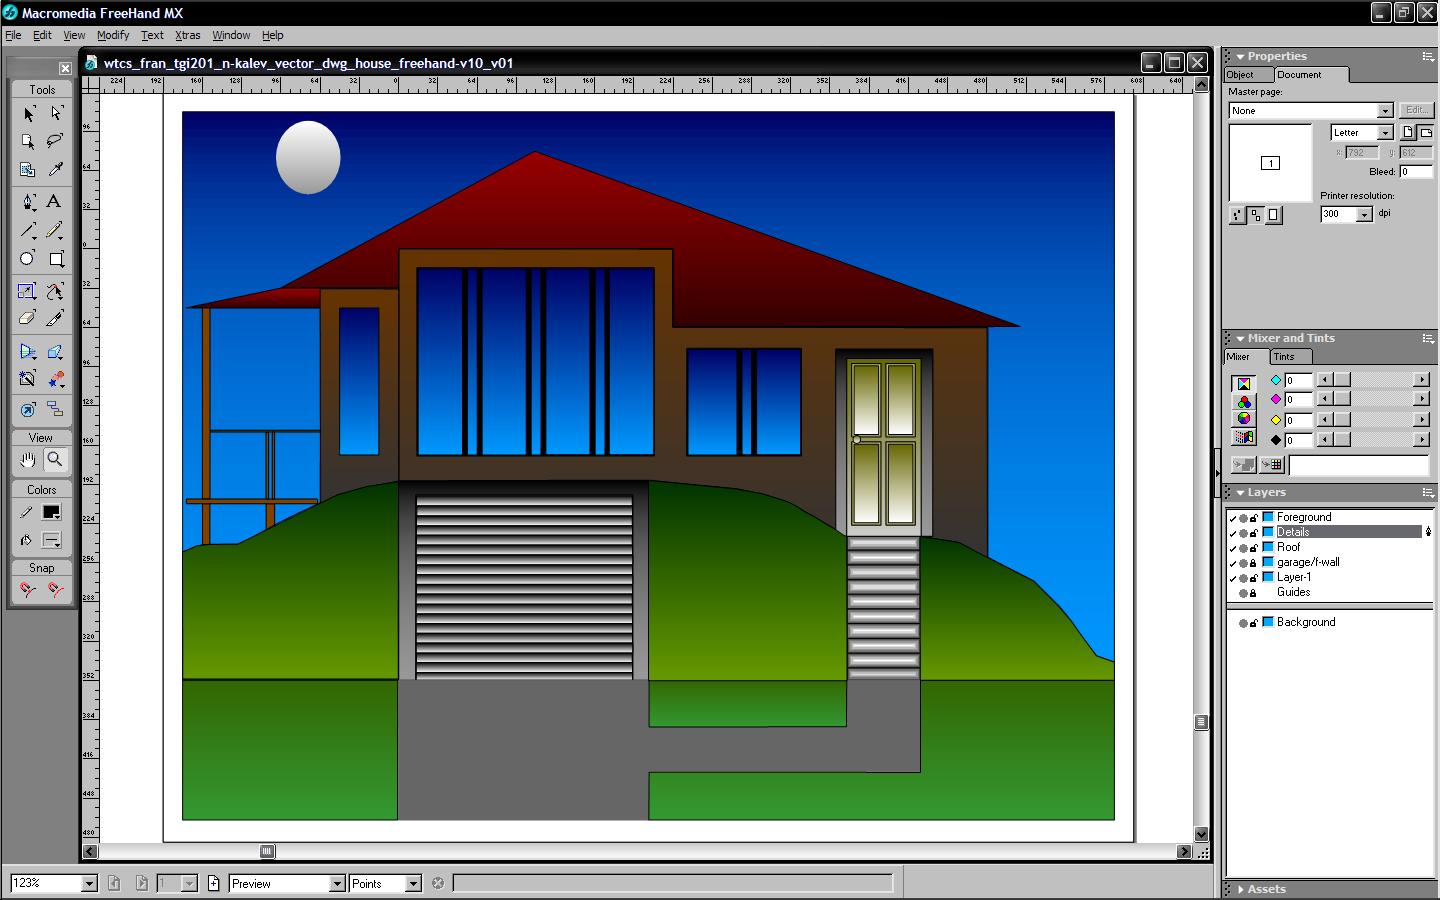
Sample 3
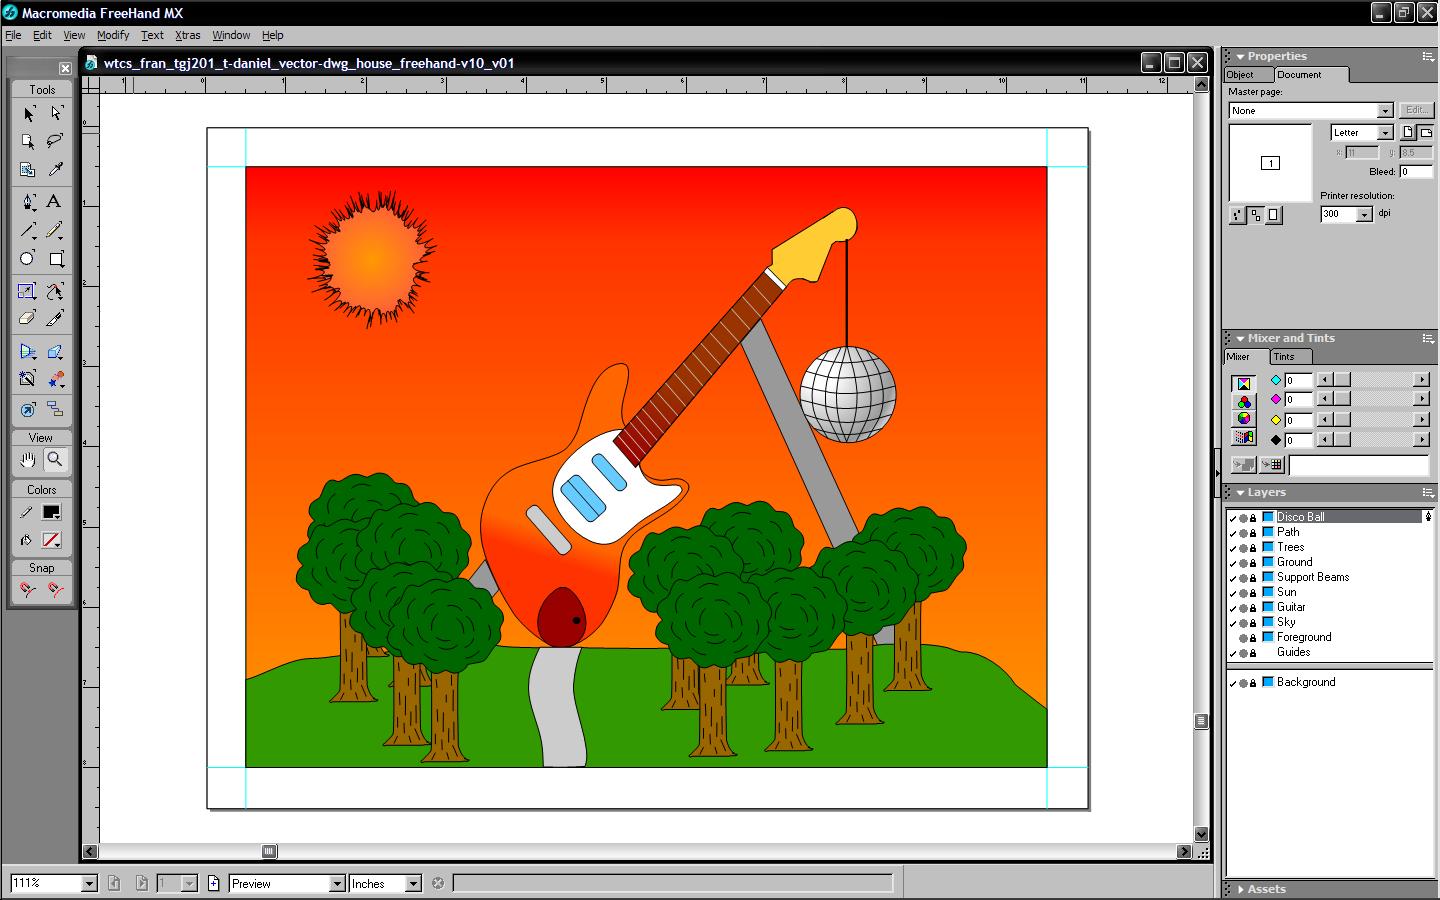
Sample 4
Create/Construct:
Start by creating a full page basic sketch of your dream house showing doors, windows, levels, landscape, driveway, background, etc. Try to add perspective to your house with different settings.
Step 1
Rough in
Step 2
Object details
Step 3
Landscape
Step 1
Object lines
Meanwhile during class, take some time to experiment with Illustrator tools, creating some basic shapes, make parts of the house, use different tools demonstrated and practiced in class to use with your dream house creation.
Once you have completed your sketch and have practiced with Illustrators tools start a new web profile file 1024*768 and set-up guides, grid, ruler, etc. Start by naming your layers and drawing your house components starting with the largest parts working to the smaller details. Make sure to use solid closed objects so that you can fill and outline properly. Try to experiment with as many tools as you can as you further your illustration dream home design.
Step 1
Rough Layer
Step 1
Details
Step 1
Fills

Step 1
Refine
When you have drawn the basic house, some foreground and background, then you will need to organize your layers by naming them and putting them in the appropriate order so that they are viewed properly. Next apply a temporary fill to view your house layers. Ensure you finish house, landscape, etc. first before spending time hunting for the exact right texture, pattern, brush, style, effect, etc. go through the sample libraries Illustrator offers first to save time.
It is possible to make your own swatch/brush libraries, and/or just do a search and find an appropriate swatch that you need for exact look you need. Using the right search terms, you can download free illustrator swatches, patterns, gradients, styles, brushes, etc. Here is a sample site for getting swatches, all-free-download.com. If you find some great resources, save them to the Hand-in folder, under the appropriate folder, and the instructor will then provide them in the Pick-up Folder for all to use.
Fill the page so that your use of "space" creates a nice balance and remember to review and apply your principals and elements of design. While working, save your work to your USB flash stick and backup to your H drive.
When you are close to finished have two peers give their input and make any improvements as needed. If you are finished early, have your instructor also review it prior to handing in. When handing in, you will submit it in the hand-in-folder as discussed in class, in the default .ai format and also export to a .jpg format. Ensure the file extension is correct and present. Here is an example of the file names you should be using:
- File name: d-joe_house.ai
- File name: d-joe_house.jpg
Evaluation:
Use this section as a check list to make sure that all the major components of this activity have been completed
| Evaluation Breakdown Component Descriptions | Marks |
|---|---|
| Always double check that you have completed all components for full marks. | |
| Sketch - house perspective, details, landscape, background, and foreground | 20 |
| Class Demo - present an Illustrator tool and how it can be used with the house illustration | 10 |
| Design Basics - Elements & Princples of Design video feedback sheet filled in | 10 |
| House design and Tools - overall design, line, text, shapes, layers, brush, stroke, and fills | 40 |
Unit 1, Act. 3: Onomatopoeia Brain Teaser
Situation:
Being creative in Cyber Arts you will need to learn and exercise a creative design process. This process includes several steps that allow you to start with an idea and come up with successful creative design(s). Using an onomatopoeia as our focus, we can go through the proper creative steps and also work more with the type tool and related components.
Problem/Challenge:
Using a creative design process, start with a minimum of 5 different thumbnail sketches showing onomatopoeias. Using illustrators' type tool and it's related components on a 1024 * 768 landscaped web page create two onomatopoeias saved in .ai and .jpg formats.
Investigation/Ideas:
Some examples of words that could be used as onomatopoeias are: "Ping", "boom", "squelch", "bang", "click", "fizz", "hush", "buzz". First you need to familiarize yourself by experimenting with the text tool and it's related control tools through the object menu, type menu, and the type palet with:
- text following a pathway
- text direction
- size
- font
- fill
- stroke
- kerning
- leading
- vertical and horizontal scale
- baseline shift
- character and word rotation
- spacing
- warp
- mesh
- outline
- effects
- expand to gradient
Once you have experimented with all of the different options you have to modify, edit, and change the type then you should consider the following:
- Research different words that can show graphically what that word sound would represent
- Review what thumbnails are, as you will need to graphically sketch those ideas on paper prior to starting your two final designs.
- Thumbnail Sketching - Short introduction and explanation
- Thumbnail sketching - some samples
- Thumbnail Sketching in a creative/design process- a detailed look
- Refer back to your Elements and Principles of Design notes for refining final designs
The following are some examples of past projects done by students:

Sample 1

Sample 2
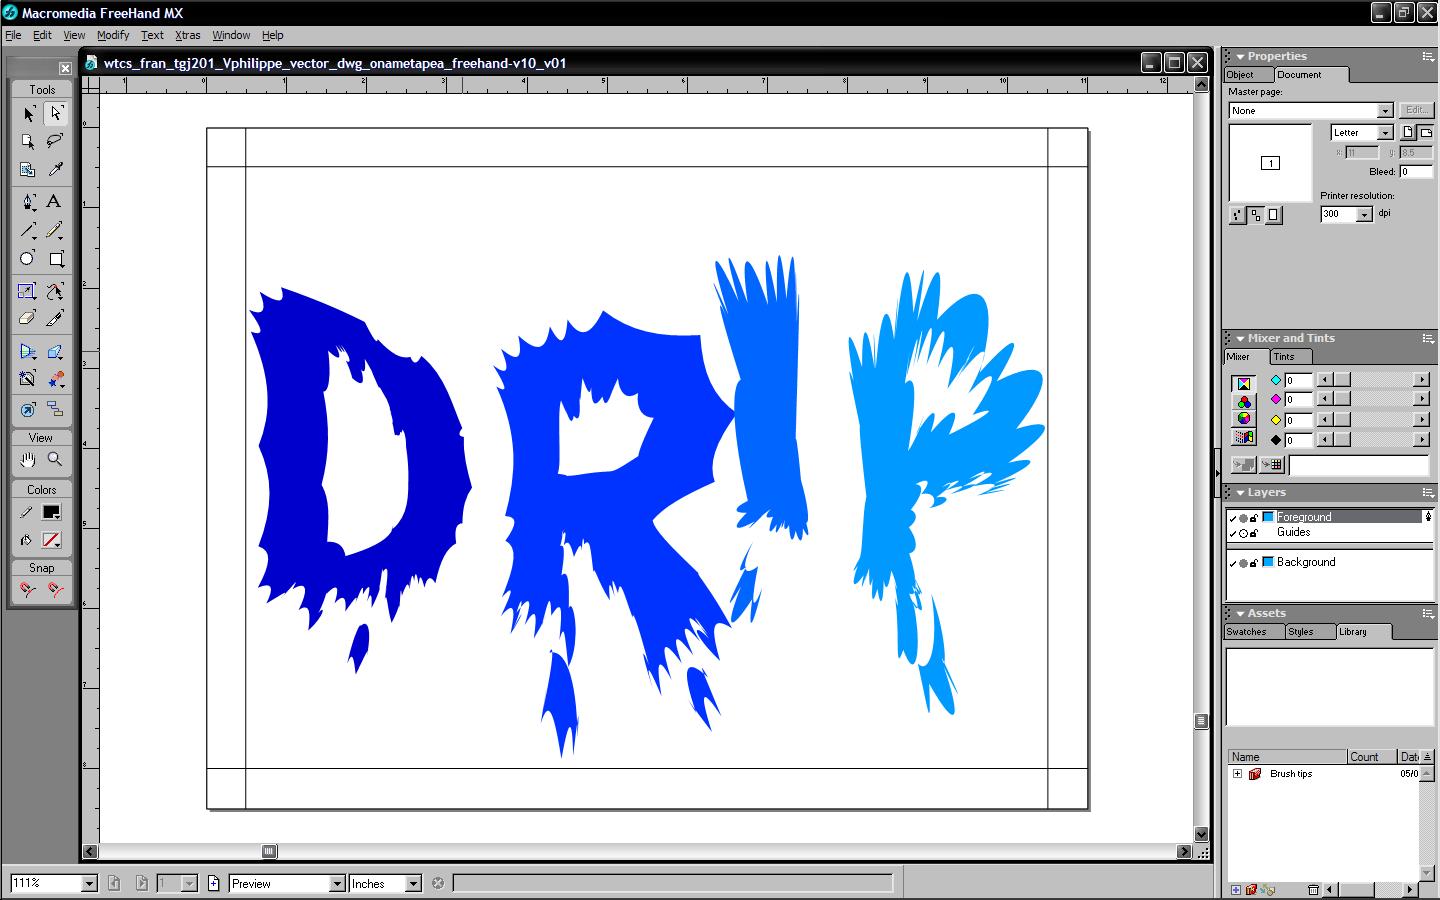
Sample 3
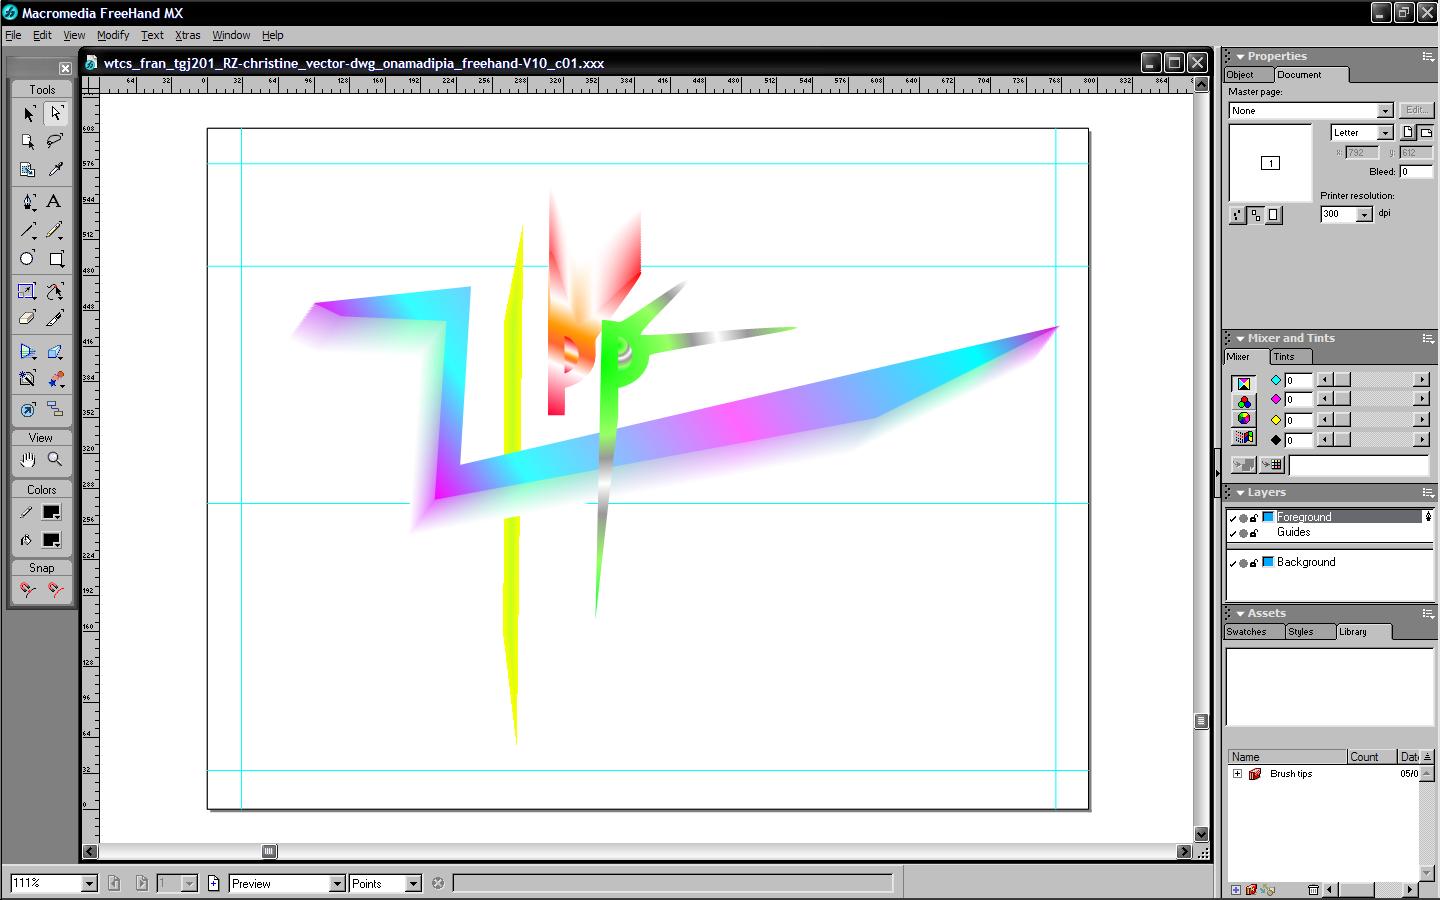
Sample 4
Create/Construct:
You will need to follow a process that should become habit when creatively designing something from scratch.
- Sketch a minimum of 5 different onomatopoeic thumbnail ideas filing a full page showing details, effects, and notes.
- Select two final design ideas to use.
- Using Illustrator, working with one idea at a time, create your onomatopoeia using the above type tools practiced and demonstrated with earlier.
- Once finished the first idea, create your second idea using different tools and effects for a completely different design
- Save your file in the standard .ai file format and then use the export command to create a .jpg version also. Your final designs must fill the page as much as possible.
Here is an example of the file names you should be using:
- File name: d-joe_Onomatopoeia.ai
- File name: d-joe_Onomatopoeia.jpg
Evaluation:
Final ideas will be evaluated for creativity, technicality, and the use of elements and principles of design.
| Evaluation Breakdown Component Descriptions | Marks |
|---|---|
| Always double check that you have completed all components for full marks. | |
| Design - five thumbnail sketches filing a full letter sized sheet | 15 |
| Class Demos - two illustrator tool class demonstrations | 10 |
| Design Illustrated - type and related tools and two final .ai and .jpg design solutions | 20 |
Unit 1, Act. 4: Logo
Situation:
It is common for businesses and individuals to want to associate themselves with unique or personal "markings". These markings are commonly referred to as "brand" logos. While it is quite true that you are not a "brand," you are actually an individual with a self-perceived identity. As a student in graphic communications you have the design knowledge and illustration tools required to express that identity in a quick, simple image logo and attach it to different mediums.
Problem/Challenge:
Design a student professional identity logo to be included in a document header/footer and a busines card. Show five preliminary sketched ideas. The final design must be a graphic related image based on:
- who you are,
- how you are integrated with technology today,
- and your future.
The logo must be 1 unit high to a ratio of 1 to 3 units wide showing 75% minimum graphics. Preliminary ideas and 5 thumbnail sketchs showing your rough ideas. The following 3 major mediums will be needed:
- Logo Design Display
- Letter sized 8.5 * 11" portrait
- 1/4" outside print margins
- Guide lines
- Colour version
- Black " White version
- Full page and 1" sized logo samples
- Design to include:
- Logo design
- Possible text name
- Background and foreground
- Layers, shapes, lines, fills, etc
- Business Card Print Master
- Letter sized 8.5 * 11" portrait
- Quarter-inch outside print margins
- Black " White and colour version
- Catch phrase or slogan
- 3.5 * 2" standard card size
- 1/8" card margin spacing
- Business card contact info (fake):
- Name
- School and position
- Related catch phrase or slogan
- Address, E-mail, and Phone
- Facebook, Twitter, Texting, etc.
- Microsoft Word Document
- Letter sized 8.5 * 11" portrait
- Logo header and complimented footer
- Body text formated with page logo design
- Self and peer evaluation table
- Feeback and explantion on logo design
- Header name, date, school name, topic/title
- Footer file name, page #
Logo design will be presented in jpg format and program propietary file format
Investigation/Ideas:
Logo design process is very easy once you understand the process. Here is an outline showing the steps you should be following in detail. You might want to check out some illustrator logo tutorials to see some of the possiblities are prior to coming up with your designs. The following steps must be shown before finalizing your logo:
- Check out logo's from others and their common traits
- Generate your own ideas for your design
- On lined paper, brainstorm ideas showing your:
- Character strengths
- Strong interestes in technology
- Future direction and possible career
- Related catch phrases and/or slogans you like
- On the same page, create graphic equivlents and combine and/or isolate images, possible text, background, and foregrouond ideas, to sketch 5 final thumbnail logo designs
- Add explanation notes, colour, etc with thumbnails logo designs
- On a blank page, sketch out 5 large rectangles, and outline business card design layouts showing placement of the logo, text related info, images, foreground, and background idesas
- Add explanation notes, colour, etc with business card designs
- Design considerations
- Keep designs simple, easy to view, memorable, and unique
- Use elements and your principles of design
- Remember your logo will only be 1" high maximum
Samples Previousely Done
These are some old samples to give you an idea of what is to be done, but these samples were done by lower grade level and a different program. You are working with a higher end program and more experience, so expectations will be higher for your final designs
Logo 1
Logo 2
Logo 3
Logo 4
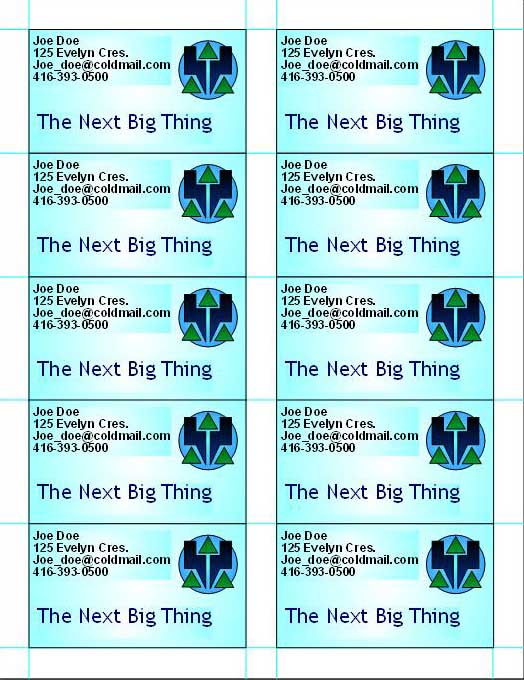
Bus Card 1
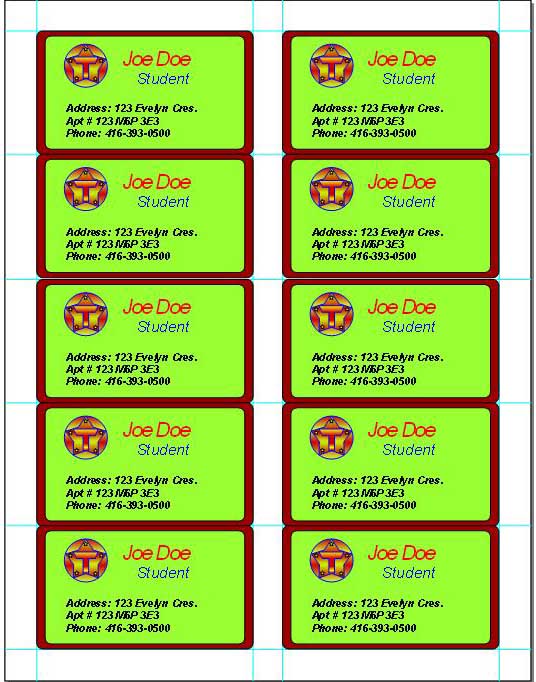
Bus Card 2
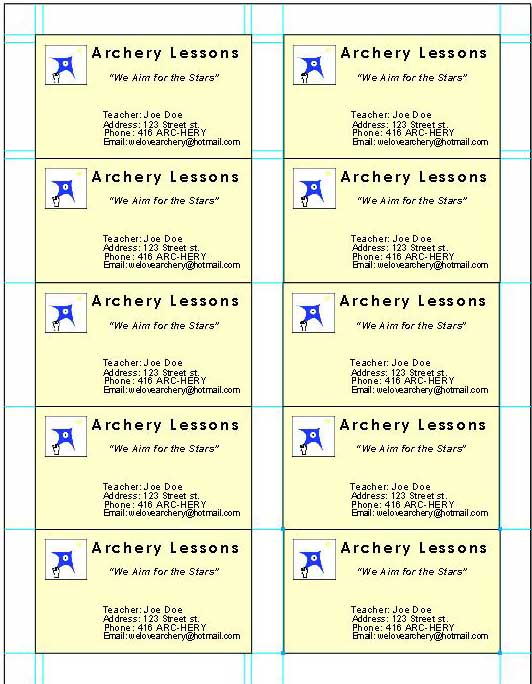
Bus Card 3
Bus Card 4

Doc 1

Doc 2
Doc 3
Doc 4
Create/Construct:
Take the following steps to successfully create your logo design and implement it into the three major presentation mediums.
- Select your final logo design idea
- Logo Display Medium
- Using Illustrator, set-up a custom print page, create print margins, guide lines for full scale and enlarged scaled logo areas
- Create a box with your ratio sized logo area, then create your coloured design with organized layers and groups
- When finished your coloured design, duplicate and then convert to a black and white version of your logo
- Once you are finished both, dupicate both and resize to 1" high and place top left and right sides, then put a title
- Remember use your layers and grouping objects and to make use of appropriate tools, colours, effects, fills, etc.
- Save propietary .ai and also as a .jpg for later hand-in
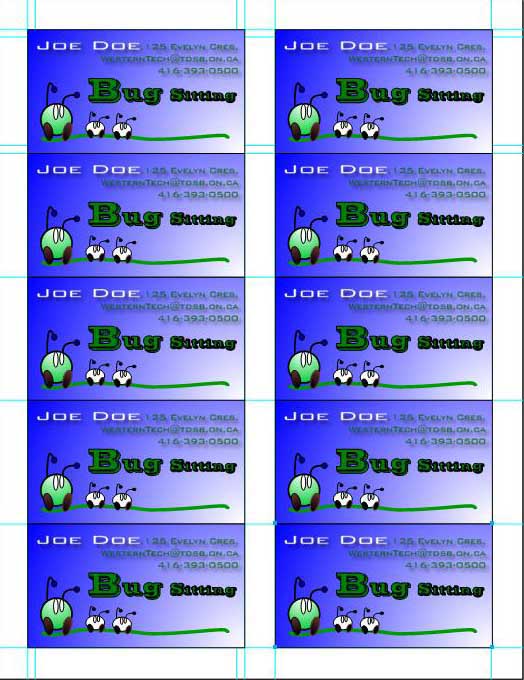
- Business Card Medium
- Using Illustrator set-up a custom print page, layourt print margins, guide lines for two columns and five rows of business cards with 1/8" bleed space between cards
- Start on your colour business card by bringing in your recently created logo design
- Enter in your text related contact information and place slogan
- Add your foreground, background, and additional images
- Blend in all graphical components togeather for final finished design
- Layout, organization of information, and graphics are very important here. Ensure you have white space, colours, design principles kept in mind when finalizing your business card design
- Save propietary .ai and also as a .jpg for later hand-in
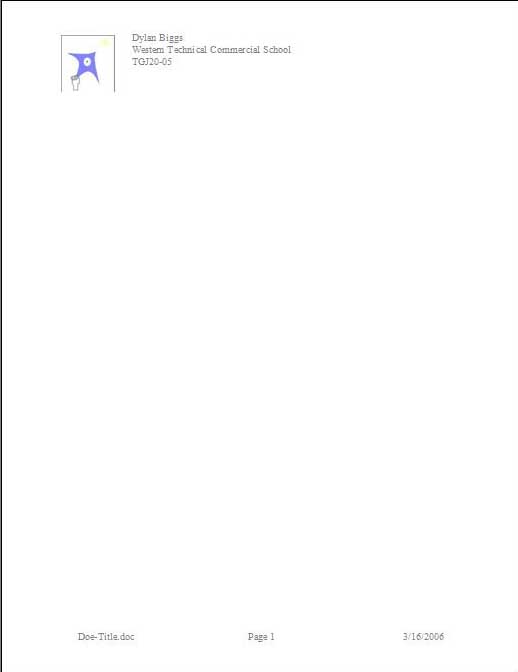
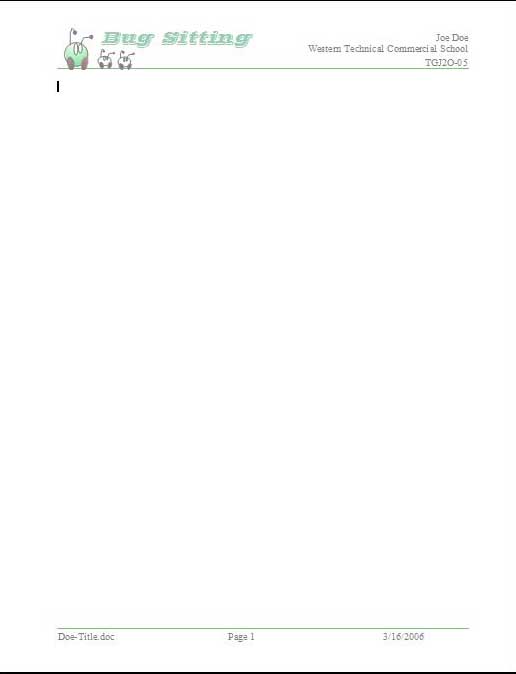
- Document Medium
- Using Microsoft Word, create a stationary document with your included logo and information
- Header to include your logo, Main Title, Name, "auto" Date, School, and course
- Header and footer design should compliment each other
- Footer to show "auto" file name and page number
- Body to inlcude approiate title format, explanation feedback on the three requirements for your logo design, self and peer evaluation table filled in and totaled up
- Save propietary .doc and also as a .jpg for later hand-in (use alt + Print Screen to save to clipboard, open paint and paste, then save as jpg)

Set-up Configuration
Set-up Configuration
Evaluation:
Final ideas will be evaluated for creativity, technicality, and the use of elements and principles of design.
| Evaluation Breakdown Component Descriptions | Marks |
|---|---|
| Always double check that you have completed all components for full marks. | |
| Logo Design - written ideas and five thumbnail sketches with notes and colours | 10 |
| Business Card Design - outline layout sketched with notes, colours, and details | 10 |
| Logo display - set-up and tools, design, colour, black and white, 1" and full size | 20 |
| Business Cards - set-up and tools, 10 duplicats, colour /BW, layout and design | 20 |
| Word Document - header/footer, 1" logo, info, body with feedback and self/peer evaluation | 20 |