Unit 4: Computer Technology - Boe-Bot
This unit will introduce you to the boe-bot. You will learn about basic electronics,basic programming, servos, and different navigation methods.
Course Units and Descriptions
Use this table for an overview and navigate to each of the course unit pages.
| Unit | Description |
|---|---|
| Review course outline for more details | |
| 1 | Careers & Safety- Intro, computers, organization, safety, and research careers |
| 2 | Computers- organization, hardware, design, software, maintenance, building, repair, and troubleshooting |
| 3 | Circuits- Electrical characteristics, calculations, components, digital logic design, project build, and troubleshooting |
| 4 | Boe-Bot- micro controllers, electronics, robot builds, circuit building, programming, robot naviagtion, testing, and troubleshooting |
| 5 | Web Portfolio- Showcase course work, projects, and understanding with web portfolio and presentation |
Unit Content Activity Quick Links, Click to Jump to Specific Activity!
- Unit 4, Act. 1: Boe-bot Introduction
- Unit 4, Act. 2: Servo Motors
- Unit 4, Act. 3: Boe-Bot Navigation
 Unit 4, Act. 1: Boe-bot Introduction


Situation:
The boe-bot is an amazing robot starter kit that allows the user to learn about all the basics of robots. This includes electronics, mechanics, servo's, circuits, design, interfacing, logic, programing, and computers.
![]() Having fun by gaining experience easily with a smaller, simple robot will give you a base knowledge to work on more sophisticated and larger robots.
Having fun by gaining experience easily with a smaller, simple robot will give you a base knowledge to work on more sophisticated and larger robots.
Problem/Challenge:

Get your numbered boe-bot and familiarize yourself with all of the components. Depending on which bot you have download and save the ![]() Parallax Boe-Bot Student Guide Version 3.0 manual or the online Arduino Tutorial on to your USB memory stick, and review the introduction to the boe-bot. The Parallax boe-bot has the same hard copy manual in your boe-bot kit.
Parallax Boe-Bot Student Guide Version 3.0 manual or the online Arduino Tutorial on to your USB memory stick, and review the introduction to the boe-bot. The Parallax boe-bot has the same hard copy manual in your boe-bot kit.
Take your boe-bot kit bot apart removing the wheels, servos, electronic components and record inventory, then confirm with teacher. You will then start on assigned activity on Communicating with your Boe-bot. All programs written need to be saved and coding handed in through a report as instructed for full marks. Two microcontroller question sheets will need to be answered as you work on these assigned activity tasks. With all parts removed, identify and organized all kit components, record number of each on given tracking sheet, then show your teacher.
Investigation/Ideas:
The presentation will explain a lot of how to complete the boe-bot tasks you will need to accomplish. Links below will help with general interest and specific knowledge needed to complete the boe-bot projects. When programing with your BASIC stamp editor, keep in mind coding conventions for full marks.
Presentation
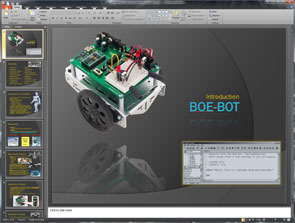
Before working with the boe-bot here is a introduction to the ![]() Introduction to the Boe-bot:
Introduction to the Boe-bot:
- Why Study Robots
- Boe-bot types
- BASIC Stamps
- Board of Education
- Microprocessor-controller
- Boe-bot in Detail
- Programming
- The BASIC Stamp Editor
- PBASIC
- Commands
- Sample Programs
- Light Emitting Diodes
- Resistors
- Breadboard
- Electronics and Code
Resource Links

 Boe-Bot Un-boxing 9.91min
- Parallax Main Boe-Bot Page
-
 Boe-Bot Guide V 2.2
 - 5 Band Resistor Calculator
- Coding Conventions
- Microcontrollers Intro
- Microcontrollers Types
- Electronic components
- Electronics Intro
- Basic Electronics 1
- Basic Electronics 2
- BASIC Stamp Microcontroller Modules
- Using a Multimeter
- Boe-Bot intro detailed, 55.03
 Arduino
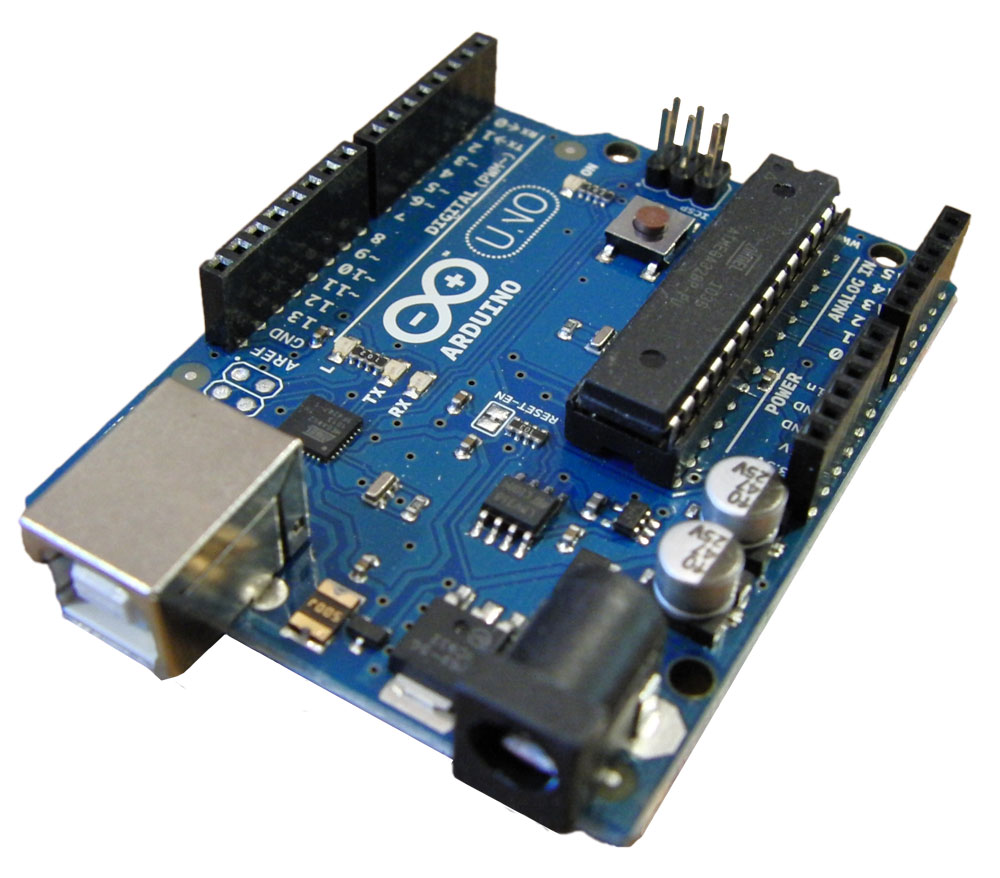
Arduino is one of the most common micro-controllers out at the moment. There are several varaitions to this controller because of it's popularity. The language is a variation of C and C++ which is a little different then Parallax's PBASIC, but programming principles are still the same. The following online Arduino Tutorial is a great place to start and follow. It covers all the basics that Parallax covers. The following links show a wide assortment of just some of the resources you can find on the web, although you focus for the near future is follloing the above tutorial.
- Arduino Software
- Robotics Shield Kit (for Arduino)
- BofE Shield for Arduino
 Intro to the Arduino
- Wikipedia on Arduino
- Site Tutorials
- Site Language Reference
- ladyada Arduino Tutorial
- Flos Science Tutorials
- Arduino Forum
- AdaFruit Forum
- Most Common Boards
- Getting Started 37.25

Resistor Chart or Use
An Online Calculator
The Parallax site has a lot of resources you can check out including manuals, guides, support material, and additional kit add-ons. If you are able to get through the basic tutorials, it may be a possibility to order different additional kits to try out different functions such as drive, pickup, sensors, cameras, etc.
- be very careful with the usb cable connection interface as they are very delicate
- confirm your power supply is centre positive between 6-9 volts
- review information on activity prior to working on task given

Create/Construct:
For this activity we have a numbers of tasks to complete to familiarize ourselves with the boe-bot. These tasks will help you fully understand how to work with the boe-bot and learn about the important components of a robot such as sensors, movement, energy, intelligence, and functions. Here are the steps/tasks to be completed:
- Once you get assigned your numbered usb interfaced kit, make sure your box, bot, and manual all have the same number.
- You are to research and answer questions on the topic Microcontrollers Assignment #1 answers of which you can find in the Boe-Bot Student Guide Version 2.2 and/or the online Arduino Tutorial
- The boe-bot is to be disassembled separating the servos, board of education, frame, and electronics on the breadboard
- Using the Hardware Disassemble and Parts Check sheet, separate and organize all components to record inventory of all your parts in your kit. You will need to complete the back page assignment explaining what each of the electronic components are which you will find answers in the Boe-Bot Student Guide Version 2.2 and/or the online Arduino Tutorial , or on the web.
- You will need to identify the different electronic components including resistors. Resistors can be identified using the resistor colour code calculator or chart.
- Ensure you have the at least the following electronic components and if not trade/share with another kit/partner:
- 3 - 470 Ω Resistor 1/4 watt
- 2 - Red LED
- 1 - Yellow and Green LED
- 6 - 3" Jumper Wires
- 1 - Piezo speaker
- You are to research and answer questions on the topic Microcontrollers Assignment #2
- Check with teacher, show your inventory sheet, then get started on hands-on-project Communicating with the BOE-BOT
- As you complete each task, record and save your coding in a doc file for later hand-in report formatted as instructed.
- When you finish each task in order given, have the teacher check your work to assign you a mark.
Evaluation:
Each boe-bot program task is to be checked by teacher before moving on to the next project. Remember code writing conventions for each of the program tasks to be done.

| Evaluation Breakdown | Marks |
|---|---|
| Always double check that you have completed all work for full marks. | |
| Microcontrollers 1 - Questions answered correctly | 26 |
| Microcontrollers 2 - Questions answered correctly | 20 |
| Boe-bot Disassemble & Parts - Check List - Check, Identify, and record all components | 10 |
| Boe-bot Disassemble & Parts - Explanations - Explain what these parts are | 13 |
| Program 2A - Message from the BOE-BOT to the computer screen | 10 |
| Program 2b - Result of a calculation from the BOE-BOT to the computer screen | 10 |
| Program 3A - Message from the BOE-BOT once per second to the computer screen | 10 |
| Program 3b - Turning ON and OFF an LED | 10 |
| Program 3c - Turning ON and OFF two LEDs (alternating) | 10 |
| Program 3d - Simulating a traffic light using red, yellow, and green LEDs | 10 |
| Program 3e - Turning ON and OFF an LED using the PULSOUT command | 10 |
| Programming Report - All circuits recorded in a doc format as required in assignment | 30 |
Unit 4, Act. 2: Servo Motors

Situation:
Using the BASIC stamp editor with PBASIC language code and the boe-bot circuit board has a lot of different projects that can be done. Using some electronic resistors and LED's different programs can be uploaded to the board to run circuit tasks based on what you want it to do. By creating screen feedback, turning on and off LED's, creating how long they stay on or off, etc, you can see how programming the boe-bot is done and apply this process to new electronic components. The fun part is programming the boe-bot to move or navigate based on your commands.
![]() Before you can move the boe-bot though, the servo's need to be calibrated and tested. Once this is done then you can attach the servo's and wheels and program the boe-bot to move.
Before you can move the boe-bot though, the servo's need to be calibrated and tested. Once this is done then you can attach the servo's and wheels and program the boe-bot to move.
Problem/Challenge:

Using the two servo's that came with your kit, you are to calibrate, or centre each servo, then test in consistent increments the speed of each of the servo's from 0 RPM to full RPM. You will need to have two LED's connected while testing so that you know your testing program is working. This needs to be done as each servo will be slightly different in it's calibrated/electronic construction. Using Excel record each of your speeds, then chart/graph the values to visually show what the servo can do at certain increments, but also that they are working properly. If it is found that there is a problem with a servo during the test, then you must prove that it is in-fact not working using trial and error. At that point you will get a new servo to check.
Investigation/Ideas:
What is a Servo?

A servo motor has many variations on it's definition, but simply put it is self-contained electric device that rotates or pushes part of a machine with great precision. The Servo Motors Presentation to the right covers the following topics:


- Boe-Bot Servo
- Servo Applications
- Inside an RC Servo
- Servos/BASIC Stamp
- PBASIC Commands
- Command Examples
- Set-up and Centering
- Speed/RPM Servo Testing
- Graphing Speed/RPM
Resource Links:

- Boe-Bot Guide Version 2.2
- Introduction to Servos
- Classification of Motors
- DC Motor Operation
- Servo's and Torque
- Continuous servo in 3-5 minutes
- BASIC Stamp Schematic
- Continuous Rotation Servo
- What is a Servo?
- Making a line graph in Excel
- Excel Formulas
- Speed, distance and time
- Servo Calibration Data
- Using a Multimeter
Create/Construct:
Testing and analyzing both servos is required in order to precisely program them for accurate navigation in later projects. Servo life span can breakdown at any point after being used depending on time used, quality, and care.

Transformer pin setting

tag left/right Servo's

#7 B-of-E Connected

#7 LED's Connected
The following is a list of general steps you will be following in the detailed handout called

#3 Excel-multimeter

#7 Centring Servo's
- Reading assignment in the Boe-Bot Guide Version 2.2 - chapter 2, activity 2 Connecting The Servo Motors (page 58 70)
- Power Connection and Set-up, multimeter use, and values recorded
- Excel sheet creation and values filled in for measured values
- Connecting the Continuous Servos
- Connect up an LED annunciator circuit
- Writing a "CenterServoP12" program
- Connecting power, LED's, and calibrating/centering servo motors
- Testing and recording RPM versus PULSOUT values of your servos
- Using sample Excel sheet fill-in the result values into two data tables
- Create line graphs representing your RPM versus PULSOUT values
- Calculate using PULSOUT values for full speed forward values for both servo's
- Add Excel columns for inches/second and feet/second and fill-in
- Finish by calculating/reporting specific time for traveling 10 feet forward at full speed
Show your calculation steps for full marks as half the mark goes to process of the calculation.

#9 Excel-Table Data

#10 Excel-Graphing

#10 Excel-Graphing

#12 Excel-Table formulas
If you find that you are not getting a relatively smooth curve similar to step number 10 in the sample line graph image above, then your servo may be at it's end of life span. If this is so you must prove your findings in which you will get a new servo to test, for proper results needed. A bad curve (i.e. servo) will be a problem when programming your bot later in the Navigating your Boe-Bot activity.
![]() Ensure you use the same power transformer supply for all of your tests to get consistent and accurate values. Batteries, depending on strength of charge may vary your results and/or create inaccurate readings as battery output reduces, giving you unreliable test data results.
Ensure you use the same power transformer supply for all of your tests to get consistent and accurate values. Batteries, depending on strength of charge may vary your results and/or create inaccurate readings as battery output reduces, giving you unreliable test data results.
Evaluation:
Each servo built will have different results because they are slightly different in the quality and build of their internal components. Using someone else's work will make your programing in later projects difficult as you will not have values recorded for your own servo's, making those projects twice as hard both time and effort.

| Evaluation Breakdown | Marks |
|---|---|
| Always double check that you have completed all components for full marks. | |
| Power Supply Excel Data - Columns and rows filled out properly using multimeter | 10 |
| RPM/PULSOUT Excel Data - Successfully tested PULSOUT's recorded for both servos | 20 |
| Excel Line Charts - Left & right RPM/PULSOUT charted directly below data | 5 |
| Speed Conversions - 2 additional columns with formula's for inches per second/feet | 10 |
| Specific Calculations - Full speed PULSEOUT values and time to travel 10' value | 5 |
Unit 4, Act. 3: Boe-Bot Navigation
Situation:
Now that you understand the basic electronics, programming and servos, it is time to combine all of these activities together to move the bot using different methods.
![]() Using the computer to program the bot to move on your command is amazingly fun, and with this experience different functions/sensors can also be explored, more on this later..
Using the computer to program the bot to move on your command is amazingly fun, and with this experience different functions/sensors can also be explored, more on this later..
Problem/Challenge:
Program the bot to move in several common move/directions: straight, rotate, and curve. You will then program a custom co-ordinated assigned bot path by first drawing a graphical equivalent X Y Coordinate map full page showing all relevant movements and details. Accuracy on all moment tasks must be with-in tolerance of the 1/2 the bot width.
Investigation/Ideas:
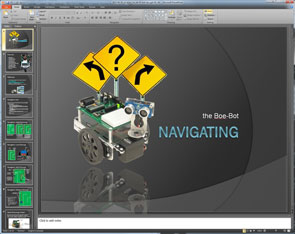
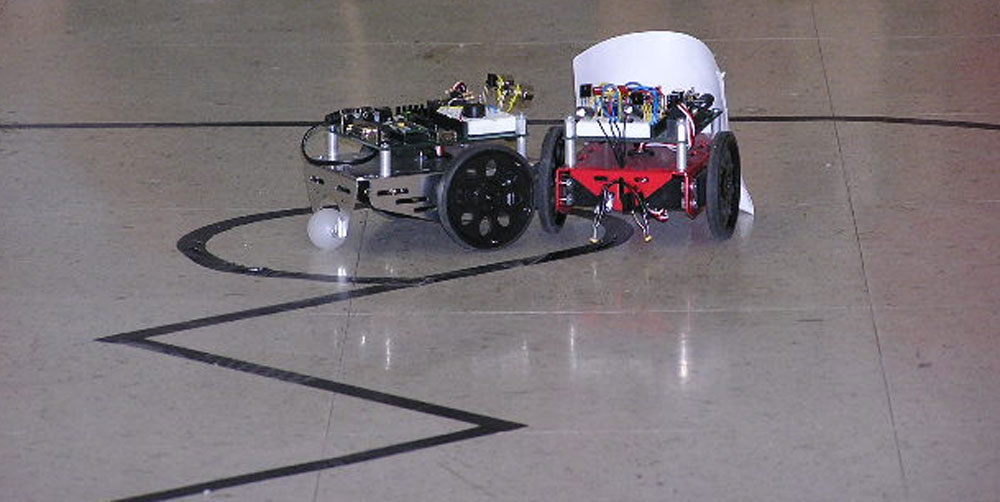
There are several different ways to navigate or move the boe-bot ![]() The Boe-Bot Navigating presentation reviews the following main topics that you need to look at:
The Boe-Bot Navigating presentation reviews the following main topics that you need to look at:

- Navigation Intro
- Dead Reckoning
- Line Following
- Wall Following
- Distance Sensing
- Dead Reckoning in Detail
- Moving Forward
- Using Servo Data
- Sample Program
- Bot Travel Distance
![]() When programming your bot for running straight, you can use your servo data to use appropriate pulsout values to accomplish straight line runs.
When programming your bot for running straight, you can use your servo data to use appropriate pulsout values to accomplish straight line runs.
Resource Links:
- Boe-Bot Guide Version 3.0
- Wikipedia on the Boe-Bot
- Boe-Bot Nav Sample
- Boe-Bot Teacher
- Nav with Whiskers
- Nav with Infrared Line Following
- Boe-Bot Maze Nav with QTIs
- Nav with Infrared Headlights
- Nav with Infrared Distance
Create/Construct:
 Dead Reckoning Navigation Tasks
Below are the main steps found in ![]() Navigating the Boe-bot instruction step sheet you must follow. The instructional sheet has details needed to accomplish the tasks correctly.
Navigating the Boe-bot instruction step sheet you must follow. The instructional sheet has details needed to accomplish the tasks correctly.
- Review the The Boe-Bot Navigating presentation and chapters 3 and 4 of the Boe-Bot Guide Version 3.0
- Navigating the BOE-BOT in a straight line (program 3a)
- Navigating the BOE-BOT in a straight line and returning to the start position (program 3b)
- Navigating the BOE-BOT with wide turns (program 3c)
- Navigating the BOE-BOT on a custom course (program 3d) by first creating a mapping graph of your course
- Submit program report with title page, coding, path map and summary/explanation of learning achieved
New Function/sensor Navigation Task (Time Permitted)
If time permits, you are to pick a function/sensor and traverse a related and predetermined path based on that function/sensor selected using the following steps:
- Research the selected function/sensor and ensure that you have all the hardware components needed
- Create a path map challenge comparable to previous custom course and document it for teacher check
- Connect function/sensors to bot, test, then demo for teacher check
- Program final path previously designed in step 2
- Demonstrate bot navigation for teacher check
- Submit program report with title page, coding, path map and summary/explanation of learning achieved
Evaluation:
Each task program must be handed in with appropriate formatting, comments, and proper file naming. The bot must complete it's task accurately with in half the width of bot itself, i.e. end target goal location must have it between the wheels, every 1/2 inch of inaccuracy will cost marks. Wiki portfolio log entry template.
| Evaluation Breakdown of Boe-bot Navigation Tasks | Marks |
|---|---|
| Always double check that you have completed all components for full marks. | |
| 3a Bot Straight Line - Program code checked/handed in, bot run accuracy | 10 |
| 3b Bot Straight Line and Returning - Program code checked/handed in, bot run accuracy | 10 |
| 3c Bot Wide Turns - Program code checked/handed in, bot run accuracy | 20 |
| Custom Course Mapping Graph- relevant course info, scaled to full page | 10 |
| 3d Bot Custom Course - Report -title page, program code, bot run accuracy | 40 |
| 3d Bot Report - Report -title page, map, program code, and learning explanation | 10 |
| Evaluation Breakdown of Boe-bot New Function/sensor Navigation Task (Time Permitted) | Marks |
| 4a Path Map Challenge- relevant course info, scaled to full page | 10 |
| 4a Bot New Course - Program code checked, bot run accuracy | 40 |
| 4a Bot Report - Report -title page, map, program code, and learning explanation | 10 |