Unit 2, Act. 1: Images with Photoshop
This unit will introduce you to photo image editing with Adobe Photoshop. There are a lot of things you can do with images and because images of this type are made up of pixels, file sizes will be a lot bigger.
Unit Content Activity Quick Links, Click to Jump to Specific Activity!
- Unit 2, Act. 1: Photoshop Introduction
- Unit 2, Act. 2: Hot Sneaker Ad
- Unit 2, Act. 3: Living Art Museum
 Unit 2, Act. 1: Photoshop Introduction
Situation:
Using a new program that works with similar tools found other applications in the Adobe suite requires some familiarity of the different tools and operations that you can be done in Photoshop. Using tutorials to support the direction and process to a final creative solution is a very useful way to familiarize yourself with this program
Problem/Challenge:
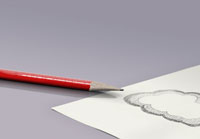
You are to the review the basics of Photoshop and pay close attention to the toolbox of tools. You will demo three of these tools to the class in about 4-7 minutes. Meanwhile you will follow a tutorial on making a image of a pencil and paper backed on a gradient. The pencil and background must be made from custom colours different from the tutorial and your peers and show good contrast. Have sketch show your logo.
Investigation/Ideas:
In order to learn how to use this program a little quicker, support links are provided for you to review in order to use Photoshop a little more effectively. The later links are related to the actual tools you will be demonstrating. Feel free to use/refer to the appropriate links in your live presentation.
- Work more efficiently in Photoshop
- 25 techniques designers must know
- Save Time with Shortcut Keys
- 18 Useful Shortcuts
- 28 More Useful Shortcuts
- 101 Photoshop Tips in 5 Min.

- All CS4 Keyboard Shortcuts

- Photoshop roadmap.com
- Getting Started with Photoshop
- Photoshops Toolbox
- Pen Tool Guide
- Using Palettes
- Working with Layers
- The Selection Tools
- Retouch and Healing Tools
- Drawing and Type Tools
- Using Transform
- Painting Tools
- Saving Images for the Web
- Layer Styles
- Type on Paths and Shapes
Create/Construct:
Ensure that have read Introduction to Photoshop CS4 ![]() , and understand the basics of Photoshop. Using the following tutorial Create a Realistic Pencil Illustration in Adobe Photoshop (PDF link
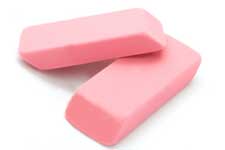
, and understand the basics of Photoshop. Using the following tutorial Create a Realistic Pencil Illustration in Adobe Photoshop (PDF link ![]() ) using custom colours for your background gradient and pencil colour. Ensure that you follow the steps in the tutorial closely and attempt to not just blindly follow the instructions but try to understand why certain values, tools, processes are used to complete a task. Make sure you have all label all layers according to each component. Hand in final image in both .PSD and .JPG file formats. If you are done early you can work on making a pink eraser to match, using the same steps and techniques as the pencil.
) using custom colours for your background gradient and pencil colour. Ensure that you follow the steps in the tutorial closely and attempt to not just blindly follow the instructions but try to understand why certain values, tools, processes are used to complete a task. Make sure you have all label all layers according to each component. Hand in final image in both .PSD and .JPG file formats. If you are done early you can work on making a pink eraser to match, using the same steps and techniques as the pencil.
Evaluation:
Use this section as a check list to make sure that all the major components of this activity have been completed
| Evaluation Breakdown Component Descriptions | Marks |
|---|---|
| Always double check that you have completed all components for full marks. | |
| Class Demo - 3 tools demonstrated to class effectively | 15 |
| Pencil-Paper - realistic, layer's labeled, effects, unique colours, and PSD & JPG | 30 |
Unit 2, Act. 2: Hot Sneaker Ad
Situation:

Now that you have experienced Photoshop introduction, now you will get an opportunity to work with more tools using a number of new tools and effects. This project allows for some additive custom creativity.
Problem/Challenge:
Your challenge is to create a sneaker ad using a custom sneaker and background. Follow the tutorial with a customized dark coloured background using the same effects and steps. You are to find a custom sneaker other then the red one used in the tutorial.
Next is to create the "HOT!" text and make it look like it is on fire. This text is to be lined up on a half circle pathway. Follow the tutorial and make sure this object has it's own group layer named hot text.
Once finished, you are to include your logo and hand scanned signature in the lower right corner. Your signature will have to be scanned in prior to this task.
Investigation/Ideas:
This tutorial has some images that have been copied to your pickup folder. As you are getting your own sneaker, I have also included a number of different sneakers for you to use with your tutorial, although you are welcome to find one on your own. The sneaker must be a high resolution (at least 800 by 500 screen pixels) so that you can cleanly separate from the background. Removing an object from the background to place in anther will require some careful selection using the magic wand tool. You will need to work with the tolerance in order to get just the shoe.
You will also have an opportunity to work with several different filters, layer blends, and colour adjustments. Tools that you will be using in the sneaker part of the tutorial are :
- Gradients with transparency
- Brushes
- Transform
- Eraser
- Layer duplication & merge down
- Smudge
- Path tool & stroke path
- Copy layer styles
- Magic wand

There is several ways to make text look on fire, but in order to make it look good the flames must be realistic in terms of the size relative to the letters. Flames also naturally burn up so when placing flame on the letters it is important to keep this in mind. You will be working with channels pallet found in the Window menu.
You will need to create an "Artist digital signature for use to identify your work. Use a dark medium pen to write your signature on some blank paper and then you will need to scan it/digitize it)
Create/Construct:
Follow the the sneaker tutorial found here. You can also load the PDF of this tutorial here. Remember to create a new layer group for both the background and the sneaker itself. Some additional notes on some of the steps will assist you as you go through the tutorial.
- Step 1, When starting create a layer group called background and then set your background and foreground colours first, then select the gradient tool
- Step 2, Instead of black, pick a colour that is close to your shoe, so that you have a tint of that colour in the background.
- Step 5 Original cloud file was no longer available, so I have given you another one in the found in the pick-up folder, use a soft brush size of about 120 -150
- Step 6, Suggest a soft brush size of about 200
- Step 7, Remove the background from the shoe using the magic wand (tolerance may have to be adjusted) by selecting the background then selecting Select > inverse, then drag to other main file, ctrl t (transform) to re-size (shift to keep aspect ratio) and rotate
- Step 9, Remember to create a new group for the sneaker layers here, use the magic wand with high tolerance of 50 with contiguous selected, then on the sneaker file use the erase tool to also get rid of additional black outlines of the flame
- Step 11, Experiment here on the size, strength of the white brush and opacity of layer to get the right look
- Step 13, With the pen tool selected, make sure path icon on the top panel is also select, right click with the pen tool on your path for related options
- Step 17, Using the gradient tool here, make sure you have transparency selected in the top panel
- Step 22, You can find the water paint brush by selecting, brush tool, then brush size dropdow, select submenu, change to large list for brush description labels to find your brush by name, note the brush number, then use the brush preset pallet to enter your settings on the right brush
For the "HOT!" lettering follow this tutorial. The tutorial shows you how to apply the special effects to one letter, but you can do all three at the same time. Remember that you have the downloaded fire file already in the pick-up folder. Some additional points to keep in mind when doing this tutorial:
- Create a new layer group called Ad Title, and sub layers as needed
- Put letters on a half circle path using the pen tool
- When blending, double click on layer bar to get access
- Rasterize the text by right clicking on layer bar
- Liquefy, zoom in with alt mouse roll and space bar drag, also select show backdrop so you can see what you are doing, it is difficult to see what you have done until you return back to main image screen
- Channels, found in Window > Channels, ctrl left click on the green layer bar to get the fire selection, drag over fire as needed for each of the letters, re-size the fire to fit the text appropriately
- Once you have completed each of the letters, erasing, merge down all fire into one layer
The last part is to put logo and artist signature in the picture. Steps to put your logo into your sneaker ad:

- Start a new layer group called signature
- Open your logo display in Illustrator and copy the 1" logo on to clipboard
- open a new file with transparent background, and paste as pixeled object
- Drag into your sneaker file, put in Signature group layer
- Adjust saturation and brightness to suit
For your signature you will need to scan it in. This is to be your "Artist" signature, so make it creative. Suggest you partner up with others and scan in all at once to save a bit of time. Once scanned you will need to use the magic wand and select the background, then inverse the selection, colour in a dull white to bring into sneaker ad. The following on the right is a sample of what your finished image may look like:
Evaluation:
This project will be evaluated on completion of all steps in the tutorial and including your logo and artistic signature at the bottom right of work. Final image to be handed in PSD and JPG formats
| Evaluation Breakdown Component Descriptions | Marks |
|---|---|
| Always double check that you have completed all components for full marks. | |
| Background - grouped, layers named, appropriate colours, page size | 5 |
| Sneaker - creative touch, placement, complete, grouped, layers named, effects | 15 |
| Fire Text - realistic, flame direction and size, text on a path, layers grouped and named | 10 |
| Logo & Signature - artistic signature and logo bottom right corner | 5 |
Unit 2, Act. 3: Living Art Museum

Situation:
Living art captured in a museum is a project which will allow you to be creative use a wide variety of Photoshop's tools to extract, modify, blend, and control how images will look. Living art has the twist that the final image will have a sense of realism where parts of the image look like they are coming to life.
Problem/Challenge:
Your challenge is to design and create a custom museum room image showing three framed pictures coming to life interacting with the room. Each is to show weather and nature elements expanding out in a realistic manner blending beyond the frames into the room. One of the frames to also show a animal from nature partially "reaching" out of the pictured frame. Pillars are to blend frames and scenes while a statue of yourself with half your face coming to life, i.e. stone to flesh realism. All major components must be custom using tutorial to bulid your image and understand the process of build to make it your own desiign. Add additional "accessories" such as a bonsai tree, table lamp, statue base, pedestal, etc to add depth of design and creativity.
Investigation/Ideas:
All images at the beginning of the tutorial can be found in the school's pickup folder, so there is no need to look for those originals. This is to be a custom/unique living museum picture so you will need to use different images to suit similar purposes, such as for the wall, floor, nature picture scenes, frames, pillars, falls, accessories, etc. I have included several images you can choose from or you can search for additional custom images to fit your creative design.
Tools and settings you will be using here will include the magic wand and additional selection tools, dodge, burn, perspective, reflect, pen, curves, hue/saturation, assorted blending options, sharpness, warp, blur, stretch, skew, assorted brushes, eyedropper, layer merging, flow, grid lines, guide lines, opacity, transparency, fill, history brush, assorted filters and effects.
You will need to continue to refine your ability to remove/extract images and place them cleanly in new settings with little evidence they have been altered. Lighting, shadows, and highlights will also be important in creating light direction, realism, and depth to your images. Keeping your layers organized by grouping each of the major components such as the background, each of the picture frames, your statue, pillars, foreground accessories, etc. Only merge layers that you are for sure you are completely finished and happy with, but leave critical layers intact for further editing. Whenever possible use the layer blending controls for non-destructive modifications.
You will need to take a picture of yourself against a backdrop for easy removal showing you in a power emotional stance of sorts that works with museum setting. If you already have a recent picture (with-in the last year) of yourself that will work in this situation, then you may use that one.
Create/Construct:
Museum Setting
Use the above tutorial's finished image sample, and incorporate the requirements of the Challenge above into your design. Review the tutorial it self and images in the pick -up folder for immediate resources, then sketch your ideas on a full page what your final design may look like. Here is the online "Create a Living Museum in Photoshop CS4" tutorial, or you can use the ![]() PDF version. Steps below:
PDF version. Steps below:
- Brainstorm some ideas as to what kind your living museum will look like:
- Weather - clouds, rain, wind, lighting, day, night, etc.
- Flooring - tile, wood, granite, cement, carpet, combination of, etc.
- Wall - wallpaper, wood, plaster, drywall, stone, brick, stucco, tile, etc.
- Nature pictures - mountains, forest, beach, waterfall, desert, rainforest, etc.
- Animals - bear, cat, snake, bird, rabbit, giraffe, elephant, etc.
- Picture frame types - contemporary, traditional, modern, basic, etc.
- Accessories - bonsai tree, vines, pedestal, ornaments, lamps, etc.
- Create a folder in your class folder on your USB memory stick called Living Museum
- Copy images you think you will use with your project into your new folder
- Create a full page sketch of your final design for hand-in
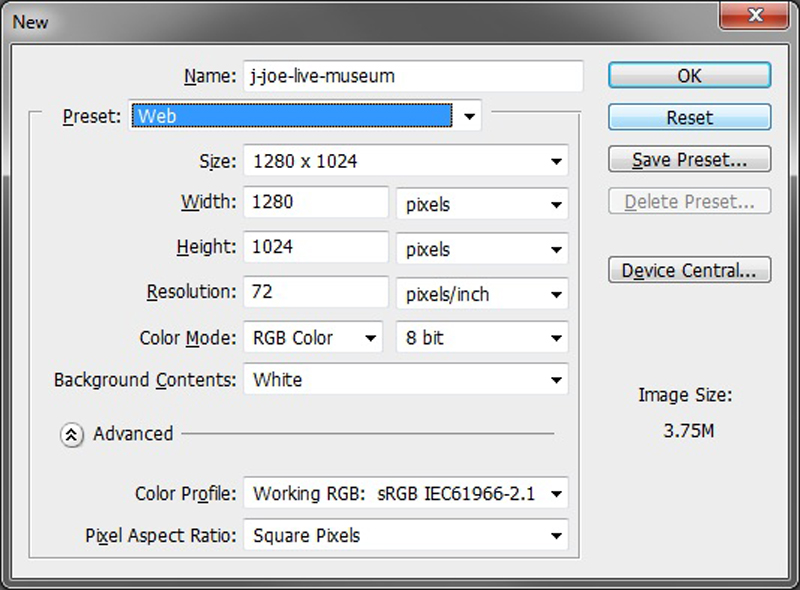
- Start your design by creating your set-up with the following settings shown to the right:
- Follow the steps in the Living Museum tutorial substituting your custom images
- You are to include an animal to be partially "reaching" outside of the picture frame along with the waterfall, clouds elements, etc.
- Remember to keep in mind light source(s) when creating shadows and highlights on all objects.
- Use guide lines to line up frames, centre middle frame, etc. Suggest you try out the grid tool for picture organization and design.
Statue
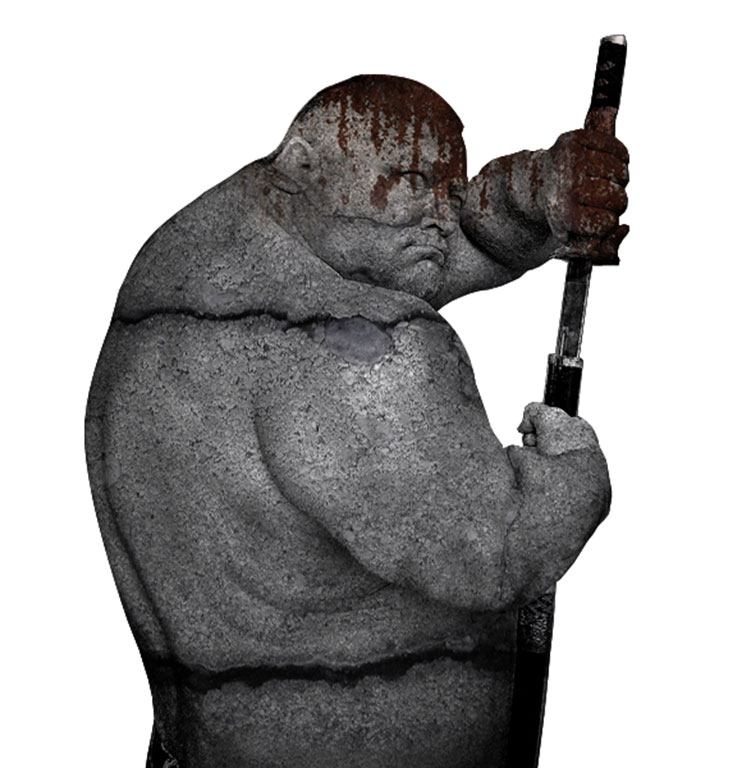
Acquire an image of yourself in a power emotional stance and using the following online "Create a Graphic Statue in Photoshop" tutorial or use the ![]() PDF Version, to create a statue of yourself. As with everything else having the the gift of life in this picture, you will need to show half of your face coming to life, i.e. half stone with the other half real flesh. This is where you can use the history bush to feather in your live face part to give your self a breath of life. As this is a statue, you will need to create or import a pedestal for your statue to stand on. Here are some points to keep in mind:
PDF Version, to create a statue of yourself. As with everything else having the the gift of life in this picture, you will need to show half of your face coming to life, i.e. half stone with the other half real flesh. This is where you can use the history bush to feather in your live face part to give your self a breath of life. As this is a statue, you will need to create or import a pedestal for your statue to stand on. Here are some points to keep in mind:
- Use an image appropriate for a statue with both eyes looking at the camera
- Use an image without a lot of noise/graphics in the background to make selection easier and quicker
- Try the quick selection tool in combination with the refine options
- Once de-saturated, try the pen tool, to select the eyes, use Ctrl+Enter or right click to turn pen line into a selection path
- Once you have found your stone texture, create a body layer mask by simply Ctrl clicking on your body portrait thumbnail layer mask in the layer panel (while you have your stone layer selected or current),which will accurately cut the stone out to just your body
- Create non-destructive image adjustments by holding on the Alt and clicking on the adjustment icon(bottom of layer panel, while your stone layer is selected or current) to select the type of image adjustment you want, and make sure you have previous layer box selected. For example, some things you will want to adjust are the hue/saturation, levels, curve, etc.
- Use the blending option on the stone layer to multiply or combine layer look
Another on-line tutorial that can give you more ideas on your statue build process can be found here at "Human Statue Effect: Cursed by Medusa" or use the ![]() PDF version. This has some additional quick tips on person to statue creation.
PDF version. This has some additional quick tips on person to statue creation.
Ensure that you put your logo and signature at the bottom right of the page.
Sample Start
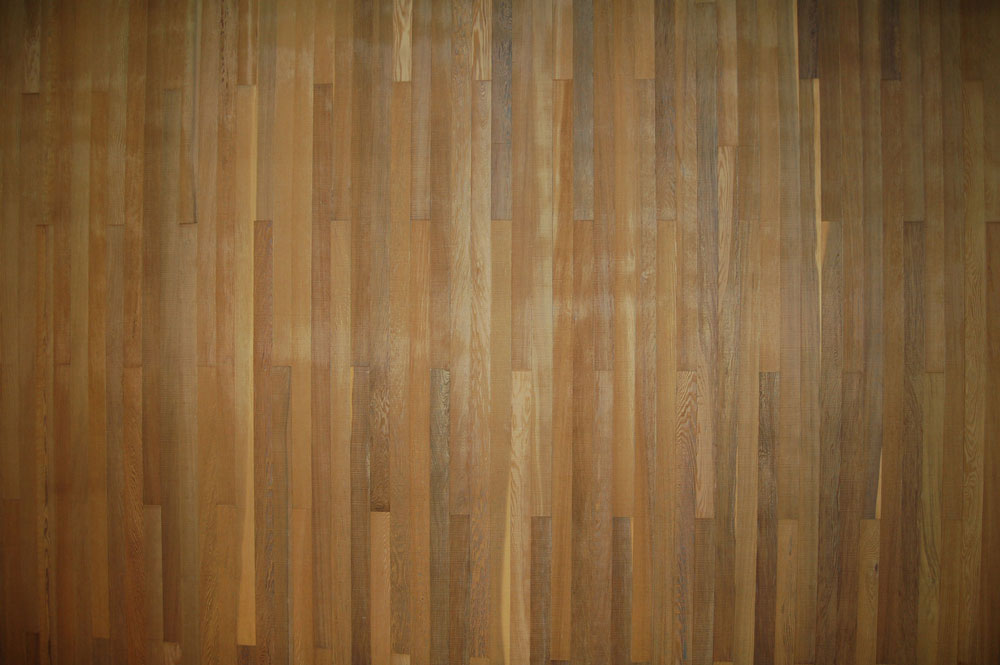
Original Floor Image

Original Wall Image
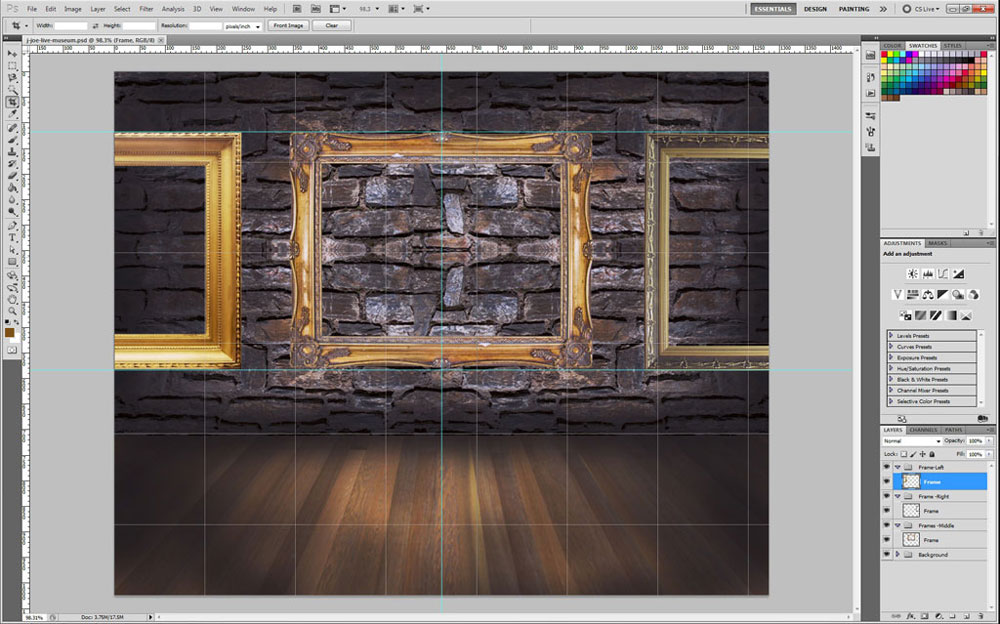
Both Blended with Frames
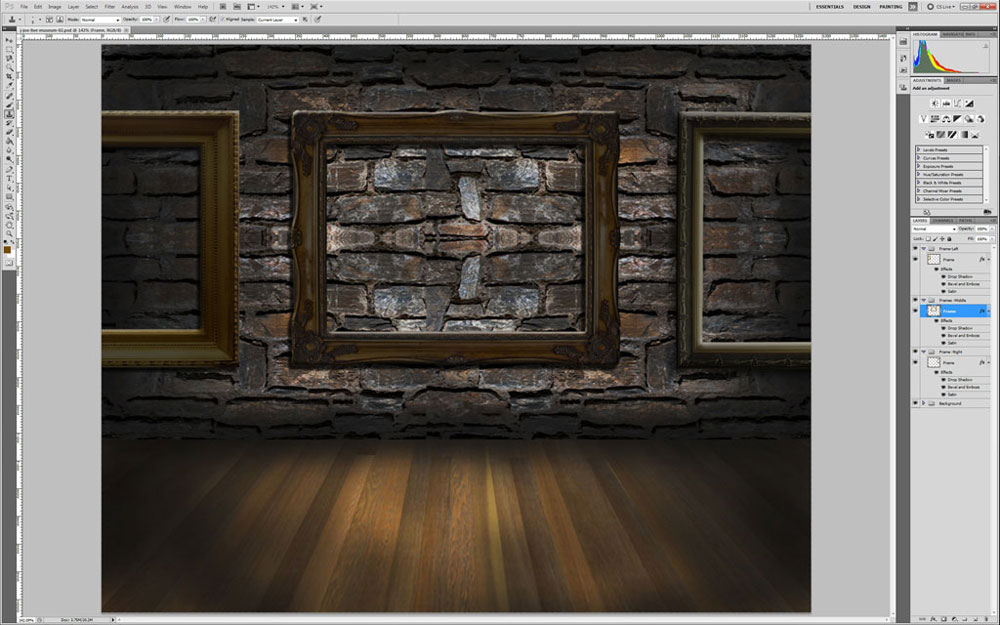
Frames Finalized
You can find some finished samples at the end of the tutorial showing some variations. Yours will show a lot more variation based on the above requirements.
Evaluation:
This project will be evaluated on completion of all steps in the tutorial, customization and creativity, including an animal, weather/elements coming to life, your statue. Ensure your logo and hand scanned signature are at the bottom right of work. Final image to be handed in PSD and JPG formats
| Evaluation Breakdown Component Descriptions | Marks |
|---|---|
| Always double check that you have completed all components for full marks. | |
| Sketch Design - Showing all ideas and required elements of final picture | 10 |
| Organization - layers grouped and named , layers named appropriately | 5 |
| Background - wall texture, floor perspective, colour, shadow direction , and highlights | 5 |
| Pictures framed - creative touch, realistic, live look, animal, weather blending with foreground | 35 |
| Statue - stone texture, half of face live and realistic, blending with setting | 15 |
| Accessories - several components, depth, realism, placement | 15 |
| Logo & signature - Hand signature and logo bottom right corner | 5 |